background image

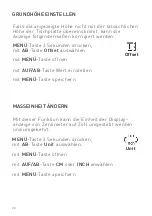
Falls die angezeigte Höhe nicht mit der tatsächlichen 

Höhe der Tischplatte übereinstimmt, kann die 

Anzeige folgendermaßen korrigiert werden:

Mit dieser Funktion kann die Einheit der Display- 

anzeige von Zentimeter auf Zoll umgestellt werden            

und umgekehrt.

MENÜ

-Taste 3 Sekunden drücken,                                            

mit

AB

-Taste 

Unit

 auswählen.

mit 

MENÜ

-Taste öffnen

mit 

AUF/AB

-Taste 

CM

 oder 

INCH

 anwählen

mit 

MENÜ

-Taste speichern

MENÜ

-Taste 3 Sekunden drücken,                                           

mit

AB

-Taste 

Offset

 auswählen.

mit 

MENÜ

-Taste öffnen

mit 

AUF/AB

-Taste Wert einstellen

mit 

MENÜ

-Taste speichern

Offset

Unit

GRUNDHÖHE EINSTELLEN

MASSEINHEIT ÄNDERN

20

Содержание LIFE.S

Страница 1: ... HÖHENVERSTELLBARE TISCHE VOR INBETRIEBNAHME UNBEDINGT LESEN DIE ANLEITUNG IST FÜR EIN SPÄTERES NACHSCHLAGEN AUFZUBEWAHREN GÜLTIG AB OKTOBER 2022 MOTORISED HEIGHT ADJUSTABLE DESKS PLEASE READ THE FOLLOWING INSTRUCTIONS CAREFULLY KEEP THESE OPERATING INSTRUCTIONS IN A SAFE PLACE VALID FROM OCTOBER 2022 ...

Страница 2: ...2 ...

Страница 3: ...uf Werkseinstellung 15 Bedienelement mit Memory Funktion 16 Speichern einer Tischplattenposition 17 Verstellung der Tischplatte zu einer gespeicherten 17 Position Erweiterte Funktionen Menü Container Stop und Shelf Stop Positionen 18 Container Stop ein 18 Container Stop aus 19 Shelf Stop ein 19 Shelf Stop aus 19 Grundhöhe einstellen 20 Maßeinheit ändern 20 Displaysperre 21 Rücksetzung auf Werksein...

Страница 4: ... Reset to factory settings 39 Control panel with memory function 40 Saving a desk top position 41 Retrieve a saved desk top position 41 Extended functions menu Container stop and shelf stop positions 42 Container stop on 42 Container stop off 43 Shelf stop on 43 Shelf stop off 43 Height calibration 44 Change unit 44 Display keylock 45 Reset to factory settings 45 Error messages on the display 46 D...

Страница 5: ... haben sich für ein Markenprodukt aus dem Hause König Neurath entschieden Damit dieses Möbel zu Ihrer Zufriedenheit funktioniert lesen Sie bitte diese Anweisungen vor Inbetriebnahme aufmerksam durch und beachten Sie die ange gebenen Sicherheitshinweise 5 ...

Страница 6: ...geeignet TRANSPORT DEN TISCH NICHT KIPPEN ODER AUF DIE SEITE LEGEN NICHT SENKRECHT TRANSPORTIEREN UND LAGERN Bitte heben oder tragen Sie den Tisch nicht an der Tischplatte sondern an dem Tischrahmen Ziehen Sie den Tisch nicht über den Fußboden es besteht die Gefahr einer Beschädigung Bei Umbaumaßnahmen oder Erweiterung des Tisches Montageanleitung beachten Die Montageanleitung finden Sie in der Me...

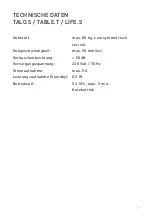
Страница 7: ... S Hubkraft max 80 kg Last symmetrisch verteilt Hubgeschwindigkeit max 50 mm sec Geräuschentwicklung 50 dB Versorgungsspannung 230 Volt 50 Hz Stromaufnahme max 5 A Leistungsaufnahme Standby 0 3 W Betriebsart S2 10 max 2 min Kurzbetrieb 7 ...

Страница 8: ...darf nur an die auf der Steuereinheit angegebenen Netzspannung angeschlossen werden Während des Betriebs Wenn die Steuereinheit ungewöhnliche Geräusche von sich gibt oder Geruch absondert ziehen Sie sofort den Netzstecker Vergewissern Sie sich dass die Kabel nicht beschädigt sind Wenn die Netzan schlussleitung dieses Gerätes beschädigt wird muss sie durch den Hersteller oder seinen Kunden dienst o...

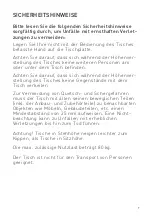
Страница 9: ...ver stellung des Tisches keine Gegenstände mit dem Tisch verkeilen Zur Vermeidung von Quetsch und Schergefahren muss der Tisch mit allen seinen beweglichen Teilen inkl der Anbau und Zubehörteile zu benachbarten Objekten wie Möbeln Gebäudeteilen etc einen Mindestabstand von 25 mm aufweisen Eine Nicht beachtung kann zu Unfällen mit erheblichen Verletzungen bis hin zum Tod führen Achtung Tische in St...

Страница 10: ... dürfen nicht von Kindern ohne Beaufsichtigung durchgeführt werden Das Hubsystem ist für Kurzzeitbetrieb ausgelegt mit einer max zulässigen Betriebszeit von 2 Minute d h nach einer Minute Betriebszeit muss eine 18 minütige Pause erfolgen Bitte beachten Sie dass das System über einen Schutzschalter verfügt der bei Überlastung das System abschaltet Reparaturen an Steuereinheit oder Bedienelement sin...

Страница 11: ...eit mit Ihrer Netzspan nung übereinstimmt Schließen Sie den Tisch an das Versorgungsnetz an Initialisieren Sie den Tisch wie auf Seite 12 beschrieben Sie sollten die Tischhöhe immer so einstellen dass Ihre Ellenbogen sowohl im Sitzen als auch im Stehen einen Winkel von 90 oder größer bilden Tipp Achten Sie auf eine blendfreie Aufstellung Ihres Bildschirms Weitere Informationen zum Thema Ergonomie ...

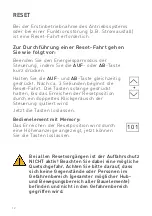
Страница 12: ...olange gedrückt halten bis das Erreichen der Resetposition durch ein doppeltes Klickgeräusch der Steuerung quitiert wird Jetzt die Tasten loslassen Bedienelement mit Memory Das Erreichen der Resetposition wird durch eine Höhenanzeige angezeigt jetzt können Sie die Tasten loslassen Bei allen Resetvorgängen ist der Auffahrschutz NICHT aktiv Beachten Sie dabei eine mögliche Quetschgefahr Achten Sie b...

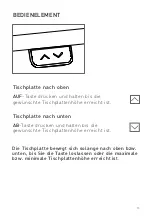
Страница 13: ...enhöhe erreicht ist Tischplatte nach unten AB Taste drücken und halten bis die gewünschte Tischplattenhöhe erreicht ist BEDIENELEMENT Die Tischplatte bewegt sich solange nach oben bzw unten bis Sie die Taste loslassen oder die maximale bzw minimale Tischplattenhöhe erreicht ist 13 ...

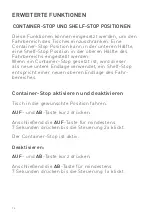
Страница 14: ...eßend die AB Taste für mindestens 7 Sekunden drücken bis die Steuerung 1x klickt Diese Funktionen können eingesetzt werden um den Fahrbereich des Tisches einzuschränken Eine Container Stop Position kann in der unteren Hälfte eine Shelf Stop Position in der oberen Hälfte des Fahrbereichs eingestellt werden Wenn ein Container Stop gesetzt ist wird dieser als neue untere Endlage verwendet ein Shelf S...

Страница 15: ...giesparmodus der Steuerung indem Sie die AUF oder AB Taste kurz drücken Halten Sie die AUF und AB Taste ca 3 Sekunden lang gleichzeitig gedrückt bis die Reset Fahrt beginnt Lassen Sie während der Reset Fahrt beide Tasten los Drücken Sie die AUF Taste für ca 10 Sekunden Die Bestätigung erfolgt durch ein Klickgeräusch der Steuerung Lassen Sie danach die Taste los Ziehen Sie den Netzstecker für minde...

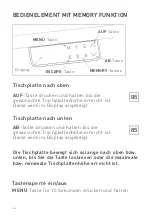
Страница 16: ...gewünschte Tischplattenhöhe erreicht ist Diese wird im Display angezeigt BEDIENELEMENT MIT MEMORY FUNKTION AB Taste AUF Taste ESCAPE Taste MENÜ Taste Display MEMORY Tasten Tastensperre ein aus MENÜ Taste für 10 Sekunden drücken und halten Die Tischplatte bewegt sich solange nach oben bzw unten bis Sie die Taste loslassen oder die maximale bzw minimale Tischplattenhöhe erreicht ist 95 85 16 ...

Страница 17: ...HPLATTENPOSITION Tisch in die gewünschte Position fahren MENÜ Taste drücken bis Diskette im Display erscheint Position durch Drücken einer MEMORY Taste z B 1 speichern Vorgang für Position 2 3 und 4 wiederholen MEMORY Taste 1 2 3 oder 4 drücken bis die gespeicherte Position erreicht ist VERSTELLUNG DER TISCHPLATTE ZU EINER GESPEICHERTEN POSITION 1 17 ...

Страница 18: ...chte Position fahren MENÜ Taste drücken bis Container Stop im Display erscheint mit MENÜ Taste öffnen mit AUF AB Taste On wählen mit MENÜ Taste speichern Diese Funktionen können eingesetzt werden um den Fahrbereich des Tisches einzuschränken Eine Container Stop Position kann in der unteren Hälfte eine Shelf Stop Position in der oberen Hälfte des Fahrbereichs eingestellt werden Wenn ein Container S...

Страница 19: ...erer Hubhälfte möglich Tisch in die gewünschte Position fahren MENÜ Taste 3 Sekunden drücken mit AB Taste Shelf Stop auswählen mit MENÜ Taste öffnen mit AUF AB Taste On wählen mit MENÜ Taste speichern Shelf Stop aus nur in oberer Hubhälfte möglich MENÜ Taste 3 Sekunden drücken mit AB Taste Shelf Stop auswählen mit MENÜ Taste öffnen mit AUF AB Taste Off wählen mit MENÜ Taste speichern Container She...

Страница 20: ...e von Zentimeter auf Zoll umgestellt werden und umgekehrt MENÜ Taste 3 Sekunden drücken mit AB Taste Unit auswählen mit MENÜ Taste öffnen mit AUF AB Taste CM oder INCH anwählen mit MENÜ Taste speichern MENÜ Taste 3 Sekunden drücken mit AB Taste Offset auswählen mit MENÜ Taste öffnen mit AUF AB Taste Wert einstellen mit MENÜ Taste speichern Offset Unit GRUNDHÖHE EINSTELLEN MASSEINHEIT ÄNDERN 20 ...

Страница 21: ...hlen mit MENÜ Taste speichern Display zeigt Data Erase Ziehen Sie den Netzstecker für mindestens 30 Sekunden Stecken Sie danach den Netzstecker wieder in die Steckdose Führen Sie eine Reset Fahrt durch wie auf Seite 12 beschrieben Hard Reset Keylock Um den Tisch gegen eine unbefugte Nutzung zu schützen kann über das Menü das Verfahren des Tisches über das Bedienelement aktiviert bzw deaktiviert we...

Страница 22: ... 2 3 8 0 2 3 80 7 7 3 6 9 2 2 2 40 2 2 17 0 2 3 0 2 3 8 Hinweis Wird ein Fehler am Display angezeigt der nicht in der Auflistung zu finden ist sollten alle Steckverbindungen kontrolliert werden Falls der Fehler nach einem manu ellen Reset erneut angezeigt wird wenden Sie sich bitte an unseren Kundendienst Telefon 06039 483 136 oder 483 512 22 ...

Страница 23: ...23 ...

Страница 24: ...24 ...

Страница 25: ...25 ...

Страница 26: ...niger verwenden danach trocken wischen Achtung Keine scheuernden Reinigungsmittel ver wenden Diese können zu bleibenden optischen Schäden führen Vermeiden Sie hohe Temperatureinwirkungen und Feuchtigkeit direkt auf der Echtholzoberfläche Beachten Sie bitte dass sich unter UV Einstrahlung die Echtholzoberfläche mit der Zeit farblich verändern kann Dies ist ein natürlicher Alterungs prozess des Holz...

Страница 27: ...führt werden Informieren Sie bitte den K N Kundendienst Wartung Die Hubsäulen sind wartungsfrei Entsorgung Die motorisch höhenverstellbaren Tische der Serie TALO S TABLE T und LIFE S sind nach gültigen Richtlinien und Vorschriften umweltgerecht zu entsorgen Kundendienst Telefon 06039 483 136 oder 483 512 ANHANG 27 ...

Страница 28: ...28 ...

Страница 29: ... customer You have chosen a quality product from König Neurath To ensure that your furniture performs to your complete satisfaction please read the following instructions carefully and take note of the safety guidelines 29 ...

Страница 30: ... TRANSPORT DO NOT TRANSPORT THE DESK IN A VERTICAL POSITION DO NOT STORE THE DESK IN A VERTICAL POSITION Please do not carry or lift the desk by the desk top but by the frame Do not drag the desk along the floor even on carpet as it could be damaged Please follow the assembly instructions when reconfiguring These can be found in the media database at www koenig neurath com 30 ...

Страница 31: ...FE S Load capacity max 80 kg load uniformly distributed Lifting speed max 50 mm sec Noise emission 50 dB Supply voltage 230 Volt 50 Hz Power consumption max 5 A Power input standby 0 3 W Mode of operation S2 10 max 2 min short term 31 ...

Страница 32: ...led The desk may only be connected to the mains voltage which is indicated on the control box During operation If the control box makes any unusual noises or emits odours pull out the mains plug immediately Make sure the cables have not been damaged If the power cord is damaged it must be replaced by the manufacturer or its customer service or a similarly qualified person in order to avouid a haza...

Страница 33: ...s waste bins or pedestals become wedged under the desk To prevent the risk of crushing and shearing the desk and all of its moving parts incl attachments and accessories must have a clearance of at least 25 mm to adjacent objects Failure to comply could cause serious injury for the user Caution Desks at standing height can tip over more easily than at seated height The max permissible net load is ...

Страница 34: ...intenance must not be performed by children without supervision The lifting system is designed for short term operation After two minutes operating time a 18 minute break is required Please note that the lifting system has a circuit breaker that switches off the system in the event of an overload Repairs of the control box or the control panel should only be carried out by qualified personnel Unau...

Страница 35: ... desk to the mains Initialise the desk as described on page 36 ERGONOMICS You should always adjust the desk height so that your elbows form an angle of at least 90 whether you are seated or standing Tip Make sure your screen position does not cause glare You can get more information on ergonomics in the office from the administrative professional association at www vbg de bueroarbeit GETTING START...

Страница 36: ...eep the buttons pressed until the reaching of the reset position is confirmed by a double clicking sound from the control system Now release the buttons Control panel with memory Reaching the reset position is indicated by an altitude display now you can release the buttons During the reset process the collision cut out is inactive Beware of the risk of crushing Please ensure that there are no obj...

Страница 37: ...on until the desired height is reached Downward movement Press and hold the DOWN button until the desired height is reached CONTROL PANEL The desk top moves up or down until you release the button or the minimum or maximum height is reached 37 ...

Страница 38: ...ition If a shelf stop position is set this position will be the new upper limit position Container stop on and off Move the desk top to the desired position Press the UP and DOWN button briefly Then press the UP button for at least 7 seconds until the control box clicks 2 times The container stop is active Deactivation Press the UP and DOWN button briefly Then press the DOWN button for at least 7 ...

Страница 39: ...box clicks 1 times Exit the energy saving mode of the control system by briefly pressing the UP or DOWN button Press and hold the UP and DOWN button for about 3 seconds until the reset starts Release both buttons during the reset Press the UP button for about 10 seconds Confirmation is signaled by a clicking sound of the control system Then release the button Disconnect the mains plug for at least...

Страница 40: ...ovement Press and hold the DOWN button until the desired height is reached Display shows desk top height The desk top moves up or down until you release the button or the minimum or maximum height is reached DOWN button UP button ESCAPE button MENU button Display MEMORY buttons Button lock on off Press and hold the MENU button for up to 10 seconds 95 85 40 ...

Страница 41: ...saved per MEMORY button Move the desk top to the desired position Press MENU button until diskette appears in the display Position can be saved by pressing the MEMORY button 1 Repeat procedure for position 2 3 and 4 Press MEMORY button 1 2 3 or 4 until saved position is reached RETRIEVE A SAVED DESK TOP POSITION 1 41 ...

Страница 42: ...osition can be defined in the lower half of the movement area a shelf stop position in the upper half If a container stop position is set this position will be the lower limit position If a shelf stop position is set this position will be the new upper limit position Container stop on only possible in lower half of stroke Move the desk top to the desired position Press MENU button until Container ...

Страница 43: ... only possible in upper half of stroke Move the desk top to the desired position Press MENU button for 3 seconds use the DOWN button to select Shelf Stop Open with MENU button Select On with UP DOWN button Save with MENU button Shelf stop off only possible in upper half of stroke Press MENU button for 3 seconds use the DOWN button to select Shelf Stop Open with MENU button Select Off with UP DOWN ...

Страница 44: ...ht can be adjusted subsequently in the menu Proceed as follows Offset Press MENU button for 3 seconds use the DOWN button to select Offset Open with MENU button Set value with UP DOWN button Save with MENU button Press MENU button for 3 seconds use the DOWN button to select Unit Open with MENU button Use UP DOWN button to select CM or INCH Save with MENU button Unit HEIGHT CALIBRATION CHANGE UNIT ...

Страница 45: ...Hard Reset Open with MENU button Select YES with UP DOWN button Save with MENU button Display shows Data Erase Disconnect the mains plug for at least 30 seconds Then plug the mains plug back into the socket Perform a reset run as described on page 36 To protect the desk against unauthorised use the movement of the desk can be activated or deactivated via the menu using the control panel DISPLAY KE...

Страница 46: ...ISPLAY E00 HOT Notice If an error is indicated on the display which is not shown in this documentation first check all connections and perform a reset If the error message reappears contact our customer service Telephone 49 0 6039 483 136 or 483 512 0 0 0 1 2 2 3 0 0 4 2 2 5 0 0 2 46 ...

Страница 47: ...47 ...

Страница 48: ...48 ...

Страница 49: ...49 ...

Страница 50: ...agent to remove soiling then wipe dry Caution Do not use abrasive cleaners This can cause permanent visible damage Avoid direct exposure of the natural wood finish to high temperatures and moisture Please note that the natural wood finish can change colour over time if exposed to UV rays This is a natural ageing process of the wood Control panel Clean the control panel with a dry soft cloth CARE A...

Страница 51: ...ase notify K N customer service Maintenance The lift columns are maintenance free Disposal The TALO S TABLE T and LIFE S desks with motorised height adjustment must be disposed of accordance with the valid directives and regulations Customer service Telephone 49 0 6039 483 136 or 483 512 APPENDIX 51 ...

Страница 52: ...4 20 74909340 info koenig neurath co uk Nederland König Neurath Nederland Beethovenstraat 530 1082 PR Amsterdam T 31 20 4109410 info konig neurath nl France König Neurath AG 53 rue de Chateaudun 75009 Paris T 33 1 44632393 info koenig neurath fr Schweiz König Neurath Schweiz GmbH St Gallerstrasse 106 d CH 9032 Engelburg St Gallen T 41 52 7702242 info koenig neurath de Österreich König Neurath AG G...

Отзывы: