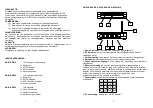
CH
1
CH
2
CH
3
CH
4
CH
5
CH
6
CH
7
CH
8
CH
9
CH
10
CH
11
CH
12
CH
13
CH
14
CH
15
CH
16
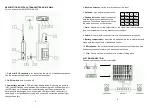
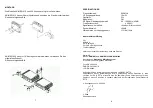
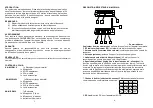
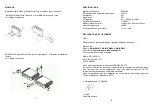
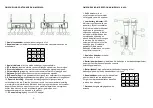
DESCRIPTION RECEIVER
KN
-MICW420:
1.
Power button:
switch on/off the receiver
2.
Channel selector:
select the channel with the following combinations of the
switches
3.
Power indicator:
lights up when receiver is on
4.
RF indicator:
shows the strength of the reception from the microphone
5.
Diversity indicator:
indicates which tuner is re-producing the received signal
6.
Volume control:
controls the volume output of the receiver
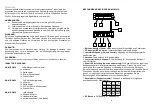
7.
Antenna:
fixed antenna for receiving signals
8.
XLR connection:
3-pin balanced output for mixer or amplifier
9.
6,3mm connection:
unbalanced output for mixer or amplifier
10.
Squelch adjustment:
The squelch adjusts the output level to suppress the
noise. Turn the button to the right for maximum adjustment with minimum noise
interference. With this adjustment the range of the system is limited. Turn the
button to the left for maximum range of the system but with possible noise
interference (use mini screwdriver from the accessory set to adjust)
11.
DC Jack:
DC input for AC/DC adapter
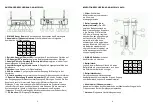
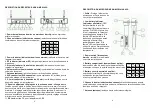
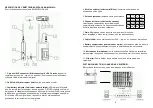
DESCRIPTION MICROPHONE
KN
-MICW410 & 420:
1.
Grille:
Protects the
microphone element and
reduces the sound of wind and
breath
2.
Low battery indicator:
LED
indicates battery status.
Switching the power to "ON", the
LED flashing once indicates that
the transmitter has sufficient
power. If the LED stays on, it
indicates that the battery has
insufficient power and the
battery should be changed soon.
If the status LED fails to flash,
the battery is either dead or not
positioned correctly, and you
should correct the positioning or
change the battery
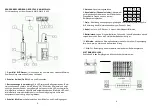
3.
Power switch:
switch on/off
the microphone
4.
Battery compartment:
Insert two AA
batteries into the compartment and make
sure that the polarity of batteries is correct.
5.
Battery cover:
push and remove the
battery cover to get acess to the battery
compartment and channel switch
6.
Channel selector:
select the channel
with the following combinations of the
switches. The chosen frequency must be
the same as chosen on the receiver
7.
Antenna:
Built-in high performance
antenna
3
.
4
.
CH
1
CH
2
CH
3
CH
4
CH
5
CH
6
CH
7
CH
8
CH
9
CH
10
CH
11
CH
12
CH
13
CH
14
CH
15
CH
16


