background image

55

Using the REC Menu (Cont’d)

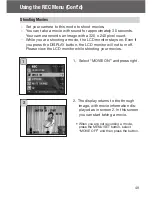
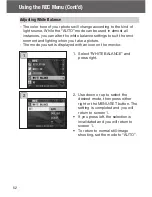
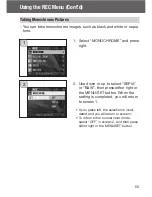
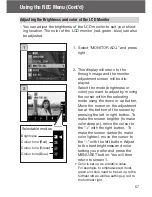
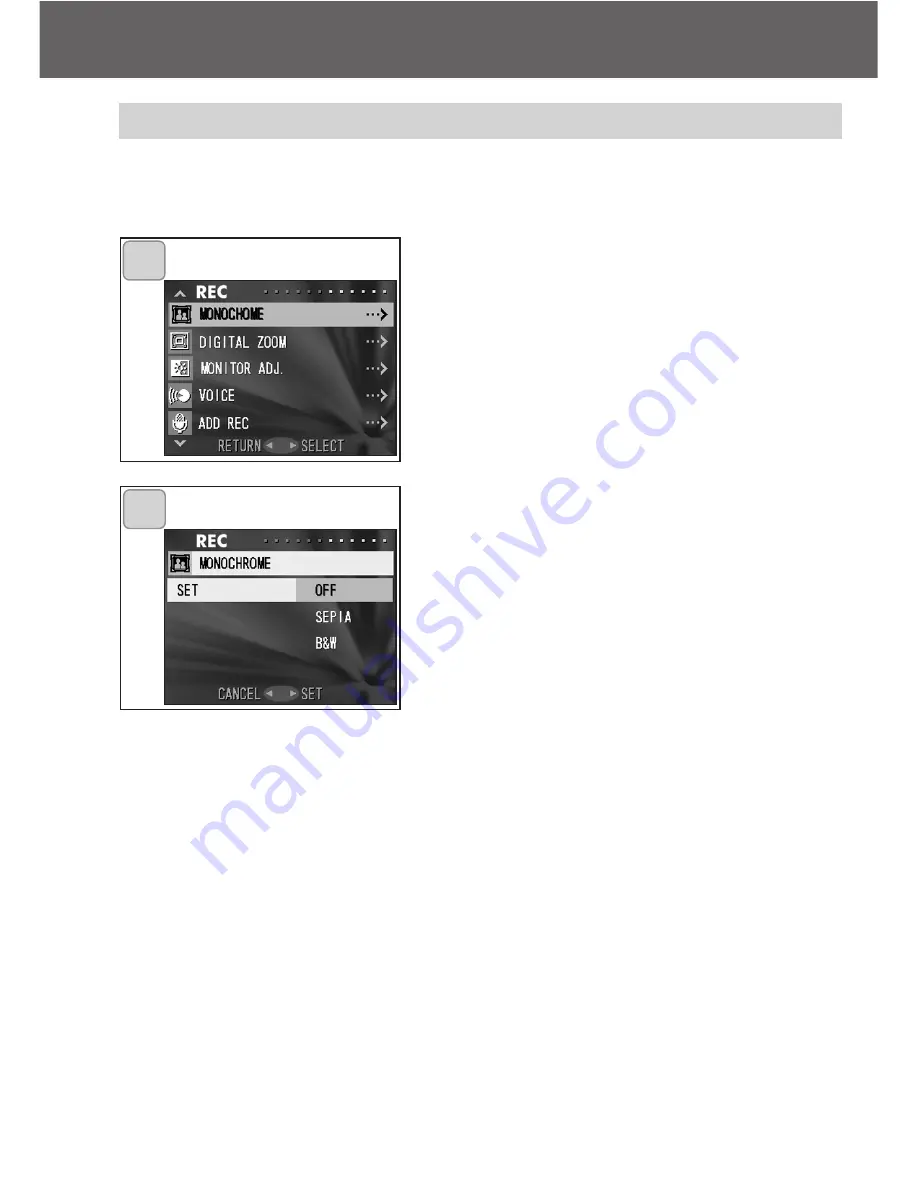
Taking Monochrome Pictures

- You can take monochrome images, such as black and white or sepia

tone.

1. Select “MONOCHROME” and press

right.

2. Use down or up to select “SEPIA”

or “B&W”, then press either right or
the MENU/SET button. When the
setting is completed, you will return
to screen 1.

• If you press left, the selection is invali-

dated and you will return to screen 1.

• To return to the normal color mode,

select “OFF” in screen 2, and then press
either right or the MENU/SET button.

2

1

Содержание DiMAGE G500

Страница 1: ...Instruction Manual E 9224 27311 11 M A306 KME 0312 ...

Страница 2: ...e hot when used for a long period of time but it doesn t mean that the camera is broken However if the camera keeps touching the skin for a long time this may cause a cryo genic burn Please be careful with it About trademarks Minolta The essentials of imaging and DiMAGE are trademarks or registered trademarks of Minolta Co Ltd Windows 98 Windows 98SE Windows XP Windows 2000 Professional and Window...

Страница 3: ...erting Removing Cards 24 Turning the Power ON OFF 26 Setting the Menu Language Date and Time 27 Basic Operation Taking Pictures 29 Holding Your Camera 29 Viewfinder and Indicator LEDs 29 Taking Pictures using the Viewfinder 31 Shooting with Focus Lock 34 Taking Pictures using the LCD Monitor 35 Selecting the Shooting Mode 38 AUTO Auto Flash 40 Red Eye Reduction 40 Fill In 41 Slow Sync 41 Off Flash...

Страница 4: ...nual exposure mode 62 Setting up image quality 64 Selecting the Set up Menu 66 Setting with the REC BASIC Menu 67 Selecting the Image Size 68 Basic Playback Erasing Playback 70 Playing Back Pre recorded Images 70 Playing Back Movies 72 Playing Back Voice Memos 73 Playing back the sound of After Recording images 73 Playing Back Enlarged Images Digital Zoom 74 Using the Quick view Function 75 Erasin...

Страница 5: ...Self timer Delay Time 103 Setting the Auto Power OFF Time 104 Resetting the File Numbers 104 Setting Memory Priority 105 Changing Languages 105 Taking Still Images with Sound 106 Customizing the Camera 107 Restoring the Default Settings 110 Connecting to your PC Connecting to your PC 111 Operating Environments 111 Connecting with a USB cable 112 Installing software and downloading images 113 Insta...

Страница 6: ... 6 Important Safety Precautions This product has been designed with safety in mind however please read the following display marks warnings and cautions for its correct usage The following warning and caution symbols are to prevent damage to the user other persons and property Definitions of the symbols The following categories explain the degree of danger or damage that may occur if the displayed...

Страница 7: ...Fire electrical shock and or malfunction of the unit may occur as a result of metal objects etc getting inside the camera Do not use the camera while driving May cause traffic accidents When using the camera while walking pay attention to the road surface surroundings etc Should any of the following occur stop using the product immediately Remove the batteries from the unit and discon nect the AC ...

Страница 8: ...t allow metals wires necklaces etc to come into contact with batteries Fluid leakage heat fire and damage may occur as a result Caution Do not point the lens directly at the sun or at a strong light source Malfunction of internal parts may occur from concentrated rays of light Using the camera in such conditions may cause short circuits and breakdown of insulation resulting in over heating and or ...

Страница 9: ...amera disconnect the AC adapter for safety Do not leave the camera in locations such as A location exposed to direct sunlight or inside a car etc where the temperature may become extremely high Fire and or damage to the unit may occur Within the reach of children The strap may wrap around the neck causing strangulation or accessories such as batteries Memory Card etc may be swal lowed Unstable sur...

Страница 10: ... of the LCD monitor may appear uneven with changes in temperature etc The LCD monitor has been developed using high precision engineering and is superior in sharpness and picture quality Due to the nature of liquid crystals however there may be missing or constantly lit pixels on the monitor This is not a malfunction of the unit If the LCD monitor becomes damaged for some reason take care to preve...

Страница 11: ...t home Connect the optional AC adapter 11 Preparation Necessary Accessories Checking the Packing Contents The following accessories should be packed with your new camera please make sure all are enclosed after opening the packaging In the unlikely event that something is missing please contact the sales out let Lithium ion Battery NP 500 Battery Charger BC 500 USB Cable USB 800 Hand Strap HS DG130...

Страница 12: ...e may occur as a result Do not touch the terminals with hands or metal objects Damage to the com ponents may occur as a result of static electricity Before handling an SD Memory Card Multi Media Card or Memory Stick discharge any static build up from your body by touching grounded metal etc Do not bend drop or apply excessive force Avoid heat liquid and direct sunlight when using and for storage D...

Страница 13: ...a Images that have been changed or added will not playback on the camera and may cause the cam era to malfunction as well Always format SD Memory Cards Multi Media Cards Memory Stick using this camera A card formatted in a PC may not operate properly The SD Memory Card and Memory Stick includes a write protect switch Sliding this switch downward prevents data from being written to the card and ima...

Страница 14: ...14 Names of Parts Camera Body Microphone Shutter Button Light Sensor Strap Holder USB Terminal Self timer LED Flash Viewfinder Window Lens Cover Main Switch Lens ...

Страница 15: ... Display Button P 16 Play Button P 16 LCD Monitor Battery Sub cap Battery Card Cover Menu Set Button P 16 4 way Button P 16 Speaker Zoom Buttons P 16 Red LED Green LED Viewfinder Eyepiece Tripod Socket Names of Parts Cont d ...

Страница 16: ...elete Button For deleting unwanted photos 4 Zoom Buttons For operating the optical and digital zoom functions 5 4 way Button up down right left Use the different buttons up down right and left to select menu items images etc This button is used for the following Selecting shooting mode Selecting menus Selecting pictures Scrolling a picture in an enlarged display Customizing the camera 6 Menu Set B...

Страница 17: ... attached take care so that it does not wrap around the neck On no account hang the camera round the neck of small children and infants Strangulation may occur as a result if the strap wraps around the neck When carrying the camera hanging from the strap take care so that it does not accidentally hit nearby objects Place the camera on a stable surface before installing the strap to avoid the possi...

Страница 18: ...ng time is about 2 5 hours Please charge your battery pack in an area with a temperature between 0 C 32 F and 40 C 104 F Charging time will vary with the surrounding temperature and the condition of the battery pack Before using new battery packs or battery packs that have not been used for some time be absolutely sure to charge them When a battery pack reaches the end of its useful life it can be...

Страница 19: ... lit and turn OFF all switches 1 Open the battery card cover by slid ing it in the direction of the arrow Do not change the battery with wet hands as there is a danger of electric shock 2 Install the battery with the terminals facing inside the camera After mak ing sure the battery pack is properly installed close the battery card cover securely Make sure that the battery pack is facing the right ...

Страница 20: ...h the batteries can lead to burns Never open the battery card cover while the camera is accessing the card or processing images p 36 To recharge the battery NP 500 do not use any charger other than the sup plied charger BC 500 Also do not use the supplied charger BC 500 to recharge batteries other than our special battery NP 500 Do not leave the battery anywhere where the temperature may reach 60C...

Страница 21: ...perate the equipment This equipment has been tested and found to comply with the limits for a Class B digital device pursuant to Part 15 of the FCC Rules These limits are designed to provide reasonable protection against harmful interference in a residential installation This equipment generates uses and can radiate radio frequency energy and if not installed and used in accordance with the instru...

Страница 22: ...amera as use of any other device may result in a breakdown fire or electrical shock Make sure the camera is OFF check that the LCD monitor is not lit and turn OFF all power After reading the Important Safety Precautions pp 7 10 in this manual and the warnings supplied with the AC adapter connect the adapter as instructed 1 Connect the AC adapter to the power supply cord and plug in the power suppl...

Страница 23: ...the battery adapter in the battery compart ment and close the battery card cover When finished using the camera turn OFF the power supply to the camera and then discon nect the connecting plug of the battery type plug from the AC adapter Never handle the adapter with wet hands It may result in electric shock 3 ...

Страница 24: ...ake sure the LCD monitor is OFF and turn OFF all power If power is ON damage may occur to the card or to the camera itself Inserting a Card 1 2 2 With the camera and the label of the card facing up insert the card with the knocked out part first into the slot and push in until a click is heard Take care that the card is inserted facing the right way If the card is forcefully inserted facing the wr...

Страница 25: ...ed LED will come on If you open the battery card cover while the red LED is flashing image processing may be interrupted or hindered While the red LED is still lit make sure that you DO NOT open the battery card cover When a card is inserted it is recorded on first When a card is not inserted internal memory is used for recording However in this case the recording image size is limited to only 640...

Страница 26: ... side the power will come on With the power ON it is possible to shoot pictures Also the LCD display will be lit 3 When you wish to turn the power OFF slide the lens cover just a little in the direction indicated by the arrow The power will turn OFF and the lens will retract After you are sure the lens has fully retracted you can close the lens cover to its fully closed position 1 2 3 ...

Страница 27: ... AC adapter is connected or that there is enough battery power 1 Turn the power on by either opening the lens cover or pressing the PLAY button The language selection screen will automatically appear on the LCD monitor By pressing down or up select the desired language and push the MENU SET button 2 You will be prompted to confirm your language selection confirm the selected YES by pressing the ME...

Страница 28: ... of the settings press the MENU SET button 6 After finishing the settings If you turned the power ON with the main switch by opening the lens cover you can take pictures once the lens has reached its extended position If you made the settings after pressing the PLAY button the LCD monitor will display playback images The internal clock is maintained by a back up battery Without a battery in the ca...

Страница 29: ...our body for a sta ble position To take a vertical picture hold the camera so that the flash is at the top Please be careful that your fingers hair or the strap do not cover the lens flash or the light sensor Viewfinder and Indicator LEDs In the macro photo mode p 42 we recommend that you use the LCD monitor for composing your pictures p 35 If you use the viewfinder what you can see and what the c...

Страница 30: ...tofocus AF Red LED On Flash charging Formatting the card Flashing Warning that your hands are shaking Both Red and Green LEDs On Camera ready to shoot Flash fires USB cable is being connected Flashing System error Card has insufficient memory is faulty not formatted Insufficient battery warning Green LED flashing Red LED on Card being accessed images being processed compressed expanded other proce...

Страница 31: ...will be using the viewfinder to conserve your battery press the DISPLAY but ton and the LCD monitor will turn off If the surface of the lens is dirty gently wipe it clean with a soft dry cloth 2 Looking through the viewfinder com pose the photo you wish to take and determine the size of the subject using the zoom buttons Also put the auto focus mark on the subject you wish to bring into focus If y...

Страница 32: ... the green LED will flash If you set the beep sound to off p 102 the self timer LED will not be lit While the card is processing image data you cannot operate the camera Once the red and green LEDs disappear the recording has finished 6 When you are finished taking pictures close the lens cover and turn OFF the power supply Shooting Distance Equivalent to 39mm in 35mm cam era conversion Equivalent...

Страница 33: ...ure that the camera is not too close to the subject then align the subject to the auto focus mark in the center of the viewfinder For the shooting distance see page 32 If the subject is too dark such as a person in the shade use the flash pp 38 40 41 Use a similar subject at the same distance and with the same bright ness to adjust the auto focus and exposure After the focus lock is set aim at you...

Страница 34: ...epeat the proce dure 2 With the shutter button pressed half way re compose your photo and press the shutter button all the way to take the picture When re composing the photo do not change the shooting distance If the dis tance has changed repeat the procedure The following subjects may be difficult to bring into focus Subjects with no contrast variance in brightness e g the sky a white wall the h...

Страница 35: ...P 11 for details 1 Once the power supply is turned on by opening the lens cover the LCD monitor will come on and a live image the image taken though the lens will be projected Date and time displayed will go off in approx 5 seconds 2 While looking at the LCD monitor compose and take your photo The shooting procedures are the same as Taking a picture using the viewfinder pp 31 32 Focus value and sh...

Страница 36: ...ill be displayed when the AF AE Lock functions are used pp 107 108 3 Exposure Compensation The compensation value will be displayed For details of how to adjust the exposure see pages 51 and 107 4 Shooting Mode The selected shooting mode will be displayed For details on each shooting mode see pages 38 to 43 5 White Balance White balance icon will be dis played For details of how to select the whit...

Страница 37: ...to being taken will be displayed 11 Picture Quality Mode 1 Normally the photo quality of the picture being taken is displayed 2 When shooting a movie is dis played About Auto Power Off Function If you do not operate for a certain period of time with the camera power on and the lens cover open the auto power off function pause status will be activated and power will be turned off with the lens stil...

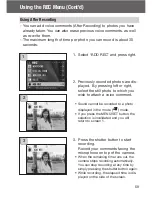
Страница 38: ...u turn the camera OFF the shooting mode you set is canceled and the camera automatically returns to AUTO mode shooting operation no display But the flash mode setting remains in effect even if you switch the power OFF and back ON Using the custom function p 107 enables you to set up your favorite shooting modes 1 Turn the power on so that the LCD monitor is lit 2 By pressing left or right bring up...

Страница 39: ... display 2 Macro photo mode p 42 3 Distant View mode p 42 4 Self Timer mode p 43 5 Self Timer Macro photo mode 6 Self Timer Distant View mode 7 4m Fixed focus mode p 43 8 2m Fixed focus mode p 43 9 1m Fixed focus mode p 43 Every time left is pressed the mode symbols will be displayed one by one through the list ...

Страница 40: ...th people Red Eye Reduction Using this mode can reduce the red eye phenomenon which is people with red glaring eyes caused by the flash When you press the shutter button the pre flash comes on followed by the real flash which finishes the shot Until the real flash comes on do not move the camera or let the subject move If the subject is not facing the pre flash or final flash or the distance to th...

Страница 41: ...shutter speed Shutter speeds will be slower so use a tripod to prevent shaking If the subject is moving the picture will be blurred Off Flash Override Use this mode for places such as a museum where flash is prohibit ed or when taking a picture of a night view or taking a picture using indoor lighting The flash will not come on even when it is dark Use a tripod to prevent shaking as shutter speeds...

Страница 42: ...e slower when taking close ups The self timer function can be used in conjunction with this function If you use the flash when shooting very close to the subject the image may come out too bright For information about the flash shooting distance see page 40 Shooting Distance Focus Distance Telephoto Macro photo Mode Shooting Distances Wide angle 6cm 2 4in to infinity 0 5m 1 6ft to infinity Distant...

Страница 43: ...t the mode every time you take a picture The activation time for the self timer can be also set at 3 second delay by using the set up menu p 103 If you set the self timer for a 3 second delay the setting is not cancelled after shooting so that you can continue to take a picture using the self timer Fixed focus mode Use this mode if you want to take photographs using fixed focus Distance can be set...

Страница 44: ...ise described Setting with the REC DETAILS Menu 1 Turn the power ON with the LCD moni tor on through image display Pressing the MENU SET button will dis play the REC menu screen 2 Select the menu you wish to set by pressing down or up Every time the button is pressed the menu mode changes as follows up down RESOLUTION p 46 MOVIE ON p 49 EXPOSURE p 51 WHITE BALANCE p 52 AE p 54 MONOCHROME p 55 DIGI...

Страница 45: ...ou to screen 1 4 You can cancel the REC Menu mode at Step 1 REC Menu screen on the left page by pressing left or pressing right or the MENU SET button after selecting RETURN This will close the menu and return you to the through image picture shooting image For details of each set up menu refer to the pages hereafter If you press the shutter button half way even when you are setting the menu the d...

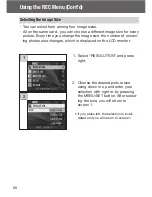
Страница 46: ...ning will change and be displayed on the LCD monitor When quality is the priority select FINE when the number of pho tos is more important select NORMAL 1 Select RESOLUTION and press right 2 Use down or up to select image size or compressions ratio then press right 3 Select the picture size Use down or up to select the desired image size then press either right or the MENU SET but ton You will ret...

Страница 47: ...ratio Use down or up to select the desired compression ratio then press either right or the MENU SET button You will return to screen 2 with your chosen compression ratio displayed If you press left the setting is invalidated and you will return to screen 2 4 ...

Страница 48: ...rd setting when you want to view mem orable photos on your computer screen or for printing them out 3 1600 x 1200 pixels approximately 1 920 000 pixels You can shoot pictures in high quality resolution with low memory requirements This mode is suitable if you wish to take more shots and the memory does not have enough space 4 640 x 480 pixels approximately 300 000 pixels As this mode produces the ...

Страница 49: ... movie the LCD monitor stays on Even if you press the DISPLAY button the LCD monitor will not turn off Please view the LCD monitor while shooting your movies 1 Select MOVIE ON and press right 2 The display returns to the through image with movie information dis played as in screen 2 In this screen you can start taking a movie When you are not recording a movie press the MENU SET button select MOVI...

Страница 50: ...g a movie the sound is also being recorded so take care not to cover the microphone on the top of the camera with your fingers etc 2 As long as the camera s power is ON you can continue to take movies but if you turn the power off it exits the movie mode If you turn the power back ON and wish to shoot another movie reset the camera to the movie mode 3 Once you have pushed the shutter button and st...

Страница 51: ...ugh image mode is entered and the adjusting exposure compensation bar is displayed If you press right the cursor moves toward the plus side while pressing left moves it toward the minus Select the desired compensation level brightness and press the MENU SET button The setting is completed and you will return to screen 1 1 2 Even after a correction there are times when the change is not apparent su...

Страница 52: ...e envi ronment and lighting when you take a picture The mode you set is displayed with an icon on the monitor 1 Select WHITE BALANCE and press right 2 Use down or up to select the desired mode then press either right or the MENU SET button The setting is completed and you will return to screen 1 If you press left the selection is invalidated and you will return to screen 1 To return to normal stil...

Страница 53: ...g photos indoors with fluorescent lighting TUNGSTEN Ideal for taking photos indoors with normal incandescent lighting About White Balance The human eye has the ability to compensate so that it sees white subjects as white whatever the light source Digital cameras and simi lar devices can also see white subjects as white by first adjusting the color balance of the ambient light to match the photo s...

Страница 54: ...ated and you will return to screen 1 Center weighted metering In this mode the camera sets the exposure according to the metering for the central part of the whole frame It is ideal for taking photos where the brightness of the subject in the center of the frame is desired Spot metering In spot metering the camera measures the light of just the subject in the center of the frame and sets the expos...

Страница 55: ... press right 2 Use down or up to select SEPIA or B W then press either right or the MENU SET button When the setting is completed you will return to screen 1 If you press left the selection is invali dated and you will return to screen 1 To return to the normal color mode select OFF in screen 2 and then press either right or the MENU SET button 2 1 ...

Страница 56: ...ress either right or the MENU SET button The setting is completed and you will return to screen 1 If you press left the selection is invali dated and you will return to screen 1 3 From screen 1 when you press left you will return to the through image mode To take a picture press the TELE zoom button until it reaches the end of the optical range then release the button for a moment then press and h...

Страница 57: ... the cursor to the with the left button Adjust to the best brightness and color setting you prefer and press the MENU SET button You will then return to screen 1 Color is set up as a relative value For example to emphasize red most green and blue need to be set up to the furthest left as well as setting up red to the furthest right 57 Using the REC Menu Cont d 1 2 Adjusting the Brightness and colo...

Страница 58: ...ss the shutter button and recording begins If you do not press the shutter button you can return to screen 1 without mak ing a recording by pressing the MENU SET button When the available recording time runs out recording will end auto matically If you wish to stop recording simply press the shutter but ton again While recording the elapsed time is displayed on the upper right of the screen To pla...

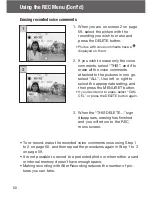
Страница 59: ...ing After Recording You can add voice comments After Recording to photos you have already taken You can also erase previous voice comments as well as re write them The maximum length of time per photo you can record is about 30 seconds 1 Select ADD REC and press right 2 Previously recorded photos are dis played By pressing left or right select the still photo to which you wish to attach a voice co...

Страница 60: ...t to select the appropriate setting and then press the MENU SET button If you decide not to erase select CAN CEL or press the DELETE button again To re record erase the recorded voice comments once using Step 1 to 2 on page 60 and then repeat the procedures again in Step 1 to 3 on page 59 It is not possible to record to a protected photo or when either a card or internal memory doesn t have enough...

Страница 61: ...ght button 3 Select the flash mode with the up or down button and press the left or right button to set the shutter speed Press MENU SET button to finish set up and go back to the screen in 1 Change the slow shutter settings to OFF to go back to the normal shutter speed default setting When the slow speed setting is OFF and if flash mode is AUTO or Fill In the shutter speed will be 1 60 second Whe...

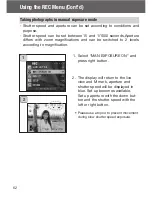
Страница 62: ...oom magnifications and can be switched to 2 levels according to magnification 1 Select MAN EXPOSURE ON and press right button 2 The display will return to the live view and M mark aperture and shutter speed will be displayed in blue Set up becomes available Set up aperture with the down but ton and the shutter speed with the left or right button Please use a tripod to prevent movement during slow ...

Страница 63: ... blue the buttons can be used for setting manual exposure When you press the up button the functions of the down left and right but tons are changed to allow setting of Flash Mode Shooting Mode and White Balance M mark aperture and shutter speed will be displayed on the LCD monitor all the time when setting up manual exposure mode The difference between the manual settings and the ambient light le...

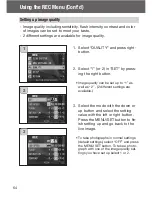
Страница 64: ... press ing the right button Image quality can be set up to 1 as well as 2 2 different settings are available 3 Select the mode with the down or up button and select the setting value with the left or right button Press the MENU SET button to fin ish setting up and go back to the live image To take photographs in normal settings default settings select OFF and press the MENU SET button To take a ph...

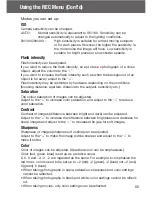
Страница 65: ...ensitivity etc Saturation The colour saturation of images can be adjusted Adjust to the to increase color saturation and adjust to the to reduce color saturation Contrast Contrast of images difference between bright and dark can be adjusted Adjust to the to increase the difference between brightness and darkness for sharp images and adjust to the to decrease the gap for soft images Sharpness Sharp...

Страница 66: ...the set up menu to your preferences you can customize your camera to suit you 1 Select SETUP and press right 2 You will enter the SET UP Menu mode For details see Using the Set up Menu on page 98 The current settings can be displayed by pressing the DISPLAY button on screen 2 1 2 ...

Страница 67: ...C DETAILS Menu on page 44 In the REC BASIC menu mode every time you press the down or up button the menu cycles through the following screens RESOLUTION p 68 MOVIE ON MONITOR ADJ SETUP RETURN up down When you are on REC Menu screen you can cancel the REC Menu mode by pressing left or pressing right or the MENU SET button after selecting RETURN This will close the menu and return you to the through...

Страница 68: ...e the image size the number of remain ing photos also changes which is displayed on the LCD monitor 1 Select RESOLUTION and press right 2 Choose the desired picture size using down or up and enter your selection with right or by pressing the MENU SET button After select ing the size you will return to screen 1 If you press left the selection is invali dated and you will return to screen 1 1 2 ...

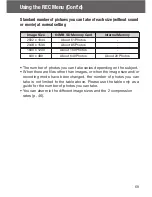
Страница 69: ...l setting The number of photos you can take varies depending on the subject When there are files other than images or when the image size and or recording mode have been changed the number of photos you can take is not limited to the table above Please use the table only as a guide for the number of photos you can take You can also mix the different image sizes and the 2 compression rates p 46 Int...

Страница 70: ... closed you can play back images by holding down the PLAY button for more than 2 seconds If there isn t any image data recorded the message NO DISPLAY DATA will be displayed 1 2 Every time you press left or right the previous or next photo will be played back If you press the W side on the zoom button Index Playback will start For operation after play back please refer to page 78 Items 2 and 3 Hal...

Страница 71: ... playback 71 Playback Cont d 1 7 3 5 6 8 2 4 9 The Playback Image Display In addition to the images you ve taken the following information is dis played You can set the camera so information is not displayed p 101 1 Recording Media Display The type of media in use is displayed SD Memory Card or Multi media Card SD Memory Stick MS Internal Memory IN Even if a Multi media Card is used SD will be dis...

Страница 72: ...on the movie image 2 If you press the shutter button the movie images will be played back When playback is finished the dis play returns to screen 1 Symbols displayed when a movie is played back are recording media file number image number and elapsed playback time only If you want to stop during playback press the shutter button again 1 2 ...

Страница 73: ...image The voice memo time is displayed in the upper right of the screen 2 Press the shutter button and the voice memo is played back When the memo finishes the display returns to screen 1 The playback time elapsed is displayed in the upper right of the screen 1 Press PLAY button and then select After Recording image with left or right button When playing back After Recording image a screen will be...

Страница 74: ... in every time you press the TELE button the image is enlarged further The zoom ratio is displayed on the LCD monitor To zoom back out press the WIDE zoom button Also half depress shutter button to dis play the image in the normal size 2 Use left right up or down to scroll around the photo to the part you want to see To conserve your battery once you ve finished viewing press the PLAY button again...

Страница 75: ...ken them When using the viewfinder to shoot images with the LCD monitor off After the LCD monitor displays the last image that you have taken it will automatically turn back to off When using the LCD monitor for shooting images 1 After you take a picture the LCD monitor automatically displays it 2 After about three seconds the LCD monitor returns to the through image ...

Страница 76: ...nd a screen appears indicating the media type to be erased and prompting you to select the frame range Press left or right to select THIS the selected image or ALL and press the MENU SET button If you decide not to erase a frame select CANCEL or press the DELETE button again then you will return to screen 1 3 Once erasing starts the THIS DELETE screen is displayed When the process is finished the ...

Страница 77: ...utton half way even when you are setting the menu the display returns to the playback image For details on making settings for each menu refer to the following pages 77 Using the PLAY Menu Advanced Playback Erasing By using the PLAY menu you can play back images erase unwanted pictures and edit images It does not matter whether the camera s power is OFF or ON 1 After pressing the PLAY button press...

Страница 78: ...eft right up or down to move the frame and select the image you wish to display or erase Pressing left when the first frame is selected or right on the last frame will switch the screen to the next nine images 3 Press the TELE zoom button or the MENU SET button and the selected image will be displayed in the nor mal size If you wish to delete the selected image press the DELETE button After pressi...

Страница 79: ...OM is selected so press right To select a different item press down or up 3 The media types will be displayed Using down or up select the media on which the image you wish to copy is recorded then press right or the MENU SET button The set ting is completed and you will return to screen 2 If you press left the setting is invalidated and you return to screen 2 If there are no images on the media se...

Страница 80: ... return to screen 4 5 Returning to screen 2 select UNIT Then the screen shown left screen 5 appears After pressing right use down or up to choose SELECT If one or multiple frames are to be selected or ALL ON Then press either right or the MENU SET button and the settings are completed returning you to screen 2 If you press left the setting is invalidated and you return to screen 2 6 After you have...

Страница 81: ... have finished selecting images use right left up or down to select END and then press the MENU SET button Go to Step 9 To select other images repeat the selec tion procedure Return to Step 7 To select multiple images repeat steps 7 and 8 9 A confirmation screen appears To carry out copying select YES with right or left then press the MENU SET button If you select NO and press the MENU SET button ...

Страница 82: ...ight 2 A screen with each setting item will appear At first MEDIA is selected so press right To select a different item press down or up 3 Using down or up select the media on which the image you wish to erase is recorded then press right or the MENU SET button The set ting is completed and you will return to screen 2 If you press left the setting is invalidated and you return to screen 2 If there...

Страница 83: ...vali dated and you will return to screen 2 5 After you have made all the set tings select ENTER and press either right or the MENU SET but ton If you chose SELECT on screen 4 go to Step 6 if you chose ALL ON go to Step 8 on page 84 If you press left the setting is invalidated and you return to screen 1 6 The 8 frame index appears Using left right up or down move the red frame to an image you wish ...

Страница 84: ...elect other images repeat the selection procedure Return to Step 6 To select multiple images repeat Steps 6 and 7 8 A confirmation screen appears To carry out erasing select YES with left or right then press the MENU SET button If you select NO and press the MENU SET button you will return to screen 1 without erasing anything 9 Once erasing starts THIS DELETE is displayed Once erasing is completed...

Страница 85: ...lue can also be adjusted Brightness and color settings are not altered by turning the power ON OFF and are saved until changed again 1 Select MONITOR ADJ and press right 2 The display screen for playback image and monitor adjustment will appear See p 57 2 for selectable mode and adjustment method Adjust the best brightness and color setting for you and press the MENU SET button You will then retur...

Страница 86: ...movie images When you print a photo you took previously you can imprint the date the date taken onto the image You can also select not to imprint the date 1 Select DPOF and press right 2 A screen with each setting item will appear At first MEDIA is selected so press right To select a different item press up or down 3 Using up or down select the media on which the image you wish to print or deselec...

Страница 87: ...If you press left the settings will be invalidated and you will returns to screen 2 5 Select DATE on screen 2 and then press right If you wish to print the date select ALL ON with down or up or if not select ALL OFF After making your choice press either right or the MENU SET button The settings are complete and you return to screen 2 If you press left the setting will be invali dated and you will ...

Страница 88: ...8 Images selected at Step 7 are sur rounded by a yellow frame For auto mode specify the number of prints using zoom button T W The number of prints will be dis played in the upper left of the screen When you have finished selecting images use left right up or down to select END and then press the MENU SET button Go to Step 9 To select other images repeat the selection procedure Return to Step 7 To...

Страница 89: ...nd press the MENU SET button your settings will be invalidated and you will return to screen 1 If you chose ALL OFF select YES and press the MENU SET button If you select NO and press the MENU SET button you will return to screen 1 without deselecting anything 9 10 The Now DPOF SET or Now DPOF OFF screen is dis played Once settings or deselection are completed the display returns to screen 1 You c...

Страница 90: ... and press right 2 Select the desired size with down or up and press right or the MENU SET button VGA records at 640 x 480 pixels and QVGA at 320 x 240 3 As you are in the playback mode press left or right to select an image you want to resize Then press the MENU SET button and after the newly resized image is recorded the display returns to screen 1 If you do not want to resize select RETURN with...

Страница 91: ...ess right 2 A screen with each setting item will appear At first MEDIA is selected so press right To select a different item press down or up 3 Using down or up select the media on which the image to protect or cancel protect is recorded then press right or the MENU SET but ton The setting is completed and you will return to screen 2 If you press left the setting will be invali dated and you retur...

Страница 92: ...nd you will return to screen 2 If you press left the settings will be inval idated and you will return to screen 2 5 After you have made all the set tings select ENTER and press either right or the MENU SET but ton If you chose SELECT for the UNIT setting go to step 6 if you chose ALL ON or ALL OFF go to Step 8 6 The 8 frame index appears Using left right up or down move the red frame to an image ...

Страница 93: ...creen appears with YES selected If you chose SELECT or ALL ON leave YES as is and press the MENU SET button If you select NO with left or right and press the MENU SET button your set tings will be invalidated and you return to screen 1 If you chose ALL OFF select YES with left or right and press the MENU SET button If you select NO and press the MENU SET button you will return to screen 1 without ...

Страница 94: ...ach setting item will appear At first FROM is selected so press right To select a different item press up or down 3 Using up or down select the media on which the image you wish to move is recorded then press right or the MENU SET button The set ting is completed and you will return to screen 2 If you press left the setting is invalidated and you return to screen 2 If there are no images on the me...

Страница 95: ... 5 Returning to screen 2 select UNIT Then the screen shown left screen 5 appears After pressing right use up or down to choose SELECT if you are moving one or multiple images or ALL and then press the MENU SET button The settings are complete and you will return to screen 2 If you press left the setting is invalidated and you return to screen 2 6 After you have made all the set tings select ENTER ...

Страница 96: ... When you have finished selecting images use left right up or down to select END and then press the MENU SET button Go to Step 9 To select other images repeat the selection procedure Return to Step 7 To select multiple images repeat Steps 7 and 8 9 A confirmation screen appears To move the image s select YES with left or right then press the MENU SET button If you select NO and press the MENU SET ...

Страница 97: ...e slide show will finish with the last frame dis played If you wish to stop during a slide show press the MENU SET button If stopped the current frame will be dis played Using the After Recording Function 1 Select ADD REC and press right For details on the function and how to make settings see page 59 to 60 Selecting the Set up Menu 1 Select SETUP and press right 2 The set up menu mode screen appe...

Страница 98: ...2 DATE SET p 103 SELF TIMER p 103 AUTO POWER OFF p 104 NUMBER RESET p 104 MEMORY PRIORITY p 105 LANGUAGES p 105 ADD REC SET p 106 CUSTOM p 107 DEFAULT p 110 RETURN up down You can close the Set up menu screen by pressing left or selecting RETURN and then pressing the MENU SET button When you close the set up menu mode the LCD monitor will display as follows 1 If you entered the Set up menu from th...

Страница 99: ... up or down to choose which media type to format and then press either right or the MENU SET button If you press left the setting is invalidated and you return to the Set up menu 2 You will be asked for confirmation To execute formatting select YES with left or right and press the MENU SET button If you decide not to format select NO and press the MENU SET button 3 Once formatting starts the mes s...

Страница 100: ... return to the set up menu If you press left the setting is invalidated and you return to the set up menu Quick View Settings Turn this mode ON if you want to be able to check your images on the LCD monitor immediately after you have taken them See page 75 for details on this function 1 Select QUICK VIEW press right and the settings screen appears Using up or down select ON and press either right ...

Страница 101: ...tion p 36 71 during shooting or play back The default setting is ON display 1 Select INFO DISP and press right Use up or down to select OFF and press right or the MENU SET button The setting is completed and the screen will return to the set up menu If you press left the setting is invalidated and you return to the Set up menu ...

Страница 102: ... or the MENU SET but ton The settings are complete and you return to screen 1 If you press left the setting will be invali dated and you will return to screen 1 3 Returning to screen 1 select EFFECT Then the screen shown on the left screen 3 appears After pressing right use up or down to select OFF or ON Then press either right or the MENU SET but ton and you will return to screen 1 If you press l...

Страница 103: ...ken However if you set the self timer for a 3 second delay the setting is effective even after shooting so that you can continue to take a pictures using the self timer 1 Select DATE SET press right and the date and time settings screen appears See Steps 3 to 6 on pages 27 and 28 about how to make the settings Once settings are completed you will return to the set up menu 1 Select SELF TIMER press...

Страница 104: ...tting the File Numbers You can reset your file numbers 1 Select NUMBER RESET press right and the settings screen appears Using up or down select ON and press either right or the MENU SET button The setting is completed If you press left the setting is invalidated and you return to the Set up menu Reference At initial setting NUMBER RESET is turned OFF and it will assign con secutive file numbers a...

Страница 105: ...edia type to have priority and press either right or the MENU SET but ton The setting is completed and you will return to the Set up menu If you press left the setting is invalidated and you return to the Set up menu Changing Languages 1 Select LANGUAGE press right and the language settings screen appears See page 27 for instructions on making the settings When the setting is completed you will re...

Страница 106: ... mode By using the REC menu p 59 or the PLAY menu p 97 to select ADD REC you can add sound to still images after they ve been taken For the Always ON Setting ALWAYS You can add sound to every still image you take Every time an image is taken once recording finishes the After Recording screen is dis played as Step 2 on page 59 so by simply pressing the shutter you can record sound The maximum recor...

Страница 107: ... right or left button Press the up button again to make settings effective Exposure compensation can be corrected in the range of 0 6 EV in 0 3 EV steps The compensation setting can be corrected in the range of 1 5 EV by combining with EXPOSURE in the REC menu When the compensation setting of REC Menu p 51 is 0 9 EV you can adjust compensation between 0 3 EV and 1 5 EV 107 Using the Set up Menu Co...

Страница 108: ...to on this feature lets you take a sequence shot by holding down the shutter button If you are taking photos with the flash make sure that the flash is fully charged before taking the next photo 1 Select CUSTOM and press right The settings screen appears Select the desired setting with down or up and press either right or the MENU SET button 2 In screen 1 select FLASH and press right The flash mod...

Страница 109: ...tings screen for each item appears Select the desired mode with up or down and press either right or the MENU SET button to change the setting When the setting is completed press left to return to screen 1 5 In Screen 1 select CONTINUOUS and press right The settings screen appears Press up or down to select ON or OFF and press either right or the MENU SET but ton to return to screen 1 If you press...

Страница 110: ...nu back to their default settings all at one time 1 Select DEFAULT press right and a confirmation screen will appear Using up or down select YES and press the MENU SET button The setting is completed and you return to the set up menu If you select NO and press the MENU SET button the setting is invali dated and you return to the set up menu ...

Страница 111: ...16MB or more of available RAM 32MB or more recommended Display 32 000 colors or more resolution of 640 x 480 pixels or more Others CD ROM drive USB port standard equipped 2 Macintosh OS Mac OS 9 0 9 2 Mac OS X v 10 0 4 10 2 CPU PowerPC or more Memory 16MB or more of available RAM 32MB or more recommended Display 32 000 colors or more resolution of 640 x 480 pixels or higher Others CD ROM drive USB...

Страница 112: ...een appears connect the cam era and PC using the USB cable Please use only the USB cable supplied with the camera 3 Switch camera on While the camera is connected to your PC the camera is inoperable While connected to your PC do not detach the USB cable or open the bat tery card cover Turn the power supply to the camera OFF when detaching the USB cable When communicating with your PC we recommend ...

Страница 113: ... supply to the camera To conserve the battery using the AC adapter sold separately AC 8U AC 8E AC 8GB see P 11 for details is recommended 1 Turn on the PC power and start Windows 2 After connecting your camera and PC with USB cable p 112 turn ON the power supply to the camera 3 The Add New Hardware Wizard screen will appear 4 Insert the DiMAGE Viewer CD ROM supplied into the CD ROM drive 5 Click S...

Страница 114: ...ocation and input D 7 Click Next 8 Click Finish The USB device driver is now installed Here the CD ROM drive is assumed to be drive D Use a different letter if appropriate The INF file necessary for the install is located in D When searching a different location click Browse ...

Страница 115: ... PC and start up Windows or Mac OS and connect your camera and PC with USB cable p 112 2 If you are using Windows open My Computer and double click the newly created icon removable device If you are using Mac an Undefined Name icon will be displayed on the desktop 3 Double click the DCIM folder 4 If you double click 100MLT35 the image file icon will be dis played The first 3 digit number of 100MLT...

Страница 116: ...nt data The protect setting set with this camera is equivalent to the read only attribute of a file Please note that if the attribute of a file is changed using a PC the protect setting set with the camera will be disabled Do not change the file name of image data saved on an SD Memory Card Multi Media Card Memory Stick using a PC or save files other than image data taken by this camera Images tha...

Страница 117: ... the DiMAGE INSTRUC TION MANUALS CD ROM into the CD ROM drive 3 Open the folder AcrobatReader5 4 Open your language specific folder 5 Double Click on the file Acrobat Reader Installer 6 Follow the instructions on the screen Windows Apple Macintosh 1 Turn the computer on 2 Insert the DiMAGE INSTRUCTION MANUALS CD ROM into the CD ROM drive 3 Open the folder Manuals 4 Open your language specific fold...

Страница 118: ...8U AC 8E or AC 8GB Please do not use the AC adapter where the voltage is outside the displayed power supply voltage AC 100V to AC240V Using the Attached Charger BC 500 Please do not use the charger where the voltage is outside the dis played power supply voltage AC 100V to AC240V ...

Страница 119: ...th follow the safety precautions of the product After using the camera If the camera is not to be used for a long period remove the batteries and ensure that the power plug of the AC adapter is disconnected from the wall outlet Leaving the batteries inside the camera for a long time may cause the battery fluid to leak resulting in malfunction of the unit When storing keep both camera and batteries...

Страница 120: ...s been developed using high precision engineering Although the percentage of active pixels is more than 99 98 there may be missing or constantly lit pixels When using the LCD monitor in a cold location the screen may appear darker than normal immediately after starting use The screen will return to normal brightness as the internal temperature of the camera rises When the LCD monitor becomes dirty...

Страница 121: ... too low Battery inserted incorrectly AC Adaptor attached incorrectly Battery level too low Low ambient temperature Power supply not on SD Memory Card or Memory Stick is write protected Pictures taken have reached the maximum number Erase unwanted pictures Set to the Self Timer mode Flash being charged Subject not in the center Subject hard to focus Dirty lens Incorrect distance from the sub ject ...

Страница 122: ...age data All image data is erased White balance incorrect Distance too great the flash didn t reach the subject Not enough light Exposure correction is not adjusted properly Flash used with subject too close Exposure correction is not adjusted properly Not connected to your PC cor rectly No image data inserted in the camera Left without battery over 24 hours Page 70 70 76 82 99 52 40 33 51 107 40 ...

Страница 123: ...e AVI style Motion JPEG compatible Image pickup 1 1 8 inch CCD Total resolution 2690 x 1994 pixels 5 360 000 pixels Sensitivity equivalent to ISO 100 changeable sensitivity AUTO 50 100 200 400 Lens F 2 8 4 9 f 8 24mm 7 elements in 6 groups Equivalent to 35mm camera conversion of 39 to117mm Metering TTL center weighed metering using a CCD image surface luminance signal spot metering Focal Range Nor...

Страница 124: ...on TFT with back light LCD color monitor Playback Single frame index playback slide show playback digital zoom playback Erase function Single frame designated frames all frames format LED display Self timer LED viewfinder LED Auto date function Year month date and time up to 20503 Power supply Lithium battery dedicated AC adapter sold separately I O terminals USB terminal Operating temperature 0 3...

Страница 125: ...s with other related devices 2 DPOF Digital Print Order Format specified by Canon Inc Kodak Co Ltd Fuji Photo Film Co Ltd and Matsushita Electric Industrial Co Ltd is a standard for recording specified information such as the images or quantity to print from the images taken by a digital camera on a recording medium 3 Manganese lithium silicon battery is in use as back up battery for calendar syst...

Страница 126: ...We offer support for our digital products 24 hours per day on www minoltasupport com Camera know how image composition digital image editing discover more about Minolta s new internet world and visit www konicaminoltaphotoworld com ...

Отзывы: