Konica Minolta DiMAGE E500 Скачать руководство пользователя страница 65

EN-64

Video Menu

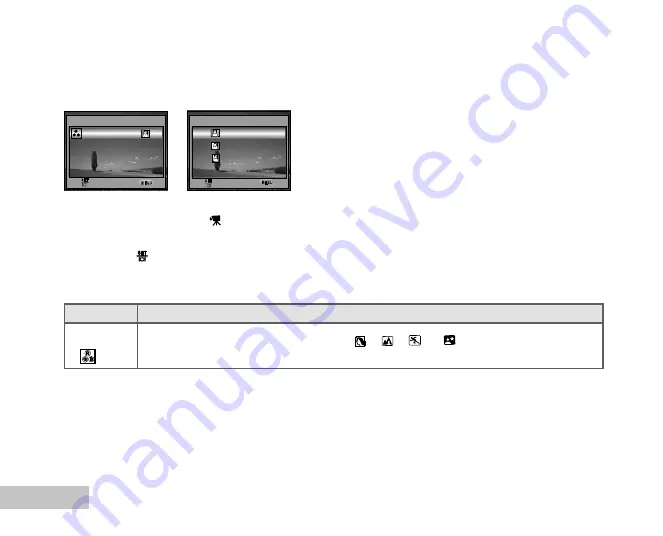
This menu is for the basic settings to be used when recording video clips.

1. Rotate the mode dial to 

 and turn your camera on.

2. Press the 

MENU

 button.

3.  Press the 

 button to access the [COLOR] menu.

4. To exit from the menu, press the 

MENU

 button.

SET :

EXIT :

VIDEO

COLOR

R

G B

1 / 1

SET :

EXIT :

COLOR

FULL COLOR

BLACK & WHITE

SEPIA

1 / 3

Item

Functional Description

COLOR

Refer to the “Camera Menu-In the 

P

 ,  

 ,  

 ,  

  or 

  Mode” of  menu options.

Содержание DiMAGE E500

Страница 1: ......

Страница 2: ...pursuant to Part 15 of the FCC Rules These limits are designed to provide reasonable protection against harmful interference in a residential installation This equipment generates uses and can radiat...

Страница 3: ...ference guide for the product The product and accessories that come with your digital camera may be different from those described in this manual This is due to the fact that different retailers often...

Страница 4: ...fluid from the batteries enters your eye immediately rinse the eye with plenty of fresh water and contact a doctor If fluid from the batteries makes contact with your skin or clothing wash the area t...

Страница 5: ...not use the product near inflammable gases or liquids such as gasoline benzine or paint thinner Do not use inflammable products such as alcohol benzine or paint thinner to clean the product The use o...

Страница 6: ...and wait for it to cool Do not fire the flash while it is in contact with people or objects The flash unit discharges a large amount of energy which may cause burns Do not apply pressure to the LCD mo...

Страница 7: ...g the Screen Language 19 Setting the Date and Time 20 Formatting an SD Memory Card or Internal Memory 21 Using the LCD Monitor 22 PHOTOGRAPHY MODE 23 Shooting Images The Basics 23 Setting Image Resolu...

Страница 8: ...ING FILES FROM YOUR DIGITAL CAMERA TO COMPUTER 52 Step 1 Install the USB driver 53 Step 2 Connect the digital camera to your computer 54 Step 3 Download images or video clips 55 EDITING SOFTWARE INSTA...

Страница 9: ...mory card Support for SD memory card for memory expansion You may wish to expand the memory capacity up to 512MB capacity by using an additional memory card USB connection USB 2 0 Full Speed compliant...

Страница 10: ...hat any item is missing or if you find any mismatch or damage promptly contact your dealer Common Product Components Konica Minolta DiMAGE E500 Digital Still Camera Hand Strap USB Cable AV Cable Batte...

Страница 11: ...10 GETTING TO KNOW YOUR CAMERA Front View 8 7 6 5 2 3 4 1 9 1 Mode dial 2 Flash 3 Microphone 4 Lens 5 Shutter button 6 ON OFF Power button 7 Self timer LED 8 PC USB AV Out terminal 9 DC in 3V termina...

Страница 12: ...ton 3 Delete button 4 Tripod socket 5 W Zoom out wide angle button 6 T Zoom in telephoto button 7 LCD monitor 8 S Arrow button Up 9 Self timer button Arrow button Right 10 OK button Display button 11...

Страница 13: ...de to adjust point and shoot action 3 Video Select this mode to record video clips 4 Setup Select this mode to adjust the camera settings 5 Night Select this option to take photographs of people again...

Страница 14: ...y card 6 Remaining battery status Full battery power Medium battery power Low battery power Virtually no battery power blinking icon 7 Self timer mode 2 sec delay 10 sec delay 10 2 10 2 sec delay 8 Wh...

Страница 15: ...2 SD memory card indicator if present 3 Battery power indicator 4 Playback information Video Playback 1 Playback mode 2 Video mode 3 SD memory card indicator if present 4 Battery power indicator 5 Pla...

Страница 16: ...1 Make sure the camera is turned off 2 Open the battery cover 3 Insert the batteries in the correct orientation as shown in the illustration 4 Close the battery cover To remove the batteries turn the...

Страница 17: ...N 3 0V 3 Connect the other end to an electrical outlet Make sure to use only the AC power adapter specified for the camera Damage caused by the use of an incorrect adapter is not covered under the war...

Страница 18: ...t an SD memory card in the correct orientation as shown in the illustration 4 Close the SD memory card cover To remove the SD memory card make sure the camera is turned off Press lightly on the edge o...

Страница 19: ...EN 18 Attaching the Camera Strap Attach the strap as shown in the illustration...

Страница 20: ...Follow the steps below to choose the desired language 1 Rotate the mode dial to and turn your camera on by pressing the ON OFF button 2 Press to select the CUSTOM menu 3 Use T to select LANGUAGE then...

Страница 21: ...menu 3 Use T to select DATE TIME then press the button You may press or to switch the date types 4 Press or to select Year Month Day and Time fields To increase a value press S To decrease a value pr...

Страница 22: ...FORMAT then press the button 3 Use S or T to select YES then press the button to confirm When you format an SD memory card be aware that all data of which will be permanently erased Protected images...

Страница 23: ...e your scene on the LCD monitor 4 Press the shutter button The LCD monitor darkens in strong sunlight or bright light This is not a malfunction To prevent your images from being blurred while pressing...

Страница 24: ...Focus feature automatically focuses the image and exposure 4 Press the shutter button the rest of the way down to capture the image The actual captured image appears to be larger than the one on LCD...

Страница 25: ...se steps below 1 Rotate the mode dial to P or and turn your camera on by pressing the ON OFF button 2 Press the MENU button The PICTURE menu is displayed 3 Use T to select IMAGE SIZE then press the bu...

Страница 26: ...ctor 3x A useful feature as it is however the more the image is magnified the grainer the image may become To capture a zoomed image perform the following steps 1 Press the ON OFF button to turn on th...

Страница 27: ...AUTO FLASH The flash fires automatically according to suit the photographic conditions RED EYE Use this mode to reduce the red eye phenomenon when you want to take REDUCTION natural looking photograph...

Страница 28: ...ose your scene and press the shutter button The self timer function is activated The photography is then taken after the preset time To cancel the self timer at any time press the shutter or ON OFF bu...

Страница 29: ...ct and the background is extremely large The EV compensation value can be set in the range from 2 0EV to 2 0EV 1 Rotate the mode dial to P or 2 Press the ON OFF button to turn on the power 3 Press the...

Страница 30: ...button to turn on the power 3 Press the MENU button then toggle to select the AE AWB menu 4 Use T to select W BALANCE then press the button 5 Use S or T to select the desired setting then press the bu...

Страница 31: ...ess the shutter button down half way the camera s Auto Focus feature automatically focuses the image and exposure 4 Press the shutter button the rest of the way down to capture the image Program Mode...

Страница 32: ...ject within the focus frame 3 Press the shutter button to capture the image Landscape Mode This mode allows you to take photographs of distant scenery or landscapes 1 Rotate the mode dial to and turn...

Страница 33: ...s frame 3 Press the shutter button to capture the image Night Mode This mode allows you to take photographs of people against a dusk or night time background 1 Rotate the mode dial to and turn your ca...

Страница 34: ...then press the button 5 To exit from the menu press the MENU button The indicator is displayed on the monitor screen 6 Press the shutter button halfway to lock the focus 7 Press the shutter button al...

Страница 35: ...e FUNCTION menu 3 Use T to select CAPTURE MODE then press the button 4 Use S or T to select AEB then press the button 5 To exit from the menu press the MENU button The indicator is displayed on the mo...

Страница 36: ...NG then press the button 4 Use S or T to select the desired metering mode then press the button AVERAGE Averages the light metered from the entire frame but gives greater weight to the subject matter...

Страница 37: ...ed image appears on the LCD monitor 3 Use or to select the desired images To view the previous image press To view the next image press The playback information displayed on the LCD monitor will disap...

Страница 38: ...the LCD monitor To view the previous image press To view the next image press 2 Adjust the zoom ration by using the Zoom W T button To enlarge the selected image press the T button To return to the n...

Страница 39: ...button The last recorded image appears on the LCD monitor 2 Press the W button once Nine thumbnail images are displayed simultaneously For recorded video clips the video mode icon will be displayed 3...

Страница 40: ...LCD monitor 2 Press the MENU button then use T to select SLIDE SHOW and press the button 3 Use S or T to set the playback interval then press the button The slide show starts The video clips are displ...

Страница 41: ...red images To view the previous image press To view the next image press 3 Press the MENU button to access in the PLAYBACK menu then use S or T to select RESIZE and press the button 4 Use S or T to se...

Страница 42: ...N OFF button 2 Press the shutter button to start recording 3 To stop recording press the shutter button again The zoom function of optical zoom 3x can be activated before you start to record video cli...

Страница 43: ...age press 3 Press the button to start playing back the video clips To pause or resume video playback press the button again The playback information displayed on the LCD monitor will disappear after s...

Страница 44: ...ing to connect to the digital camera then turn all connected devices off 1 Connect one end of the AV cable to the AV terminal of the digital camera 2 Connect the other end to the AV input socket of th...

Страница 45: ...NO To delete image video clip by preference 1 Press the button The last recorded image appears on the LCD monitor which can also be deleted directly by pressing the button 2 Use or to select the imag...

Страница 46: ...elect PROTECT and press the button 4 Use S or T to choose the desired setting then press the button PROTECT ONE Protect one image movie PROTECT ALL Protect all images movies at once 5 Use S or T to se...

Страница 47: ...ecify how many prints or which image you would like Take your memory card to a DPOF enabled printer that accepts memory cards The DPOF card compatible printer will read the embedded information on the...

Страница 48: ...on to return to the image playback mode The is marked on the displayed image To unmark the mark go back to step 3 to select RESET ALL with S or T 4 5 Step Figure Procedure ONE IMAGE QUANTITY DATE CANC...

Страница 49: ...select the CUSTOM menu then use T to select USB 3 Press the button 4 Use S or T to select PICTBRIDGE then press the button 5 Connect your camera and the printer via a supplied USB cable The screen tu...

Страница 50: ...ancel the print settings use S or T to select CANCEL After the step 4 finished you can still use or to change the image by your preference then press the button to print SELECT CANCEL PRINT MORE 9 DAT...

Страница 51: ...to CONTINUE or CANCEL printing 7 In PRINT ORDER Mode This function only lets you print the specified image based on the previous DPOF settings Step Figure Procedure Use S or T to select the PRINT ORD...

Страница 52: ...NT then press the button to confirm This starts printing and displays the message TRANSFERRING on the monitor screen The message will disappear after the transferring is finished To cancel printing Pr...

Страница 53: ...to install the software you need to check your system according to the table as shown below System Requirements For the camera to be connected directly to the computer and used as a mass storage devic...

Страница 54: ...USB driver 1 Insert the enclosed CD ROM into your CD ROM drive 2 When the welcome screen appears click INSTALL USB DRIVER Follow the on screen instructions to complete the installation 3 After the USB...

Страница 55: ...to select USB 3 Press the button 4 Use T to select PC then press the button 5 Connect one end of the USB cable to an available USB port on your computer 6 There will be a new Removable Disk icon dete...

Страница 56: ...m the Edit menu You may also drag and drop image files from the digital camera to a desired location Macintosh Open the NO_NAME disk icon and the destination location on your hard disk Drag and drop f...

Страница 57: ...in one tool for owners of digital cameras WebCams DV camcorders scanners or anyone who strives to effectively organize a large collection of digital media 1 Insert the enclosed CD ROM into your CD ROM...

Страница 58: ...s photographic filters and special effects Embellish projects by adding creative design elements such as frames callouts and stamp objects Share results with family and friends via e mail and multiple...

Страница 59: ...ware is not included with the digital camera This mode is not supported for Mac The following operation systems are compatible with the camera Windows 98 98SE Me 2000 Professional and XP Home and Prof...

Страница 60: ...3 Run your application software i e Windows NetMeeting To use Windows NetMeeting for videoconferencing 1 Go to Start Programs Accessories Communications NetMeeting to launch the NetMeeting program 2...

Страница 61: ...the desired setting then press the button PICTURE FUNCTION 1 5 IMAGE SIZE QUALITY Q 5M SHARPNESS LOW COLOR PICTURE FUNCTION AUTO X1 1 3 PICTURE FUNCTION AE AWB EXPOSURE W BALANCE ISO 100 0 7 1 3 AUTO...

Страница 62: ...In the Auto Mode in list of menu options SHARPNESS Sets the level of image sharpness LOW MEDIUM HIGH Item Functional Description FOCUS You can take images with the distance to the subject set by auto...

Страница 63: ...nual titled Selecting the Metering Mode for further details PICTURE Item Functional Description COLOR Sets the color of the image that will be captured FULL COLOR BLACK WHITE SEPIA SATURATION To captu...

Страница 64: ...alance photographing under a variety of lighting conditions and permits photographs to be taken that approach the conditions that are seen by the human eye AUTO DAYLIGHT CLOUDY SUNSET TUNGSTEN FLUORES...

Страница 65: ...to and turn your camera on 2 Press the MENU button 3 Press the button to access the COLOR menu 4 To exit from the menu press the MENU button SET EXIT VIDEO COLOR R G B 1 1 SET EXIT COLOR FULL COLOR B...

Страница 66: ...ption DELETE Delete one or all images you captured Refer to section in this manual titled Deleting Images Video Clips for further details SLIDE SHOW You can play back recorded images in order with a s...

Страница 67: ...ler size is available 2560x1920 2048x1536 1280x960 640x480 DPOF Allows you to select the desired pictures to be printed and set the number of prints and date displayed in DPOF format You can print ima...

Страница 68: ...W POWER OFF DIGITAL ZOOM SET TO DEFAULT 3 MIN ON LOUDER USB BASIC CUSTOM PC SET 5 5 BASIC CUSTOM SET DATE TIME TV LANGUAGE LCD BRIGHTNESS Y M D NTSC ENGLISH NTSC PAL Y M D T S 1 5 Item Functional Desc...

Страница 69: ...NO DATE IMPRINT The date of recording can be printed directly on the still images This function must be activated before the image is captured ON OFF FORMAT Erases all images and reformats the SD car...

Страница 70: ...ment that you are going to connect to the camera PAL NTSC LANGUAGE Sets the language that is displayed on the LCD monitor Refer to the section in this manual titled Choosing the Screen Language for fu...

Страница 71: ...EN 70 CONNECTING THE DIGITAL CAMERA TO OTHER DEVICES...

Страница 72: ...2mm Equivalent to 35mm Camera 32 96mm Focus range Normal 50cm infinity Macro 6cm infinity Wide 35cm infinity Tele LCD monitor 2 0 LTPS color LCD High resolution 130K pixels display Self timer 10 sec d...

Страница 73: ...use a different memory card Select a different flash mode Select SINGLE in the capture mode Select a different self timer mode Insert a new SD memory card Check all connections Install the USB driver...

Страница 74: ...om dust and chemicals For long periods of disuse store the camera in an airtight container with a silica gel drying agent Remove the batteries and memory card from the camera when not in use for exten...

Страница 75: ...h temperature In cold environments we recommend keeping spare batteries in a warm place such as the inside of a coat Batteries can recover their power when they warm up In cold environments the use of...

Страница 76: ...events and journeys Check the camera s operation take test pictures and purchase spare batteries Konica Minolta has no responsibility for any damage or loss incurred by equipment malfunction Copyrigh...

Отзывы: