E-4
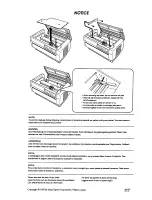
2. Remove the protective sheet from the operation
panel.
3. Open the right and front doors.
4. Remove the cover shown in the illustration and
unplug the connector. (One screw)
5. Unscrew the screws shown in the illustration to
remove the imaging unit. (Two screws)
Note:
• Do not touch or scratch the photoconductor.
• Cover the imaging unit, which has been
removed, with a protective cloth or similar
material.
6. Close the front door.
7. Remove the protective tape.
8. Push the ends of the transfer roller shaft in the
direction of the arrow to remove the fixing brack-
ets that fix the transfer roller.
9. Close the right door.
A3PEIXC009DA
A3PEIXC010DA
A0XXIXC012MA
A3PEIXC011DA


