background image

472405/A

185

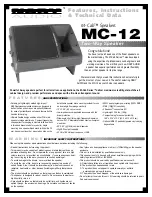
464618 HWS dimensions - MC330 - Rack
model

Drawing file

Содержание EM 2040 MKII

Страница 1: ...472405 A November 2021 Kongsberg Maritime AS KONGSBERG EM 2040 MKII Multibeam echo sounder Installation Manual KM Shallow Survey 2015...

Страница 2: ...ents of the appropriate manuals before attempting to operate or work on the equipment Kongsberg Maritime disclaims any responsibility for damage or injury caused by improper installation use or mainte...

Страница 3: ...room requirements 25 Environmental requirements 25 Size and access requirements 25 Requirements for insulation heating and ventilation 26 Requirements for electrical installations cables and communic...

Страница 4: ...Installing the Hydrographic Work Station 74 Installing the HWS MC330 Rack model 75 Installing the HWS MC330 Desktop model 78 Installing the Processing Unit 80 Installing the Processing Unit 81 Process...

Страница 5: ...mote control 121 Transmit Transducer cable 122 Transmit transducer cable Portable Processing Unit 124 Receive Transducer cable 126 Receive transducer cable Portable Processing Unit 128 TX to RX transd...

Страница 6: ...ONS 190 Performance specifications 191 Interface specifications 194 Different datagram formats 195 Interface specifications Processing Unit all format 197 Interface specifications Processing Unit KMal...

Страница 7: ...echanical or electromechanical unit 230 Handling instructions for printed circuit boards and electronic modules 230 Unpacking and handling printed circuit boards and electronic modules 231 Returning a...

Страница 8: ...8 472405 A KONGSBERG EM 2040 MKII...

Страница 9: ...stallation of electronic and mechanical products We assume that you are familiar with the basic acoustic principles of sound in water We also expect that you have some experience with multibeam and or...

Страница 10: ...ERG EM 2040 MKII Topics System description page 11 System diagram single system page 13 System diagram dual RX page 14 System diagram dual TX page 15 Main system units page 17 KONGSBERG EM 2040 MKII I...

Страница 11: ...yaw stabilization Nearfield focusing on both transmit and receive Short pulse lengths large bandwidth Shortest pulse is 14 s IHO S 44 exclusive order compliant Seabed image Swath coverage Single syste...

Страница 12: ...ultiFrequency Mode Dual Swath not available in this mode MultiFrequency Backscatter MultiFrequency Inspection MultiFrequency Bathymetry MultiFrequency Pulse Extra detection KONGSBERG EM 2040 MKII Inst...

Страница 13: ...terface capabilities and power cables are not shown A Hydrographic Work Station HWS B Interfaces Sound speed sensor Tide Centre depth output C Processing Unit PU D Interfaces Positioning systems Attit...

Страница 14: ...ne or two Processing Units may be required depending on the system configuration A Hydrographic Work Station HWS B Interfaces Sound speed sensor Tide Centre depth output C Processing Unit PU D Interfa...

Страница 15: ...ain components of a dual TX EM 2040 MKII system Only the main connections between the units are shown Detailed interface capabilities and power cables are not shown One or two Processing Units may be...

Страница 16: ...ntre depth output C Processing Unit PU D Interfaces Positioning systems Attitude roll pitch and heave Sound speed sensor Velocity Heading Clock Trigger input output Clock synchronization 1PPS E Transm...

Страница 17: ...be delivered in different versions with different transmission beam width EM 2040 04 MKII 0 4 degrees at 400 kHz EM 2040 07 MKII 0 7 degrees at 400 kHz The EM 2040 MKII has separate transducers for t...

Страница 18: ...s may be required depending on the system configuration Portable Processing Unit description The EM 2040 MKII Processing Unit is available in a portable splash proof IP67 rated version The portable ve...

Страница 19: ...Desktop model page 19 Portable HWS Dell Latitude 5424 page 20 HWS MC330 Rack model MC330 is the name of a Lenovo computer assembled by KONGSBERG for use as an operator station for several products It...

Страница 20: ...use CAT 5E STP Shielded Twisted Pair quality or better Using cables with lower bandwidth capacity will reduce performance Remote Control Unit K Rem description A dedicated junction box has been desig...

Страница 21: ...ible to mount it on a flat surface or in a bulkhead It is also prepared for mounting on telescopic rails Related topics Interface to Remote Control Unit for external synchronisation page 116 K Sync in...

Страница 22: ...nd consumables required for installation page 23 Personnel qualifications page 23 Sonar room requirements page 25 Where to install the transducer page 28 Acoustic noise page 33 Transducer installation...

Страница 23: ...tools are available All necessary tools and consumables required for welding All necessary tools and consumables required for physical installation of transducer frames and transducer modules All nece...

Страница 24: ...ly be done by a certified welder If applicable the final installation welds must be approved by the vessel s national registry the corresponding maritime authority and or classification society Observ...

Страница 25: ...vironmental conditions are poor Avoid running large power cables trough the sonar room Observe the environmental specifications related to the EM 2040 MKII units Size and access requirements A well de...

Страница 26: ...t pipes to divert moisture to the bilge On the main deck the best ventilation is provided when the outlet pipe is at least four meters higher than the inlet pipe To keep out sea water rain and spray t...

Страница 27: ...connected to other EM 2040 MKII units located in different compartments on the vessel The units may also be connected to peripheral devices If these cables pass through hatches or areas where they ma...

Страница 28: ...ach system installation must be handled separately depending on the hull design and the other electrical and mechanical systems installed on the vessel Mount the transducer deep In order to achieve th...

Страница 29: ...cer as deep as possible on the hull Note Kongsberg Maritime AS takes no responsibility for any damages to the transducer the cable or the mounting arrangement caused by slamming Avoid protruding objec...

Страница 30: ...nsducer useless almost no matter where it is installed When the bow thrusters are not in operation the tunnel creates turbulence If your vessel is pitching the tunnel may be filled with air or aerated...

Страница 31: ...ssel hull has a bulbous bow this may well be a good transducer location but also in this case the flow pattern of the aerated water must be taken into consideration The foremost part of the bulb is of...

Страница 32: ...lination angle compared to water flow Do not place a transducer near protruding objects and especially not close behind them Make sure that the surface of the resulting installation is as smooth and s...

Страница 33: ...ipment used on board a vessel Such factors include The quality and properties of the transmitted signal The quality of the receiving system The operational settings made during operation The propertie...

Страница 34: ...coustic system for example echo sounder or sonar will produce more or less self noise There are many sources of such self noise It is necessary to analyse the different sources of self noise on a vess...

Страница 35: ...er may be structure borne to the transducer If a propeller blade is damaged this may increase the noise considerably Propeller cavitation is a severe source of noise Singing propellers might be a sour...

Страница 36: ...The turbulent flow is a disorderly flow pattern full of eddies A Turbulent flow B Laminar flow C Air bubbles Air bubbles absorb and reflect the sound energy and they may in worst cases block the soun...

Страница 37: ...her vessels interference Precipitation noise Heavy rain or hail In some areas where many vessels operate together the engine and propeller noise from other vessels may be disturbing Interference from...

Страница 38: ...noise will be the main contributor Note The information here must be considered as general advice Each system installation must be handled separately depending on the hull design and the other electr...

Страница 39: ...l is difficult to avoid The problem may be reduced by choosing the working frequencies carefully and to some extent by separating the different transducers On vessels with a large number of separate h...

Страница 40: ...n principles The EM multibeam system is supplied with transducers and electronic units While the electronic units are installed using normal tools the transducers must be located and installed dependi...

Страница 41: ...e of the type having a pressure rating of 4 bars or more If the conduits end below the vessel s water line classification requirements may require a double set of approved glands The conduits should b...

Страница 42: ...e rear end close to the vessel s hull A gondola installation may help in avoiding air bubble blockage of the sound path under the transducers by aerated water Gondolas may also contain additional tran...

Страница 43: ...system The blister can also be used for other sonar and echo sounder transducers The interior of the blister must be filled with water Use drainage holes in the bottom and an air outlet on the top The...

Страница 44: ...revent any air to be trapped and to avoid back pressure behind the transducers Note This installation method may prove unsuccessful due to aerated water blocking the signal path to and from the transd...

Страница 45: ...former multibeam echo sounder installations Note The installation shipyard must provide all necessary installation drawings If required all drawings and documents must be approved by the vessel s nati...

Страница 46: ...splacements of the transducer must be less than the installation accuracy requirements The alignment specifications are found in the Technical specifications The line of sight from the transducer to t...

Страница 47: ...Transducer F Keel The retractable hull unit is more expensive than a blister but on vessels with a hull where it is difficult or impossible to install a blister it may still be a cost effective soluti...

Страница 48: ...e 54 Baffle for multipath reduction page 56 Transducer cables and space requirement page 58 Cable support page 59 Free viewing sector page 60 Portable installation page 62 Installation of dual RX syst...

Страница 49: ...tic systems and the challenges related to physical installation of these Context The outline dimensions of the EM 2040 MKII transducer and the relevant installation items can be found in the Drawing f...

Страница 50: ...d in a permanent installation 4 Mount the transducers 5 Do a dimensional survey to determine the necessary position and angle measurements of the transducer and the relevant sensors The information pr...

Страница 51: ...ons Adding a second receive transducer increases the angular coverage The cables are connected to the transducers with underwater connectors The standard length of the transducer cables is 15 30 or 50...

Страница 52: ...transducer should be aligned parallel to the vessel s keel The receive transducer should be aligned 90 degrees on the keel Both transducers should be horizontal on a plane on the keel Transducer defau...

Страница 53: ...ve heading between the RX and the TX shall always be 90 degrees A transducer mounting plate is provided with the system to ensure accurate relative orientation of the transducers Transducer mounting p...

Страница 54: ...ween the RX and TX transducers are extremely strict These requirements can only be met using the supplied mounting plate or using a survey company personnel with good experience in maritime dimensiona...

Страница 55: ...rque values The mounting plate must be bolted to the structure Bolts M12 A4 80 Washers Nord lock Threadlocker Loctite 243 Torque 68 Nm The transducers must be bolted to the mounting plate Bolts M10 A4...

Страница 56: ...ansducer and the baffle With a single receive transducer the transmit transducer beam pattern across is wider than the angular coverage of the receiver beams especially for the lowest frequencies Dual...

Страница 57: ...h a dual TX system a baffle plate should be mounted on each transmit transducer The baffle should be mounted as for a single RX system Related topics 359252 Baffle plate 0 7 x 0 7 degrees page 182 Ins...

Страница 58: ...mum radius you can bend the transducer cable without damaging it A Transmit Transducer cable Minimum bending radius 125 mm The connector and cable will with minimum bending radius build 215 mm Receive...

Страница 59: ...or cable trays The only exception to this rule is over the final short distance maximum 0 5 meters as the cables run into the cabinets units to which they are connected These short service loops are...

Страница 60: ...it has a clear view of the bottom Transmit transducer TX For EM 2040 MKII transmit transducer the optimal free viewing sectors relative to the transducer face are A 20 degrees in along direction B 130...

Страница 61: ...eive transducer RX For EM 2040 MKII receive transducer the optimal free viewing sectors relative to the transducer face are A 35 degrees in along direction B 90 degrees in across direction Installing...

Страница 62: ...ns on a vessel the transducer might be deployed on a pole fixed to the bow or to the side or in a moon pool A prefabricated baffle provided by Kongsberg Maritime may be used to ensure a rigid high acc...

Страница 63: ...472405 A 63 An example of a Kongsberg Maritime fabricated baffle that has been mounted to a pole over the bow is shown below Installing the transducer...

Страница 64: ...f 35 to 40 degrees To be able to cover 100 degrees the roll installation angle should not be less than 35 degrees To obtain overlap between the two RX arrays at shallow depths the roll installation an...

Страница 65: ...f the two RX transducers of 1 meter the overlap between the two heads starts at about 1 4 metres depth below the RX transducers with beams steered 60 degrees re array With c c of 2 meter the overlap s...

Страница 66: ...be supported and protected along their entire lengths using conduits and or cable trays The dual RX mounting bracket is equipped with cable brackets for support of the transducer cables KONGSBERG EM 2...

Страница 67: ...erformance of your system The transducer has not been designed with any protection against biological fouling Whenever opportunity arise typically when the vessel is dry docked the transducer face mus...

Страница 68: ...Observe the relevant instructions and safety information provided by the paint manufacturer Recommended paints are listed here Approved anti fouling paints page 71 Non permanent transducer installati...

Страница 69: ...cer has not been designed with any protection against biological fouling Anti fouling paint may therefore be applied to the transducer face To minimize the negative acoustical effects the layer of ant...

Страница 70: ...irless spray Apply the minimum specified film thickness per coat and for the complete layer It is not possible to measure dry film thickness on transducer surface You must therefore use a wet film gau...

Страница 71: ...rd Norway Manufacturer s website http www jotun com Products SeaMate M Primer Safeguard Universal ES Apply 80 m wet film thickness 50 m dry film thickness Paint SeaMate M Apply 250 m wet film thicknes...

Страница 72: ...R Primer Intersleek 737 Apply 50 m dry film thickness Paint Intersleek 1100SR Apply 150 m dry film thickness Intersmooth 7465Si SPC Primer Intergard 269 Apply 40 m dry film thickness Paint Intersmooth...

Страница 73: ...405 A 73 Installing the EM 2040 MKII system hardware units Topics Installing the Hydrographic Work Station page 74 Installing the Processing Unit page 80 Installing the EM 2040 MKII system hardware un...

Страница 74: ...stant development of new computer parts older parts are no longer manufactured This means that the computer type used with the EM 2040 MKII system changes from time to time The Hydrographic Work Stati...

Страница 75: ...ble as a rack model and a desktop model Follow this procedure to install the rack model of the computer Context A suitable location for the computer must be defined prior to installation Note Observe...

Страница 76: ...hub Mouse keyboard and USB license dongle are connected here The power button is in the front and one USB C and one USB B are also in the front If a wireless mouse is used it may be better to insert t...

Страница 77: ...ided with the HWS Note The network cable from the Processing Unit must be connected directly at the main PC B 4 Attach all the cables to the moving arm using cable ties 5 Insert the HWS into the rack...

Страница 78: ...he installation requirements a Depending on its physical properties install the computer inside a console in a cabinet or 19 rack or on a desk b Choose a position to fit the available cable lengths be...

Страница 79: ...a stand alone desktop unit a Place the computer on the surface b Secure the computer using any means available c Secure the removable SSD using any means available 6 Connect the cables Note When you...

Страница 80: ...ing Unit Topics Installing the Processing Unit page 81 Processing Unit rear panel description page 83 Processing Unit circuit boards and modules page 84 CBMF board dip switch setting page 85 KONGSBERG...

Страница 81: ...Processing Unit is located in the sonar room Make sure that ample ventilation is provided to avoid overheating Procedure 1 Prepare the location and the necessary tools 2 Observe the installation requi...

Страница 82: ...dard component shelf suitable for the 19 rack you are using 5 Connect the cables Note When you connect the cables make sure that they are all properly secured and able to withstand the vibration and m...

Страница 83: ...n unit The Processing Unit has two fan units for cooling purposes B Remote Control connector C 48 Vdc output connector D Ground connector E AC mains power socket F Fuse for the AC mains supply G CPU b...

Страница 84: ...r CBMF board is used by the Processing Unit for beamforming and signal processing purposes There are one or two Compact Beamformer CBMF boards in the Processing Unit The number of CBMF boards depends...

Страница 85: ...itch setting on the CBMF board has to be correct All the dip switches on all the CBMF boards in the Processing Unit should be set to OFF OFF is when they are pushed towards the edge of the circuit boa...

Страница 86: ...page 87 Cable plans page 88 List of cables page 101 HWS MC330 Connections page 104 Cable drawings and specifications page 108 Steel conduits page 140 Handling of underwater connectors page 141 Basic c...

Страница 87: ...ovided in this publication 3 Commercial cables Commercial cables may be provided by Kongsberg Maritime as a part of the delivery The cables may also be included with third party items that are used wi...

Страница 88: ...l swath page 96 Cable plan Portable Processing Unit Single system page 98 Cable plan Portable Processing Unit Dual RX page 99 Cable plan Hydrographic Work Station page 100 About the cable plans Due to...

Страница 89: ...wer and to the transducer One Ethernet cable is used to connect the Processing Unit to the Hydrographic Work Station A Processing Unit PU B Transmit Transducer TX C Receive Transducer RX Cables identi...

Страница 90: ...to the transducer One Ethernet cable is used to connect the Processing Unit to the Hydrographic Work Station A Processing Unit PU B Transmit Transducer TX C Receive Transducer RX Cables identified wi...

Страница 91: ...it to AC mains power and to the transducer One Ethernet cable is used to connect the Processing Unit to the Hydrographic Work Station A Processing Unit PU B Transmit Transducer TX C Receive Transducer...

Страница 92: ...92 472405 A Related topics List of cables page 101 KONGSBERG EM 2040 MKII Installation Manual...

Страница 93: ...er and to the transducer One Ethernet cable is used to connect the Processing Unit to the Hydrographic Work Station A Processing Unit PU B Transmit Transducer TX C Receive Transducer RX Cables identif...

Страница 94: ...Processing Unit cables include those used to connect the EM 2040 MKII Processing Units to AC mains power and to the transducer Ethernet cables are used to connect the Processing Units to the Hydrogra...

Страница 95: ...PU slave C Transmit Transducer TX D Receive Transducer RX E Ethernet switch Cables identified with an asterisk are system cables These cables are supplied with the EM 2040 MKII delivery Related topics...

Страница 96: ...The Processing Unit cables include those used to connect the EM 2040 MKII Processing Units to AC mains power and to the transducer Ethernet cables are used to connect the Processing Units to the Hydr...

Страница 97: ...PU slave C Transmit Transducer TX D Receive Transducer RX E Ethernet switch Cables identified with an asterisk are system cables These cables are supplied with the EM 2040 MKII delivery Related topics...

Страница 98: ...the transducer One Ethernet cable is used to connect the Processing Unit to the Hydrographic Work Station A Portable Processing Unit PPU B Transmit Transducer TX C Receive Transducer RX Cables identif...

Страница 99: ...the transducer One Ethernet cable is used to connect the Processing Unit to the Hydrographic Work Station A Portable Processing Unit PPU B Transmit Transducer TX C Receive Transducer RX Cables identi...

Страница 100: ...HWS B Display The Hydrographic Work Station supports three or four displays The number of displays depend on the computer model used C Computer keyboard D Computer mouse or trackball Cables identified...

Страница 101: ...ower supply UPS 2 x 1 5 mm2 1 5 mm2 Ground C8 Ground cable From Hydrographic Work Station to vessel ground 1 x 6 mm2 Ethernet cable From Processing Unit to Hydrographic Work Station CAT5 E STP Shielde...

Страница 102: ...P Shielded Twisted Pair C33 The Processing Unit must be connected to the global positioning system GPS to receive the Attitude velocity datagram The connection is made using an Ethernet cable On the P...

Страница 103: ...w all the main cables and how the various products are connected In such project cable drawings the EM 2040 MKII system cables may be identified as EM 2040 MKII Cx Related topics Cable plan Processing...

Страница 104: ...mounted in a cabinet and the cables are connected inside the cabinet HWS MC330 Rack model Top view A Rack mount drawer B Front C Moving arm D MC330 computer E Power supply F Solid state drives SSD G...

Страница 105: ...model Top view A Cabinet Front B MC330 computer C Power supply D Solid state drives SSD E Ethernet switch for network connection F USB hub Mouse keyboard and USB license dongle are connected here Cab...

Страница 106: ...F Display G Ethernet switch for network connection H Ethernet Net B I Ethernet Net C J Ethernet Net D K Ethernet Net E L USB hub M Computer keyboard N Computer mouse O USB to serial line unit P Serial...

Страница 107: ...472405 A 107 Related topics Cable plan Hydrographic Work Station page 100 Cable layout and interconnections...

Страница 108: ...interface to Remote Control Unit page 117 Remote control page 119 Remote Control using K Rem page 120 Dummy plug for not using remote control page 121 Transmit Transducer cable page 122 Transmit trans...

Страница 109: ...9 pin D Subminiature connector D Male 9 pin D Subminiature connector Unless otherwise specified this cable must be provided by the installation shipyard Note that this cable does not support all the...

Страница 110: ...second and may be sent on cables as long as 1500 meters A Local connection RJ45 connector B Connection on remote device Unless otherwise specified this cable must be provided by the installation shipy...

Страница 111: ...or to the Processing Unit Two adapters and two standard Cat6 patch cables are provided with a standard delivery The adapter has RJ45 female connector at one end and 9 pin male D connector at the other...

Страница 112: ...connection for interface to an external synchronization system This connection is used for interface to an external synchronization system for example K Sync used when multiple echo sounders are empl...

Страница 113: ...rements Conductors 2 x 3 x 0 2 mm Screen Overall braided Voltage 30 V Maximum outer diameter Defined by the plugs and or the cable gland We recommend using a shielded CAT 6A quality or better cable Ca...

Страница 114: ...must be adjusted accordingly The connector is RJ45 type This cable must be provided by the installation shipyard A Connections on the Processing Unit The connector is RJ45 type B Connections on the K...

Страница 115: ...he arrows Note that each of the two connector elements can be pulled out of the IO Module for easy access Configuration board Unless otherwise specified this cable must be provided by the installation...

Страница 116: ...on the Processing Unit The connector is RJ45 type Note Pin 3 and 6 is used by Kongsberg Maritime only B Connections in the Remote Control Unit K Rem Unless otherwise specified this cable must be prov...

Страница 117: ...Module follows Pin no Signal Description 1 TRIG OUT Trigger out Signal to external device enabling it to transmit 2 GROUND Mandatory connected to pin 5 inside the module 3 RTT Ready to transmit Input...

Страница 118: ...f the EM 2040 MKII delivery Minimum cable requirements Conductors 2 x 5 x 0 5 mm2 Screen Overall braided Voltage 60 V Maximum outer diameter Defined by the plugs and or the cable gland Related topics...

Страница 119: ...nnection male 9 pin D connector B Connection to remote lamp and on off switch C Female 9 pin D connector D Male 9 pin D connector Minimum cable requirements Conductors 3 x 0 5 mm Screen Overall braide...

Страница 120: ...e 9 pin D connector B Connection at the terminal strip in Remote Control Unit K Rem C Female 9 pin D connector D Male 9 pin D connector Minimum cable requirements Conductors 3 x 0 5 mm Screen Overall...

Страница 121: ...enclosed remote control dummy plug has to be inserted in the Remote Control connector in the Processing Unit Note If remote control is not used the enclosed remote control dummy plug has to be insert...

Страница 122: ...72405 A Transmit Transducer cable The transducer is connected to the Processing Unit with a special cable The transducer cable is part of the transducer delivery KONGSBERG EM 2040 MKII Installation Ma...

Страница 123: ...able Type D P4TP22 4C18 OS Minimum bending radius 125 mm Maximum outer diameter 13 2 mm nom Weight in air 209 kg km nom Weight in sea water 69 kg km nom Depth rating 6000 metres 4 Ethernet twisted pai...

Страница 124: ...or LTW CDU 14BFMA LL7001 Face view B Transducer end Underwater connector MacArtney SubConn DIL13M Face view Cable specifications Cable length 15 or 30 meters Diameter DLSA locking sleeve transducer en...

Страница 125: ...and 1 screen Screen Overall braided Voltage Power conductor 600V max 4 A Twisted pairs 250V max 1 5 A Important Sacrificial anodes must be mounted near the transducer to protect the connectors Inspect...

Страница 126: ...re are currently two versions of the cable delivered that have the same part number This change was introduced to the cable in Q2 2011 Please make sure to check the connections in your RJ45 connector...

Страница 127: ...ending radius 100 mm Maximum outer diameter 10 4 mm nom Conductors 4 twisted pairs Ethernet Weight in air 140 kg km nom Weight in sea water 53 kg km nom Depth rating 6000 metres Screen Overall braided...

Страница 128: ...ive transducer cable Portable Processing Unit The transducer is connected to the Processing Unit with a special cable The transducer cable is part of the transducer delivery KONGSBERG EM 2040 MKII Ins...

Страница 129: ...mum outer diameter 10 4 mm nom Conductors 4 twisted pairs Ethernet Weight in air 140 kg km nom Weight in sea water 53 kg km nom Depth rating 6000 metres Screen Overall braided Voltage Twisted pairs 25...

Страница 130: ...transducer cable The transmit transducer must be connected to the receive transducer for synchronization and power A Connector in TX end Face view B Connector in RX end Face view KONGSBERG EM 2040 MKI...

Страница 131: ...1 5 meters Depth rating 6000 metres Screen Overall braided Voltage 250V max 1 A Important Sacrificial anodes must be mounted near the transducer to protect the connectors Inspect the anodes regularly...

Страница 132: ...TX to dual RX transducer cable In a dual RX system the transmit transducer must be connected to both receive transducers This connection is for synchronization and power KONGSBERG EM 2040 MKII Install...

Страница 133: ...MCIL4M MCDLSF connector in RX end Cable length 0 5 3 0 meters or 0 5 1 0 meters Depth rating 6000 metres Screen Overall braided Voltage 250V max 1 A Important Sacrificial anodes must be mounted near...

Страница 134: ...nection RJ45 connector B Connection on remote device Unless otherwise specified this cable must be provided by the installation shipyard Minimum cable requirements Conductors 2 x 3 x 0 2 mm Screen Ove...

Страница 135: ...connection RJ45 connector B Connection on remote device Unless otherwise specified this cable must be provided by the installation shipyard Minimum cable requirements Conductors 2 x 3 x 0 2 mm Screen...

Страница 136: ...nna with a dedicated cable The cable is delivered with the Seapath 130 unit A Local connection Amphenol LTW DU 22BFFA SL7000 B Connection to Seapath 130 antenna JVS07A1726SN The DGNSS signal can be co...

Страница 137: ...ter Conductors 11 twisted pairs 26 AWG Provided by Amphenol with soldered connector UL2464 26AWG 11 Pairs Drain AL Mylar PVC Jacket UV Resistant 22pin 2 ethernet TPs 2 power conductors 12 serial com l...

Страница 138: ...specifications Cable length 15 m Maximum outer diameter 9 mm Minimum bending radius 10 x diameter Conductors 11 twisted pairs 26 AWG Provided by Amphenol with soldered connector UL2464 26AWG 11 Pairs...

Страница 139: ...a dedicated cable The cable is delivered with the Seapath 130 system A Local connection Amphenol LTW CD 08BFMA LL7001 B Connection Seapath MRU SEACON 5501 1508 Cable specifications Cable length 15 m M...

Страница 140: ...Brattberg All cables between the bridge the various operation and equipment rooms must be supported and protected along their entire length using conduits or cable trays Note that the cables must not...

Страница 141: ...nimum 1 10 of socket depth should be applied to the female connector c The inner edge of all sockets should be completely covered and a thin transparent layer of grease left visible on the face of the...

Страница 142: ...e and repair 1 Wherever possible cable trays must be straight accessible and placed so as to avoid possible contamination by condensation and dripping liquids oil etc They must be installed away from...

Страница 143: ...ng sheathing braiding or other suitable material In such a situation flexible cables should be screened wherever possible It is important that cables other than those supplying services to the equipme...

Страница 144: ...ons are shown on the applicable cable plan and or interconnection diagrams Where the cable plan shows cable connections outside an equipment box outline the connections are to be made to a plug or soc...

Страница 145: ...signed including provision for making electrical connection to the armour or braid and lead or aluminium sheath of the cable if any Cable glands may also be used for sealing cables passing through bul...

Страница 146: ...inet and select the cable gland through which the cable is to pass Note A minimum of 5 cm recommended 5 to 10 cm of cable slack must be allowed both inside and outside the unity or cabinet when you in...

Страница 147: ...nnection drawings for the EM 2040 MKII Procedure 1 Referring to the wiring diagram and ensuring that there is 5 to 10 cm slack cable inside the cabinet prepare and connect the cable cores to the appro...

Страница 148: ...re detailed drawings of the electrical system and identify each cable Illustration Sealing system example the finished assembly Context Only a brief description of the sealing system will be presented...

Страница 149: ...comply with the fire and or pressure demands for the vessel If the sealing is to be used under water both pressure and material requirements must be taken into consideration 2 Mount the frame 3 Pull...

Страница 150: ...ent Topics About dimensional surveying and alignment page 151 Dimensional surveying page 151 Alignment page 152 Calibration page 153 Vessel coordinate system page 153 Alignment report template page 15...

Страница 151: ...ar intervals and prior to each survey Dimensional surveying Determining the relative positions and orientations of the sensors and the transducer with high accuracy is important This can only be met u...

Страница 152: ...sional survey measurement requirements are summarized in the chapter Technical specifications Alignment To ensure a successful installation of the EM 2040 MKII system all alignment and measurements mu...

Страница 153: ...l locations of system units and sensors When you have several different sensors and transducers on your vessel and you wish each of them to provide accurate data you need to know their relative physic...

Страница 154: ...ransducers motion reference units etc are referenced to the origin In most cases the location of the vessel s official origin has been defined by the designer or shipyard This origin is normally ident...

Страница 155: ...nce point is in front of and below the origin and on the starboard side The accuracy of the three numerical values for X Y and Z defines the accuracy of the sensor data Important If you require a high...

Страница 156: ...rnatively the report template can be completed and serve as the final alignment report General information Table 1 Scope of work Sensor sys tem Position Heading Roll Pitch Flatness Table 2 Personnel N...

Страница 157: ...reference point system definition Definition description Origin point X axis X axis is positive Y axis Y axis is positive Z axis Z axis is positive Vessel reference plane Additional description of ves...

Страница 158: ...i e CRP on port or starboard side Enter definition of axes i e which of the axes is X axis which is Y axis and to what direction is the Z axis pointing Enter distance to CRP from vessel centre line an...

Страница 159: ...observations Point no Z Point description Remarks Figure 2 Waterline Instructions Indicate all survey points used to define the waterline Enter Z value of waterline Enter definition of axes forward an...

Страница 160: ...ey accuracy x y z roll pitch yaw Remarks Figure 3 MRU position Instructions Enter distances from CRP along the defined X Y and Z axes Indicate reference directions of the MRU installation that clarifi...

Страница 161: ...ions Use only the sketch that applies to your MRU installation i e pointing down in bow fore or aft direction Enter angle between MRU centre axis and vessel coordinate Z axis along the fore aft direct...

Страница 162: ...Use only the sketch that applies to your MRU installation i e pointing down in port or starboard direction Enter angle between MRU centre axis and vessel coordinate Z axis along the port stb direction...

Страница 163: ...e only the sketch that applies to your MRU installation i e pointing to port or starboard side of the vessel centre line Enter angle between MRU centre axis and vessel coordinate forward axis along as...

Страница 164: ...GNSS for heading determination e g Seapath and POSMV Table 7 GPS heading alignment Seapath POSMV etc Antenna 1 Survey accuracy x y z Antenna 2 Survey accuracy x y z Heading 1 2 Survey accuracy Heading...

Страница 165: ...pointing port or starboard as seen from above Enter reference direction i e whether antenna direction referred to X or Y direction forward or sideways Enter angle between antenna centre axis and refe...

Страница 166: ...on sensor Table 8 Position sensor alignment summary Antenna 1 Accuracy x y z Antenna 2 Accuracy x y z Antenna 3 Accuracy x y z Antenna 4 Accuracy x y z Antenna 5 Accuracy x y z KONGSBERG EM 2040 MKII...

Страница 167: ...s Use only the sketch that applies to your installation i e CRP on port or starboard side of vessel centre line Indicate all antenna locations on sketch both height and as seen from above Enter defini...

Страница 168: ...Table 9 TX transducer TX Starboard side TX Port side Survey accuracy x y z roll pitch yaw Remarks Figure 9 TX position Instructions Enter distances from CRP along the defined X Y and Z axes KONGSBERG...

Страница 169: ...that applies to your TX array installation i e pointing down in bow fore or aft direction Enter angle between transducer plane and vessel reference axis along the fore aft direction Enter definition...

Страница 170: ...at applies to your TX array installation i e pointing down on port or starboard side Enter angle between transducer plane and vessel reference axis along the port stb direction Enter definition of por...

Страница 171: ...Use only the sketch that applies to your TX array installation i e heading to port or starboard side Enter angle between transducer centre line and vessel forward axis Enter definition of forward dir...

Страница 172: ...able 10 RX transducer RX Starboard side RX Port side Survey accuracy x y z roll pitch yaw Remarks Figure 13 RX position Instructions Enter distances from CRP along the defined X Y and Z axes KONGSBERG...

Страница 173: ...that applies to your RX array installation i e pointing down in bow fore or aft direction Enter angle between transducer plane and vessel reference axis along the fore aft direction Enter definition...

Страница 174: ...at applies to your RX array installation i e pointing down on port or starboard side Enter angle between transducer plane and vessel reference axis along the port stb direction Enter definition of por...

Страница 175: ...Use only the sketch that applies to your RX array installation i e heading towards fore or aft side Enter angle between transducer centre line and vessel starboard axis Enter definition of starboard d...

Страница 176: ...s page 180 355913 Transducer mounting plate 0 4 x 0 7 degrees page 181 359252 Baffle plate 0 7 x 0 7 degrees page 182 385422 Processing Unit dimensions page 183 424178 Portable Processing Unit dimensi...

Страница 177: ...472405 A 177 338208 RX transducer outline dimensions 0 7 degrees Drawing file...

Страница 178: ...178 472405 A 338207 TX transducer outline dimensions 0 7 degrees KONGSBERG EM 2040 MKII Installation Manual...

Страница 179: ...472405 A 179 337805 TX transducer outline dimensions 0 4 degrees Drawing file...

Страница 180: ...180 472405 A 353631 Transducer mounting plate 0 7 x 0 7 degrees KONGSBERG EM 2040 MKII Installation Manual...

Страница 181: ...472405 A 181 355913 Transducer mounting plate 0 4 x 0 7 degrees Drawing file...

Страница 182: ...182 472405 A 359252 Baffle plate 0 7 x 0 7 degrees KONGSBERG EM 2040 MKII Installation Manual...

Страница 183: ...472405 A 183 385422 Processing Unit dimensions Drawing file...

Страница 184: ...184 472405 A 424178 Portable Processing Unit dimensions KONGSBERG EM 2040 MKII Installation Manual...

Страница 185: ...472405 A 185 464618 HWS dimensions MC330 Rack model Drawing file...

Страница 186: ...186 472405 A 475694 HWS dimensions MC330 Desktop model KONGSBERG EM 2040 MKII Installation Manual...

Страница 187: ...472405 A 187 370275 Remote Control Unit K REM dimensions Drawing file...

Страница 188: ...188 472405 A 373962 Remote Control Unit K REM wiring diagram KONGSBERG EM 2040 MKII Installation Manual...

Страница 189: ...472405 A 189 Related topics Interface to Remote Control Unit for external synchronisation page 116 K Sync interface to Remote Control Unit page 117 Remote Control using K Rem page 120 Drawing file...

Страница 190: ...formance specifications page 191 Interface specifications page 194 Weights and outline dimensions page 206 Power requirements page 209 Environmental requirements page 212 Alignment specifications page...

Страница 191: ...200 kHz Up to 170 degrees 85 8 times water depth on a flat bottom 300 kHz Up to 170 degrees 85 8 times water depth on a flat bottom 400 kHz Up to 120 degrees 60 3 5 times water depth on a flat bottom...

Страница 192: ...kHz 50 m 25 m Beamwidth Tx x Rx EM 2040 MKII 0 4 degrees system 200 kHz 0 7 x 1 5 degrees 300 kHz 0 5 x 1 degrees 400 kHz 0 4 x 0 7 degrees 600 kHz 0 25 x 0 5 degrees 700 kHz 0 225 x 0 45 degrees EM 2...

Страница 193: ...Up to 60 kHz 12 8 mm Pulse length CW Pulse shading Hanning Total pulse length 37 to 2450 s Nominal pulse length 25 to 1700 s Effective pulse length 14 to 918 s BS footprint Pulse length FM The FM pul...

Страница 194: ...g Unit all format page 197 Interface specifications Processing Unit KMall format page 200 External sensors requirements page 204 Interface specifications Hydrographic Work Station all format page 205...

Страница 195: ...SIS 5 The KM multibeam output datagram format is described in a Doxygen document a documentation generator writing software reference documentation and can be downloaded from the Kongsberg websites S...

Страница 196: ...m C Program Files 86 Kongsberg Maritime SIS PU EMxxxx Update EMSWUpgrade exe Do this steps to change PU SW to meet SIS and data format 1 Compare the SW versions Difference will be marked 2 Upgrade the...

Страница 197: ...imrad 90 The Simrad 90 datagram is a proprietary format created by Kongsberg Maritime to interface position sensors Supported datagram formats for external clock The EM 2040 MKII supports the followin...

Страница 198: ...t connection Supported datagram formats for motion information The EM 2040 MKII system supports the following datagram format from a motion sensor These datagram formats are received using a serial co...

Страница 199: ...pplanix com for position attitude and sound speed data Coda Octopus MCOM The Coda Octopus MCOM is a third party proprietary datagram format created by Oxford Technical Solutions Limited http www oxts...

Страница 200: ...ck The EM 2040 MKII supports the following datagram format from an external clock NMEA ZDA The NMEA ZDA datagram contains the universal time code UTC day month year and local time zone Supported datag...

Страница 201: ...very high resolution on timing and sensor parameters Seapath Binary 11 This is a proprietary format created by Kongsberg Seatex http www km kongs berg com seatex for position attitude and velocity da...

Страница 202: ...Smart Sensor message formats are AML NMEA NMEA like format AML SV Sound Velocity AML SVT Sound Velocity and Temperature AML SVP Sound Velocity and Pressure Micro SV Sound Velocity Micro SVT Sound Velo...

Страница 203: ...a Doxygen document a documentation generator writing software reference documentation and can be downloaded from the Kongsberg websites See the page to download the Doxygen document https www kongsbe...

Страница 204: ...he following requirements Roll 0 02 degrees RMS An accuracy of 0 05 degrees RMS can be accepted unless you have very long pulse length and large beam angles Pitch 0 05 degrees RMS Heading 0 2 degrees...

Страница 205: ...put of depth below keel in NMEA DPT format serial line Output to autopilot in NMEA APB format serial line Interface specifications Hydrographic Work Station KMall format The EM 2040 MKII system will i...

Страница 206: ...mm Height 150 mm Weight Weight In air 45 kg Weight In water 30 kg Volume 15 litres Transmit transducer 0 7 degrees Outline dimensions Length 407 mm Width 200 mm Height 150 mm Weight Weight In air 23...

Страница 207: ...mensions Length 614 mm Width 407 mm Height 139 mm including support pillars Weight 16 kg Processing Unit Make and model Kongsberg Maritime EM PU Outline dimensions Depth 424 mm Width 482 5 mm 19 rack...

Страница 208: ...ation MC330 Desktop model Make and model MC330 Outline dimensions Depth 322 9 mm Width 431 mm Height 56 7 mm Weight approximately 6 1 kg Portable Hydrographic Work Station Make and model Dell Latitude...

Страница 209: ...erg Maritime EM PU Voltage requirement 100 to 250 VAC 47 to 63 Hz Maximum power consumption With one CBMF board without transducer 115 W With two CBMF boards without transducer 125 W Portable Processi...

Страница 210: ...mption Component AUV or Portable Processing unit with 2xCBMF 73 EM 2040 MKII 0 7 degrees Receiver 29 EM 2040 MKII 0 4 degrees Transmitter sending FM pulses 48 Total 150 W EM 2040 MKII 0 7x0 7 degrees...

Страница 211: ...Note The use of an Uninterruptible Power Supply UPS is highly recommended for the Hydrographic Work Station Portable Hydrographic Work Station Make and model Dell Latitude 5424 Rugged Voltage requirem...

Страница 212: ...del Kongsberg Maritime EM PU Operating temperature 0 to 50 C Storage temperature 30 to 70 C Relative humidity 5 to 95 Non condensing Ingress protection IP code IP22 Certificates IEC 60945 2002 and COR...

Страница 213: ...rtable Hydrographic Work Station Make and model Dell Latitude 5424 Rugged Operating temperature 29 to 60 C Storage temperature 51 to 71 C Ingress protection IP code IP52 Dust protected protected again...

Страница 214: ...sition y 0 02 m Position z 0 005 m Pitch TX transducer 0 05 degrees RX transducer 0 20 degrees Roll TX transducer 0 20 degrees RX transducer 0 02 degrees Heading 0 05 degrees Relative heading between...

Страница 215: ...472405 A 215 Position sensor alignment accuracy Position x 0 05 m Position y 0 05 m Position z 0 005 m Waterline determination accuracy Position z 0 005 m Technical specifications...

Страница 216: ...s Transporting Kongsberg Maritime equipment page 217 Lifting units and transportation boxes page 218 Inspection of units and transportation boxes after arrival page 219 Specifications for storage prio...

Страница 217: ...ations must be investigated by the packer shipper before the unit is dispatched Procedure 1 Ensure that all local transportation is done according to the same specifications as for the initial deliver...

Страница 218: ...thin the workshop or installation area Note Observe the local rules and regulations related to the use of lifting equipment Procedure 1 Check the weight of the box or unit before you attempt to lift i...

Страница 219: ...port request that a representative of the carrier is present during the inspection Procedure 1 Check all boxes wooden or cardboard boxes plastic bags and or pallets for physical damage Look for signs...

Страница 220: ...is damaged prepare an inspection report stating the condition of the unit and the actions taken Describe the damage and collect photographic evidence if possible Re preserve the equipment b If the un...

Страница 221: ...otection the box to be used for storage and transportation must be lined on all walls base and lid using minimum 5 cm thick polyurethane or polystyrene foam Most system units can normally be stored in...

Страница 222: ...f the carrier to be present while the box is opened so any transportation damage can be identified and documented 3 If a unit has been damaged prepare an inspection report stating the condition of the...

Страница 223: ...t that this unpacking is done without inflicting damage to the equipment Prerequisites Observe the procedure for unpacking of standard parts and units Context Mechanical and electromechanical units ma...

Страница 224: ...s and other electronic units will always be wrapped in a clear plastic protective bag and the bag will be sealed Procedure 1 Lift the unit in its protective bag out of the transport box Note You must...

Страница 225: ...o any mechanical stress Protect the transducer face with a padded cover plate to prevent damage Transducers may be heavy A transducer must always be handled as a delicate instrument Incorrect actions...

Страница 226: ...that the unit has been used and you will be billed accordingly Each unit must be installed in its intended operating position as soon as possible after unpacking If the unit contains normal batteries...

Страница 227: ...ard handling and packaging Any units that requires protection against extreme temperatures are identified as such in the applicable documentation The box used to transport and store such units are cle...

Страница 228: ...must be properly cleaned and prepared before packing Topics Cleaning an electronic cabinet or unit page 228 Cleaning a mechanical or electromechanical unit page 230 Cleaning an electronic cabinet or u...

Страница 229: ...e battery and the electrical contacts to prevent electrical discharge The battery can then remain in the unit reducing the risk of it being misplaced during the storage period Caution Units containing...

Страница 230: ...Wipe clean all exposed cables and check for damage If a cable shows signs of wear or ageing contact Kongsberg Maritime for advice 6 Secure and protect loose parts shock absorbers plug and sockets prot...

Страница 231: ...n The wristband must be electrically connected to the service mat Sensitive printed circuit boards and electronic modules must always be transported and stored in protective antistatic packing bags It...

Страница 232: ...You will need the documentation if the item shall be returned to us 7 Remove any packing and desiccant material that may be found inside the shipping container or bag 8 Keep the protective antistatic...

Страница 233: ...astic protective bag and the bag will be sealed Note Failure to follow these rules may result in an unserviceable circuit board or module Procedure 1 Place the circuit board or module in the same prot...

Страница 234: ...ther by direct contact or induction by an electrostatic field The passing of a charge through an electronic device can cause local overheating and it can also puncture insulating layers within the str...

Страница 235: ...container for example a static shielding bag before transportation 5 During installation and servicing all electrical equipment for example soldering irons and test equipment must be earthed Related...

Страница 236: ...free of charge The cost of having products removed packed and delivered to a Kongsberg Maritime registered company location is however not covered by us Prior to returning any material please contact...

Страница 237: ...ce or installation work is in progress on the system 2 For safety reasons two persons must always be present during troubleshooting with power turned ON 3 Read and understand the applicable first aid...

Страница 238: ...r 214 waterline determination 215 all datagram format 195 alternative origin vessel coordinate system 154 ambient noise acoustic noise 37 anodes sacrificial anodes 125 antenna interface Seapath 136 13...

Страница 239: ...9 30 36 transducer 30 CBMF board configuration 85 dip switch setting 85 characteristics performance 191 circuit board return to manufacturer 232 unpacking 231 circuit boards Processing Unit 84 cleanin...

Страница 240: ...trol Unit 187 remote control using K Rem 120 RS 232 serial line cable 109 RS 422 serial line cable 110 RX transducer cable 126 128 RX transducer outline dimensions 177 serial line cable for DGNSS inpu...

Страница 241: ...nd transportation boxes 218 pack for storage or shipment 227 prepare a cable for termination 145 return printed circuit board or electronic module to manufacturer 232 secure and terminate a cable 147...

Страница 242: ...connectors 104 installation 75 78 interfaces 104 mechanical unit cleaning 230 unpacking 223 module return to manufacturer 232 unpacking 231 modules Processing Unit 84 Molykote 141 monitor environment...

Страница 243: ...rocessing Unit 209 Processing Unit 209 sonar room 26 PPU brief description 18 cable plan 98 99 environmental requirements 212 outline dimensions 207 outline dimensions drawing 184 power requirements 2...

Страница 244: ...frequency interference 143 supply power 209 temperature 212 retractable transducer installation 47 returning electronic module 232 printed circuit board pcb 232 RF interference cable requirements 143...

Страница 245: ...ographic Work Station 211 Portable Processing Unit 209 Processing Unit 209 transducer 209 support requirement transducer cables 59 surface protruding objects 29 sync external synchronization 112 synch...

Страница 246: ...ical unit 223 a sonar head 225 a transducer 225 an electronic or electromechanical unit 224 instructions 221 printed circuit boards and modules 231 standard parts and units 222 V ventilation requireme...

Страница 247: ......

Страница 248: ...2021 Kongsberg Maritime...

Отзывы: