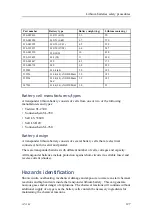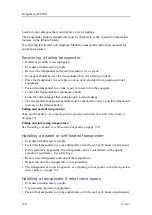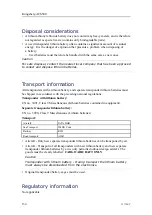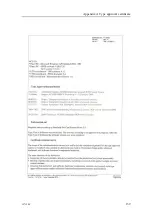
Appendix B Information from the connector producer
Appendix B
Information from the
connector producer
3 HINWEISE ZUR HANDHABUNG DER STECKER /
INSTRUCTIONS FOR MATING OF PLUGS
The following information has been provided by GISMA. For additional details related
to the underwater connectors, consult
http://www.gisma-connectors.de/
1. Alle zu kuppelnden Stecker müssen frei von Schmutz und Bewuchs sein. Koax-
und Lichtwellenleiter- Einsätze müssen gegen Feuchtigkeit geschützt werden. The
connector that is to be joined must be free of dirt and foreign matter. Coaxial- and
fibre-optic inserts must be protected against moisture.
2. Verschmutzte Außenbordsteckverbinder mit GISMA Schaumreiniger auspinseln
und ca. 3 Minuten einwirken lassen. Bei starker Verschmutzung diesen Vorgang
wiederholen. Danach den Steckverbinder mit sauberem Wasser ausspülen.
Anschließend den Steckverbinder mit der beiliegenden Spüllösung sorgfältig
ausspülen, um den Schaumreiniger zu neutralisieren. Dirty outboard-connectors
to be daubed with GISMA foam cleaner. Allow three minutes to react. In case of
strong dirt repeat the procedure. Then rinse with clean water. Following rinse with
the enclosed cleaning liquid to neutralize foam cleaner.
3. Vor der ersten Kupplung muss die Vorderseite des Buchsenisolierkörpers
des Steckerisolierkörpers leicht mit GISMA-Fett EK2 gefettet werden, so dass
die konischen Dichtkegel mit Fett gefüllt sind. Das Einfetten muss nach 5
Unterwassersteckungen wiederholt werden (nur Baureihe 10). Before the initial
coupling the front side of the socket connectors insulation frame is grease slightly
with GISMA-Fett EK2, to fill the conical seal cavities with grease. After 5
underwater matings the connector must be greased again (only series 10).
4. Die Überwurfmutter des Steckers ist auf Leichtgängigkeit zu prüfen. Check to
see if the coupling nut of the connector runs smoothly.
5. Außengewinde (für die Überwurfmutter) der Einbaudose, Schottdurchführungen
oder Druckkörperdurchführungen z.B. mit Loctite anti-seize 8151 Spray oder
Molykote BR2-plus leicht fetten. Lightly grease the locking threads of the
receptacles and the through bulkhead receptacles e.c. with Loctite anti-seize 8151
spray or Molykote BR2-plus.
397128/C
141
Содержание ACS500
Страница 1: ...INSTRUCTION MANUAL ACS500 Acoustic Control System Gisma testport system...
Страница 2: ......
Страница 15: ...ACS500 System with interface cables 397128 C 13...
Страница 38: ...Kongsberg ACS500 ACU Computer buttons on page 37 User interface on page 38 36 397128 C...
Страница 71: ...Simulation and test 397128 C 69...
Страница 74: ...Kongsberg ACS500 Testing ACS500 with HiPAP Testing the system is also possible using HiPAP 72 397128 C...
Страница 93: ...Maintenance 4 Connect a new 9 volt battery and assemble everything in the reverse order 397128 C 91...
Страница 113: ...Drawing file Dunking transducer unit outline dimensions 397128 C 111...
Страница 114: ...Kongsberg ACS500 Acoustic Command Unit outline dimensions 112 397128 C...
Страница 115: ...Drawing file Subsea Control Unit outline dimensions 397128 C 113...
Страница 116: ...Kongsberg ACS500 Subsea Control Unit arrangement 114 397128 C...
Страница 117: ...Drawing file Subsea Control Unit bracket 397128 C 115...
Страница 118: ...Kongsberg ACS500 TDR30V 34GT Subsea transducer outline dimensions 116 397128 C...
Страница 119: ...Drawing file External quad battery unit for SCU outline dimensions 397128 C 117...
Страница 120: ...Kongsberg ACS500 Simulator outline dimensions 118 397128 C...
Страница 138: ...Kongsberg ACS500 Appendix A Type approval certificate 136 397128 C...
Страница 139: ...Appendix A Type approval certificate 397128 C 137...
Страница 140: ...Kongsberg ACS500 138 397128 C...
Страница 141: ...Appendix A Type approval certificate 397128 C 139...
Страница 142: ...Kongsberg ACS500 140 397128 C...
Страница 148: ...2016 Kongsberg Maritime...

