9
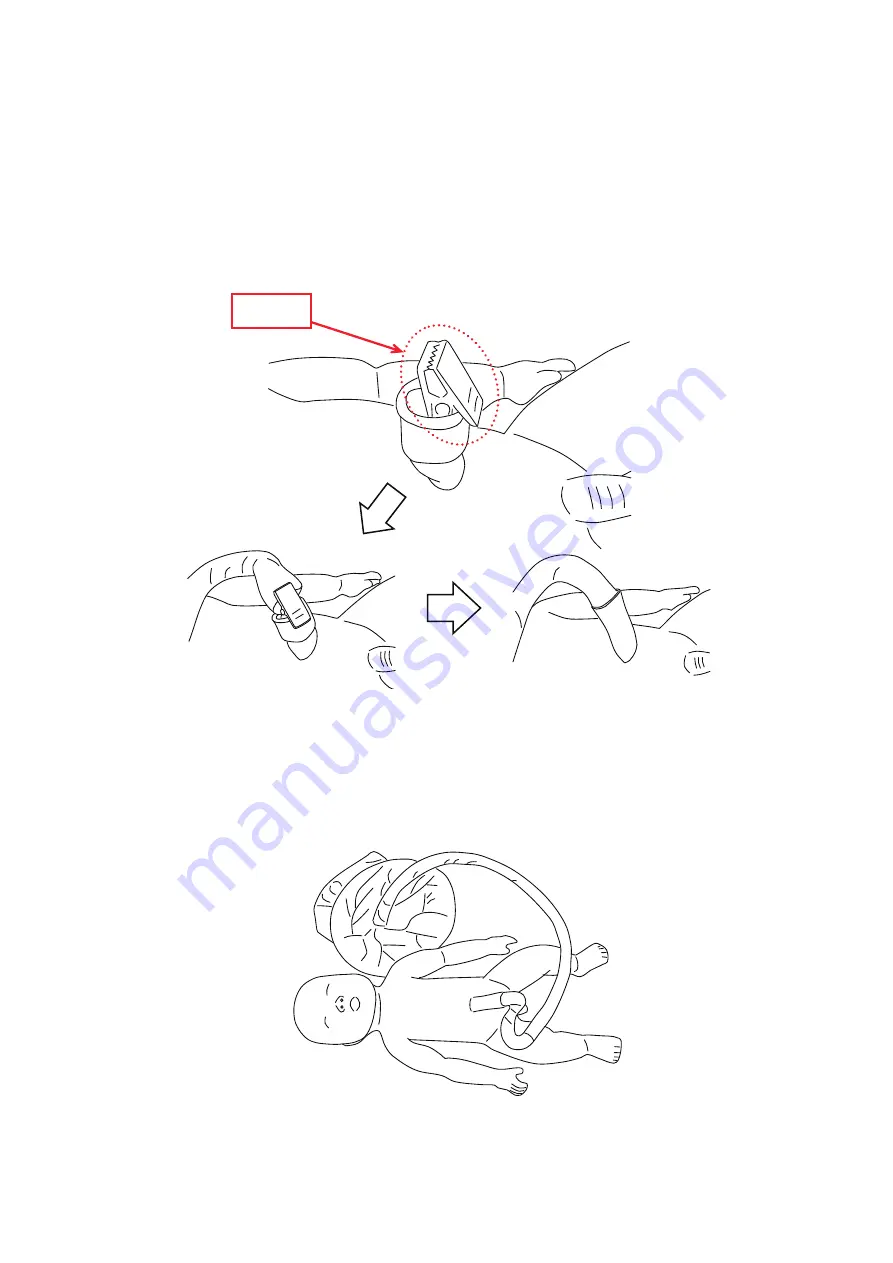
5. Roll down the end of the umbilical cord connector with the clip so that the clip is visible, then
clamp it onto the umbilical cord. After clamping them together, unfold the end of the umbilical
cord connector and roll it over the umbilical cord for tying and cutting.
*If the umbilical cord is not partially covered by the umbilical cord connector, they may come
apart.
6. Assembly is now complete. To re-attach the umbilical cord after it is cut off, start the procedure
again from step 5.
*Apply a sufficient amount of glycerin to both the fetal and the placenta models when
practicing delivery.
*Air bubbles or impressions in the model that may remain from the fabrication process do not
affect the strength of the material, as the material used is strongly tear-resistant.
- 8 -
5.
Roll down the end of the umbilical cord connector with the clip so that the clip is
visible, then clamp it onto the umbilical cord for tying and cutting. After clamping
them together, unfold the end of the umbilical cord connector and roll it over the
umbilical cord for tying and cutting.
*If the umbilical cord for tying and cutting is not partially covered by the
umbilical cord connector, they may come apart.
6.
Assembly is now complete. To re-attach the umbilical cord for tying and cutting
after it is cut off, start the procedure again from step 5.
*Apply a sufficient amount of glycerin to the fetal model and placenta model
when practicing delivery.
*Air bubbles or impressions in the model that may remain from the
fabrication process do not affect the strength of the material, as the material
used is strongly tear-resistant.
Clip
Содержание LM-101B
Страница 2: ...10000...


