Kohler REVIVAL K-873 Скачать руководство пользователя страница 4

4

 Kohler Co., Kohler WI

114014-2-

AA

 (9537)

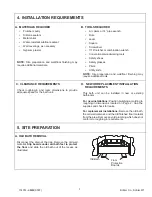
B. SUBFLOOR PREPARATION

Check the flooring under the bath and repair it if
necessary. Make sure the subfloor is level. Seal the
subfloor to reduce the risk of water damage.

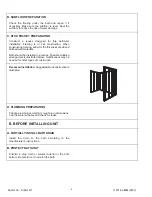
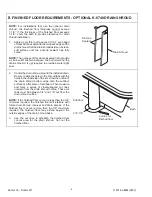
C. STUD POCKET PREPARATION

Construct a recess designed for this particular
installation. Framing is of 2x4 construction. When
constructing framing, allow for the thickness of sub and
finished wall materials.

Bath should be installed in a recess. Possible studding
arrangement is illustrated below; modifications may be
needed for other types of construction.

Recessed Installation: Suggested stud construction is
illustrated.

D. PLUMBING PREPARATION

Position plumbing according to roughing-in dimensions.
Cap the water supplies and check for leaks.

6.

 BEFORE INSTALLING UNIT

A. PARTIALLY INSTALL BATH DRAIN

Install the drain to the bath according to the
manufacturer’s instructions.

B. PROTECT BATH UNIT

Position a drop cloth or similar material in the bath
bottom. Be careful not to scratch the bath.

Содержание REVIVAL K-873

Страница 1: ... make changes in prod uct characteristics packaging or availability at any time without notice These instructions contain important care and cleaning information please leave these instructions for the consumer 2 PRODUCT REQUIREMENTS A SUMMARY OF KEY REQUIREMENTS Observe all local plumbing and building codes Install the unit level with the subfloor Provide properly dimensioned framing Make sure th...

Страница 2: ...CT INFORMATION Fixture basin area top area weight Bathing well 44 x 22 52 x 29 348 lbs water depth capacity To overflow 12 1 2 58 gals Approximate measurements for comparison only C INSTALLATION NOTES Read entire installation instruction before beginning installation Fixture should be on the job site to determine dimensions Roughing In Notes Fixture dimensions are nominal and conform to toler ance...

Страница 3: ...QUIREMENTS Check roughing in and room dimensions to provide adequate space for the bath unit D NEW OR REPLACEMENT INSTALLATION REQUIREMENTS This bath unit can be installed in new or existing bathrooms For new installations Position plumbing according to roughing in dimensions located on Page 2 Cap the supplies and check for leaks For replacement installations Remove the old bath the old wall mater...

Страница 4: ...d wall materials Bath should be installed in a recess Possible studding arrangement is illustrated below modifications may be needed for other types of construction Recessed Installation Suggested stud construction is illustrated D PLUMBING PREPARATION Position plumbing according to roughing in dimensions Cap the water supplies and check for leaks 6 BEFORE INSTALLING UNIT A PARTIALLY INSTALL BATH ...

Страница 5: ...recess area until it is shimmed properly if the feet are not accessible from the back or side Metal Shim Decorative Drain B INSTALL PLUMBING 1 When the bath is securely positioned connect the drain into the trap The drain tailpiece may have to be removed and cut to fit the trap properly Connect Here 2 Install the faucet valving and spout tee If the faucets are deck mounted the deck must be finishe...

Страница 6: ...ne Sealant Drain Shroud 2 Center the drain shroud around the installed drain Be sure to align the holes in the shroud tabs with the holes in the underside of the rim Draw the outline of the drain shroud bottom edge onto the subfloor surface or a flat piece of cardboard Then measure and mark a series of closely spaced cut lines outward from the drain shroud outline These cut lines must be between 3...

Страница 7: ...w Press the drain shroud tightly against the apron wall and use a 7 16 ratchet or combination wrench to tighten each screw until the drain shroud is secure NOTE Do not overtighten the screws Bath Plastic Spacer Flat Washer Hex head Screw Rim Hole Drain Shroud Tab Apply a thin bead of silicone sealant to the bottom outside edge of the shroud base Apply a second thin bead of silicone sealant close t...

Страница 8: ...aucet manufacturer s instructions 12 CLEAN UP AFTER INSTALLATION When cleaning up after installation do not use abrasive cleansers as they may scratch and dull the bath surface Use warm water and a liquid detergent to clean the surface Stubborn stains paint or tar can be removed with turpentine or paint thinner Do not allow cleaners containing petroleum distillates to remain in contact with the ba...

Отзывы: