background image

NOTICE D’INSTALLATION
USER MANUAL
MONTAGEANLEITUNG

MANUAL DE INSTALACÍON

Руководство пользователя

CONTRA

E22FC80-GA
E22FC90-GA

E22C120-GA, E22C140-GA
E22C160-GA, E22C170-GA

NOTICE D’INSTALLATION

USER MANUAL

MANUAL DE INSTALACíON

MONTAGEANLEITUNG

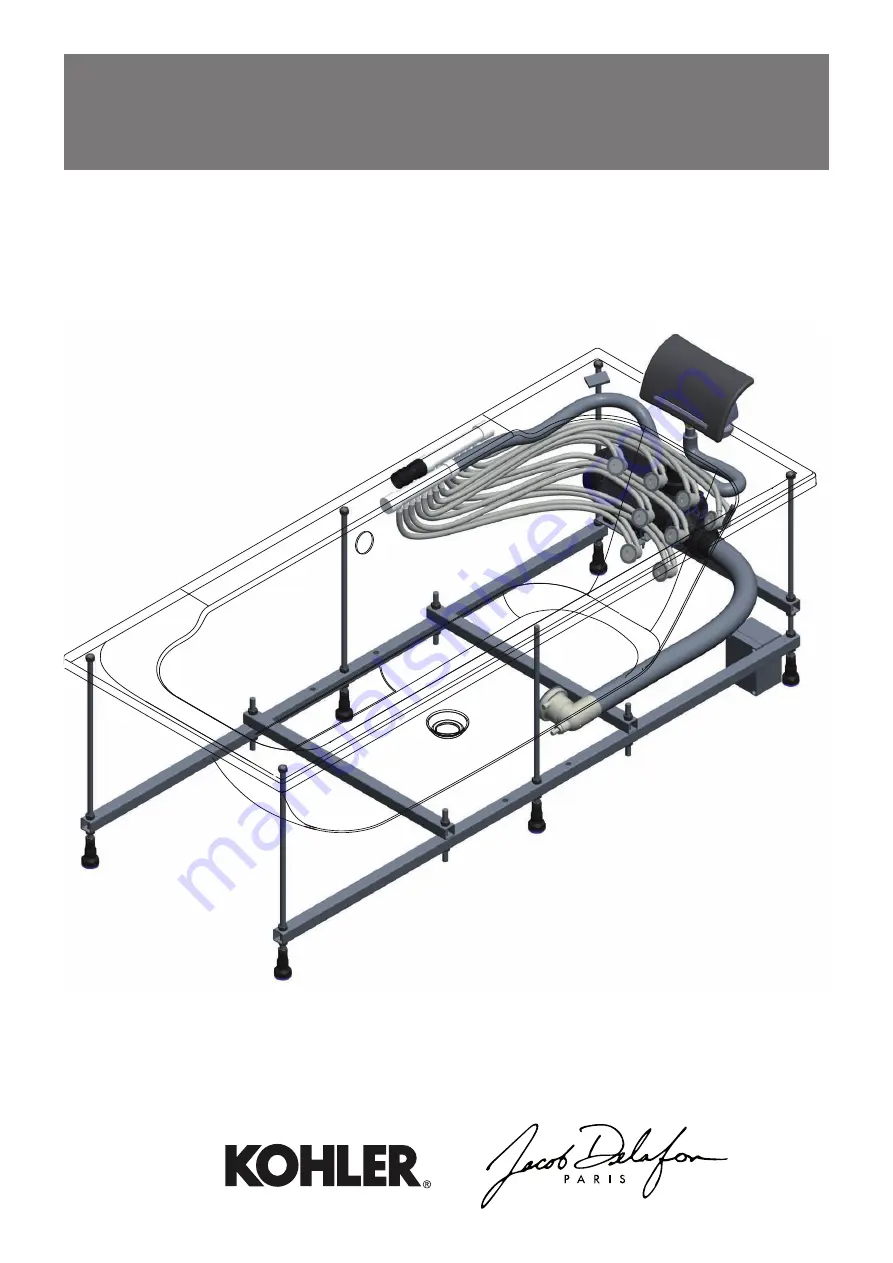
MASSDREAM

E5BE....-00


Содержание MASSDREAM

Страница 1: ...UAL MONTAGEANLEITUNG MANUAL DE INSTALACÍON Руководство пользователя CONTRA E22FC80 GA E22FC90 GA E22C120 GA E22C140 GA E22C160 GA E22C170 GA NOTICE D INSTALLATION USER MANUAL MANUAL DE INSTALACíON MONTAGEANLEITUNG MASSDREAM E5BE 00 ...

Страница 2: ...35223 n ru Delafon España km 17 46 86 n es Kohler UK Cromwell Road Cheltenham Gloucestershire GL52 5EP Tel 44 0 870 850 5551 www kohler co uk Kohler Middle East Al Thuraya Tower II 9th Floor Office 905 P O Box 500431 DIC Dubai UAE Tel 971 4 3624650 www me kolher com Kohler Jacob Delafon Maroc 207 Bd Anfa rue Beaumarchais Casablanca Tel 212 2 295 9740 www jacobdelafon ma Kohler Africa Pty Ltd Coach...

Страница 3: ... habillage étanchéité des raccordements et fonctionnement Prévoir une trappe d accès et une ventilation côté pompe La trappe d accès doit nécessiter l usage d un outil pour l ouverture comporter l étiquette attention déconnecter l appareil du réseau avant toute intervention être équipée d une grille d aération de minimum 120x90 mm 2 dm2 minimum Les dimensions de la trappe doit être suffisante pour...

Страница 4: ...ine même inaccessible Elle doit être réalisée par des conducteurs isolés dans un conduit isolant ou des câbles multi conducteurs avec gaine isolante de type A05 W F FR N05 W U et R U 1000 R2V la section est à déterminer en fonction de la puissance du système Les plots anti vibratiles fournis avec la baignoire ne doivent pas être déposés ni modifiés ni scellés Il est recommandé d habiller les paroi...

Страница 5: ...tection et d étanchéité en suivant les indications du fabricant Robinetterie Vidage Raccordement de l appui tête cascade Mettre la cascade dans les 2 trous pré percé sur la baignoire en ayant au préalable mis les joints mousses fournis dans le sachet notice sur les embouts filetés côté lisse de la baignoire Faire un joint silicone autour des 2 embouts filetés côté renfort de la baignoire non lisse...

Страница 6: ...t derrière chaque patte de fixation Mise en place de la baignoire Attention installer la baignoire hors tension ne jamais sceller les pieds au sol Installation classe type E cf instructions générales d installation Baignoire fixée sur quatre murets ou adossée à un ou plusieurs murs les autres côtés étant adossés à des murets Quels que soient les cas de figure de l installation une baignoire ne doi...

Страница 7: ...7 Kit insonorisation en option sur PLUS réf E6754 NF Les murs doivent être propres et secs dépoussierez avec une balayette avant de placer les faces adhésives x 8 ...

Страница 8: ...ectuez la liaison équipotentielle à partir de la borne marquée du symbole normalisé située sur le châssis de la baignoire mur 5 mm revêtement mural position de la baignoire vide ciment colle Tasseau support Mastic silicone Mastic silicone Carrelage Carrelage Colle Colle Position de la baignoire vide Position de la baignoire vide Carreau de platre Mastic silicone Position de la baignoire pleine wal...

Страница 9: ...ret électronique RWA773NF 8 Collecteurs RWA778NF 9 Coussin gel sur support RWA760NF 10 Appui tête cascade EWA728 MN 11 Pied chassis RWA709NF OPTIONS 12 Kit acoustique E6D035 NF 13 Kit silence box E6754NF 1 4 7 6 11 2 8 8 3a 3b 5 5 9 10 Caractéristiques techniques POMPE 230 Volts 50 Hertz Puissance 900 w Débitmaximum 400litres minute Pression maximale 1 05 bar 12 13 x 8 REP Nomenclature Code 1 Kit ...

Страница 10: ...ified by the local electricity supply company Ensure that these instructions are left with the user and are passed on to subsequent owners and users Fill the bath with water and test thoroughly to ensure correct operation and that there are no leaks before completing the apron An access panel s shall be provided to allow access to the pipework and whirlpool components for maintenance or repair pur...

Страница 11: ...t are in contact with the support or the walls must have a foam joint interposed to ensure sound insulation to attenuate noise transmitted through solid material Provide one or more inspection holes suitable for any intervention or dismantling that might prove necessary of pump blower electronic box waste etc If circumstances permit it is a good idea to install cladding that can be entirely disman...

Страница 12: ...rotective waterproof sealing follow manufacturer s instructions Drilling for taps Waste Installing the waterfall headrest Place foam rings supplied in instructions pack over threaded ends on the smooth side of the bath Insert waterfall unit into both holes pre drilled on the bath Apply silicon seal around both threaded ends on the support side of the bath not smooth Place both lock nuts and tighte...

Страница 13: ... fixing bracket Installing the bathtub Warning Disconnect the bathtub from the mains before installation Never fix the anti vibration feet to the floor Installing a Class E type bath see General installation instructions Bath surrounded by four low walls or positioned against one or several walls with the other sides positioned against low walls Regardless of your installation layout the bath shou...

Страница 14: ...14 Soundproofing kit optional réf E6754 NF Walls should be clean and dry Dust with whisk broom before putting adhesive backed panels in place x 8 ...

Страница 15: ...ocated on the bath support frame Zone 1 Zone 2 Zone 0 Zone 1 Zone 1 Zone 2 Zone 2 2 25m 2 25m Outside Zones Outside Zones Outside Zones Outside Zones ciment colle wall 5 mm wall covering cement glue Wood support block silicone mastic silicone mastic silicone mastic Tiling Tiling Glue Glue Position of empty bath Position of empty bath Position of full bath Position of empty bath 5 mm Revestimento m...

Страница 16: ...ronic unit RWA773NF 8 electrovalve unit RWA778NF 9 Gel cushion on a backing RWA760NF 10 Waterfall headrest EWA728 MN 11 Frame legs RWA709NF OPTIONS 12 Acoustic kit E6D035 NF 13 Soundproofing kit E6754NF 1 4 7 6 11 2 8 8 3a 3b 5 5 9 10 Technical features PUMP 230 Volts 50 Hertz Power 900 w Maximum flow rate 400 litres minute Maximum pressure 1 05 bar 12 13 x 8 REP Nomenclature Code 1 Kit de fixatio...

Страница 17: ...uncionamiento Prever una trampilla de acceso y una ventilación por el lado bomba Para abrir la trampilla de acceso debe ser necesario utilizar una herramienta asimismo debe llevar la etiqueta atención desenchufar el aparato de la red antes de cualquier intervención y estar equipada con una rejilla de ventilación de 120x90 mm como mínimo 2 dm2 como mínimo Sus dimensiones deberán ser suficientes par...

Страница 18: ...to incluso inaccesible Debe realizarse con conductores aislados en un conducto aislante o con cables multiconductores con revestimiento aislante de tipo A05 W F FR N05 W U y R U 1000 R2V la sección se determinará en función de la potencia del sistema Los tacos antivibraciones suministrados con la bañera no deben ser desmontados modificados ni empotrados Se recomienda revestir las paredes interiore...

Страница 19: ... y de estanqueidad siguiendo las indicaciones del fabricante Montaje del reposacabezas cascada Poner la cascada en los 2 agujeros preperforados en la bañera después de haber colocado previamente las juntas de espuma incluidas en la bolsita junto al folleto de instrucciones en los extremos roscados por el lado liso de la bañera Hacer una junta de silicona alrededor de los 2 extre mos roscados por e...

Страница 20: ...en dos semizapatas 4 Colocar una semiza pata detrás de cada pata de fijación Instalación de la bañera Atención Instalar la bañera fuera de tensión No empotrar nunca las patas en el suelo Instalación clase tipo E véanse las instrucciones generales de instalación Bañera fijada en cuatro muretes o adosada a una o varias paredes con los otros lados adosados a muretes Sean cuales fueren los ejemplos de...

Страница 21: ...21 Kit de insonorización opcional réf E6754 NF Los muros deben estar limpios y secos quitar el polvo con una escobilla antes de colocar las caras adhesivas x 8 ...

Страница 22: ... Carreau de platre Mastic silicone Position de la baignoire pleine Fliese Position Kleber Silikon Silikon silicone silicone Piastrella Piastrella Colla Colla posizione della vasca da bagno vuota posizione della vasca da bagno vuota Cola wall 5 mm wall covering cement glue Wood support block silicone mastic silicone mastic silicone mastic Tiling Tiling Glue Glue Position of empty bath Position of e...

Страница 23: ... electrónica RWA773NF 8 electroválvulas RWA778NF 9 Almohadilla de gel apoya RWA760NF 10 Reposacabezas cascada EWA728 MN 11 Pie chasis RWA709NF OPCIONES 12 Kit acústico E6D035 NF 13 Kit de insonorización E6754NF 1 4 7 6 11 2 8 8 3a 3b 5 5 9 10 Características téchnicas BOMBA 230 Volts 50 Hertz Potencia 900 w Caudal máximo 400 litros minuto Pression maximale 1 05 bar 12 13 x 8 REP Nomenclature Code ...

Страница 24: ...leidung immer einen vollständigen Test der Badewanne bei eingelassenem Wasser durch Dichtheit der Anschlüsse und Betrieb Sehen Sie auf der Seite der Pumpe eine Zugangsklappe und eine Belüftung vor Die Zugangsklappe muss so angelegt sein dass sie nur mit Hilfe eines besonderen Werkszeugs geöffnet werden kann Sie muss ein Etikett mit der Aufschrift Vorsicht vor der Durchführung jeglicher Arbeiten di...

Страница 25: ... R U 1000 R2V bestehen der QuerschnittistjenachLeistungdesSystemszu bestimmen Die mit der Badewanne mitgelieferten Schwingungsdämpfer dürfen nicht weggelassen nicht verändert oder eingemauert werden Die Auskleidung der Innenwände unter der Badewanne mit einem schalldämpfenden Werkstoff wie z B Schaumstoff Noppenplatten Steinwolle o ä wird empfohlen Dämpfung des Luftschalls Bei der Auslegung der Ve...

Страница 26: ... und prüfen ihn aif Dichtigkeit Wannenrandmontage der Armaturen Anschluss der Nackenstütze mit freiem Wasserlauf X2 X2 X1 X1 Schaumstoffdichtungen im Beutel der Gebrauchsanweisung mitgeliefert auf die Gewinde an der glatten Wannenseite aufstecken und den Wasserlauf in die beiden vorgebohrten Bohrungen an der Badewanne einsetzen Um die beiden Gewindestücke an der verstärkten Wannenseite raue Seite ...

Страница 27: ...l einen hal ben Schwingungsdämpfer an Einbau des Whirlpools Achtung Installieren Sie den Whirlpool bei abgeschalte tem Strom Mauern Sie die vibrationsdämpfenden Füße niemals in den Boden ein Installation Klasse E Siehe allgemeine Installationsanweisungen Die Badewanne wird entweder auf vier Stützmauern oder an einer oder mehreren Wänden und die übrigen Seiten auf Stützmauern befestigt Unabhängig v...

Страница 28: ...28 Schalldämmsystem Optional réf E6754 NF Die Wände müssen trocken und sauber sein Staub muss vor dem Anbringen der Klebeflächen mit einem Handbesen beseitigt werden x 8 ...

Страница 29: ...er Position der leeren Badewanne Position der leeren Badewanne Silikon Position der Vollen Badewanne silicone silicone Piastrella Piastrella Colla Colla posizione della vasca da bagno vuota posizione della vasca da bagno vuota Cola wall 5 mm wall covering cement glue Wood support block silicone mastic silicone mastic silicone mastic Tiling Tiling Glue Glue Position of empty bath Position of empty ...

Страница 30: ...ronik Schaltgehäuse RWA773NF 8 Gehäuse RWA778NF 9 Gel Kissen unterstützt RWA760NF 10 Nackenstütze mit freiem Wasserlauf EWA728 MN 11 Fuß träger RWA709NF OPTIONEN 12 Akustik Kit E6D035 NF 13 Schalldämmsystem E6754NF 1 4 7 6 11 2 8 8 3a 3b 5 5 9 10 Technische Eigenschaften PUMPE 230 Volts 50 Hertz Leistung 900 w Maximaler Durchsatz 400 litres minute Maximaler Druck 1 05 bar 12 13 x 8 REP Nomenclatur...

Страница 31: ...or any other commercial events Auf die von uns hergestellten Produkte wird seitens unseres Vertriebshändlers eine Händlergarantie für die unten aufgeführten Zeiträume gewährt Garantiebeginn ist das Datum des Kaufes Sollten an unseren Produkten während der Garantiezeit Material oder Herstellungsmängel auftreten so erhalten Sie von dem Händler bei dem Sie das Produkt erworben haben kostenlosen Ersat...

Страница 32: ...choosing Kohler company Gracias por eligir productos del grupo Kohler Благодарим Вас за выбор продукции компании KOHLER Group Votre produit est le fruit de notre savoir faire et de notre passion pour le design et l innovation Nous sommes convaincus qu il vous apportera toute satisfaction pour les années à venir Vielen Dank für Ihren Kauf eines Kohler Produktes Ihr Produkt spiegelt Kohlers Leidensc...

Отзывы: