

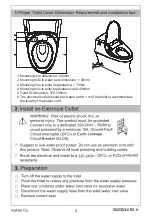


Washer
(Right)
Washer
(Left)
Bolt
Mounting Plate
Note
: Align the left/right washer with mounting holes, bent side of washer
upwards.
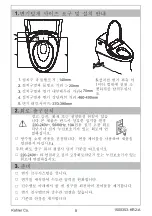
□ Position the mounting plate over the mounting holes on the bowl.
□ Insert screw into washer separately.
Note
: Some toilet base plate has already equipped with threaded insert,
no nut required for such toilet.
Toilet with threaded inserts:
□ Snap screws into mounting board and the toilet mounting holes, move
washer to snap into the mounting board groove. Pay attention to
the washer direction: bent side upwards for washer close to hole.
□ Tighten bolts slightly towards threads direction. Loosely thread a nut onto
each of the bolts for future adjustment.
For all other toilets installation:
□ Position the mounting plate over the mounting holes on the bowl.
□ Place each screw into washer, pay attention to the washer direction:
with bent side upwards for washer close to the hole.
□ Insert each bolt through the mounting plate and into the mounting holes.
□ Position the left/right mounting plate so to rest in the grooves of the
mounting plate.
□ Loosely thread a nut onto each of the bolts. Manually tighten the nuts.
1500353-KR2-A
4
Содержание K-8297KR-HC-0
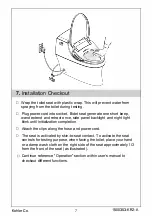
Страница 5: ...Mounting Plate Release Button 1500353 KR2 A 5 ...
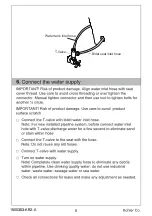
Страница 6: ...Water tank inlet hose Bidet seat inlet hose T Valve 1500353 KR2 A 6 ...
Страница 8: ...1500353 KR2 A 8 ...
Страница 9: ...140mm 20mm 70mm 1500353 KR2 A 9 ...
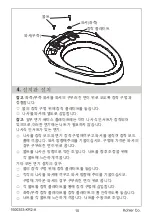
Страница 11: ...장착 플레이트 릴리스 버튼 11 ...
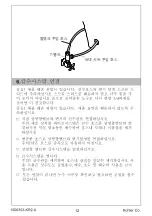
Страница 12: ...물탱크 주입 호스 비데 시트 주입 호스 T 밸브 12 ...
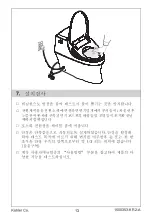
Страница 13: ...전원케이블을 전원 소켓에 연결하면 변기덮개에서 부저음이 1차 울린 후 노즐관이 한차례 신축되면 키보드위의 배광등 및 조명등이 초기화 끝날 때까지 깜빡입니다 1500353 KR2 A 13 ...