1278235-X2-B
4
Kohler Co.
ก่อนกำรติดตั้ง
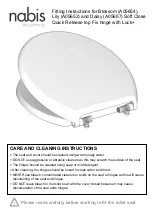
Tools/
เครื่องมือ
ข้อควรระวัง ควำมเสี่ยงซึ่งอำจท�ำให้ได้รับบำดเจ็บหรือผลิตภัณฑ์เสียหำย
ควร
เคลื่อนย้ายสุขภัณฑ์ด้วยความระมัดระวัง สุขภัณฑ์อาจแตกหรือบิ่นได้ หากเคลื่อนย้้าย
สุขภัณฑ์อย่างไม่ระมัดระวัง
¨
ตรวจสอบระบบสุขาภิบาลและกฎหมายควบคุมอาคาร
¨
ก่อนทําการติดตั้ง ตรวจสอบสุขภัณฑ์ใหม่ว่าชํารุดหรือไม่ นําสุขภัณฑ์กลับลงกล่อง จนกระทั่ง
ท่านพร้อมที่จะดําเนินการติดตั้ง
¨
ใช้กระดาษแม่แบบที่มาพร้อมกับสุขภัณฑ์
¨
หากไม่ปฏิบัติตามข้อแนะนําการติดตั้ง อาจทําให้การติดตั้งไม่สมบูรณ์
¨
หากสุขภัณฑ์ชุดเก่ายังไม่ติดตั้งวาล์วเปิด-ปิดนํ้าใต้ถังพักนํ้า ให้ทําการติดตั้งก่อนการติดตั้ง
สุขภัณฑ์ชุดใหม่
¨
ผลิตภัณฑ์ผลิตภายใต้มาตรฐานผลิตภัณฑ์อุตสาหกรรม (มอก.)
ข้อควรระวัง ควำมเสี่ยงซึ่งอำจท�ำให้เกิดควำมเสียหำยแก่ทรัพย์สินหรือผลิตภัณฑ์
ช�ำรุด
เปิดนํ้าเพื่อทําความสะอาดและขจัดเศษต่างๆ ออกจากท่อนํ้าดีก่อนประกอบกับ
วาล์วนํ้าเข้า
ข้อควรระวัง ควำมเสี่ยงจำกก๊ำซซึ่งอำจท�ำให้เกิดอันตรำย
หากยังไม่ติดตั้งสุขภัณฑ์
ชุดใหม่ทันที ควรใช้ผ้าอุดหน้าแปลนของท่อนํ้าทิ้งไว้ก่อน เพื่อป้องกันก๊าซที่เป็นอันตราย
Содержание K-30311X
Страница 1: ...Installation and Care Guide One Piece Toilet 1278235 X2 B 2017 Kohler Co K 76815X K 30311X...
Страница 4: ...1278235 X2 B 4 Kohler Co Tools...
Страница 12: ...1278235 X2 B 12 Kohler Co...
Страница 14: ...1278235 X2 B 14 Kohler Co 1 2 3 4 5...
Страница 15: ...Kohler Co 15 1278235 X2 B...