1345406-T01-B
GROOMING
悦明
INSTALLATION INSTRUCTIONS
安装说明书
MIRRORED CABINET 600mm
镜柜
600mm
K-30495T-L/K-30495T-R
-1-
BEFORE YOU BEGIN
安装之前
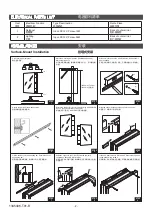
TOOLS REQUIRED
所需工具
ACCESSORIS LIST
随附清单
ROUGHING-IN
尺寸图
© Copyright Kohler China Investment Co., Ltd. 2018
©
版权为科勒(中国)投资有限公司所有
2018
ZHONGSHAN KOHLER SHOWER CO., LTD. NO13-1, XINGYE ROAD, ZHONGSHAN TORCH
DEVELOPMENT ZONE, ZHONGSHAN, GUANGDONG, CHINA POST CODE: 528437
中山科勒卫浴有限公司
广东省中山市中山火炬开发区兴业路
13-1
号
邮编:
528437
•
请仔细阅读本指引,以便熟悉所需工具、物料及安装程序。请遵照适用的章
节来安装本产品,以免安装失当导致不必要的损失。除了有关正确的安装方
法之外,还务请详阅所有操作及安全指引。
•
本指引所载之一切资料,均以印刷时所有之最新产品情况为基础,科勒中国
保留权利随时更改产品特性、包装或供应情况,恕不另行通知。
•
说明书包括重要的安装、清洁及保养方面的内容,
请把这些资料交给用户阅
读,保管
。
•
安装之前,仔细检查产品是否有损伤。
•
本产品符合
GB/T10357.4-2013, GB/T10357.5-2013, GB24977-2010,
GB19510.1-2009, GB19510.14-2009
和
GB7000.1-2015
。
•
Please read these instructions carefully to familiarize yourself with the
required tools, materials, and installation sequences. Follow the sections
that pertain to your particular installation. This will help you avoid costly
mistakes. In addition to proper installation, read all operating and safety
instructions.
•
All information in these instructions is based upon the latest product
information available at the time of publication. Kohler China. reserves
the right to make changes in product characteristics, packaging, or
availability at any time without notice.
•
These instructions contain important care, cleaning, and warranty
information-
please leave instructions for the consumer
.
•
Before installation carefully inspect the new fixture for any signs of
damage.
•
The product complies with GB/T10357.4-2013, GB/T10357.5-2013,
GB24977-2010, GB19510.1-2009, GB19510.14-2009 and
GB7000.1-2015.
警告:有触电的危险。
请找合格的电工来进行所有的线路连接。
警告:有触电的危险。
仅能和双极型断路器保护的电路连接。
警告:有触电的危险。
工作之前先切断电源。
WARNING: Risk of electrical shock.
A licensed electrician should
make all electrical connections.
WARNING: Risk of electrical shock.
Connect only to a circuit
protected by a typical two-pole circuit breaker.
WARNING: Risk of electrical shock.
Disconnect power before
servicing.
φ
6
φ
4
Anchors (as needed)
入墙胶粒(若需
)
(10)
(4)
(4)
(4)
(2)
(1)
(2)
(14)
(10)
(4)
(2)
UNIT: mm
单位
:
毫米
Reference Value
参考值
Kohler reserves the right to change marked dimensions without prior notice.
科勒公司保留随时变更图中标示尺寸的权利,无需另行通知。
K-30495T-L/K-30495T-R
591
133
762
29


