3
SAFETY AND WARNINGS
CAUTION
• Read all instructions before beginning instruction and assembly.
• Failure to follow these instructions may result in property damage, serious injury, or death.
• Surpassing the rated weight (including TV weight, screws and all attached hardware and
components) may result in instability and cause possible injury.
• This product is designed to be installed on wood stud walls, solid concrete walls or brick
walls.
• This product is designed for indoor use only. Use outdoors could lead to product failure and
personal injury.
• This product contains small items that could be a choking hazard if swallowed. Keep these
items and all packaging away from young children.
• This product is not a toy. Do not allow children to play near this stand without direct
supervision.
• Make sure these instructions are read and completely understood before attempting
installation. If you are unsure of any part of this installation, please contact help.kogan.com
or a professional installer.
• The wall or mounting surface must be capable of supporting the combined weight of the
mount and the display, otherwise the structure must be reinforced.
• It is highly recommended to install with the wall anchoring kit supplied. This is to prevent
the stand from toppling, which may cause product damage, property damage or death.
Failure to anchor this product to a wall is done so at the user’s risk.
• Safety gear, safe working methods and proper tools must be used. A minimum of two
people are required for this installation. Failure to use safety gear and safe working
methods may result in property damage, serious injury or death.
• Check the joints every 3 months, and ensure any loose screws have been re-tightened
before continued use.
• If you have any questions regarding any of the instructions, contact help.kogan.com
Содержание KALKTVSTNDA
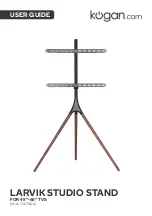
Страница 1: ...USER GUIDE LARVIK STUDIO STAND FOR 45 65 TVS KALKTVSTNDA ...
Страница 2: ......
Страница 4: ...COMPONENTS ...
Страница 6: ...6 ASSEMBLY cont d Step 3 Step 4 ...
Страница 7: ...7 Step 4 continued NOTE Ensure the cable clips G are attached to the upper bracket throughout step 4 ...
Страница 8: ...8 ASSEMBLY cont d Step 4 continued ...
Страница 9: ...9 Step 5 Step 6 ...
Страница 10: ...10 Ensure the screen doesn t touch the aluminium plate ASSEMBLY cont d Step 7 ...
Страница 12: ...12 DIMENSIONS Note Design and specifications are subject to change without notice ...
Страница 13: ...13 NOTES ...


