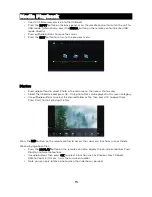
Kogan KALED55CUHDUA Скачать руководство пользователя страница 15

System Menu

OSD Language

Use this to select the desired on-screen display

language. The default language is English.

TT Language

Use this to select the desired language for teletext

display.

(Please note that teletext is not available in

Australia anymore)

Audio Language

Press OK or   to enter. Then you can select the desired primary and secondary audio language 

(only adjustable if there is a signal).

Subtitle Language

Press OK or   to enter. Then you can select the desired primary and secondary subtitle 

languages and turn on/off the hearing impaired function when this mode is on (only adjustable if

there is a signal).

Hearing Impaired

This item is used to set Hearing Impaired function ON or OFF. For hearing impaired users, this 

function can assist them to know a certain scene or action through the caption instead of 

hearing it.

Note: hearing impaired function works only when you are viewing programs that contain suitable

captions.

Aspect Ratio

Use this to adjust the aspect ratio of the image being displayed.  This should normally be correct 

by default, however if the image appears squashed, stretched or cropped, this option should be 

able to fix the issue.

Available options: Auto, 4:3, 16:9, Zoom 1, Zoom 2)

Blue Screen

Turn the default blue background screen on or off.

First Time Installation

Select this option to go through the initial setup steps again.

Reset

Press this to reset your TV to the default factory settings.

Software Update (USB)

Use this option to install new firmware on the television. ONLY use firmware supplied by 

Kogan.com.  The installation of other firmware will void your warranty.
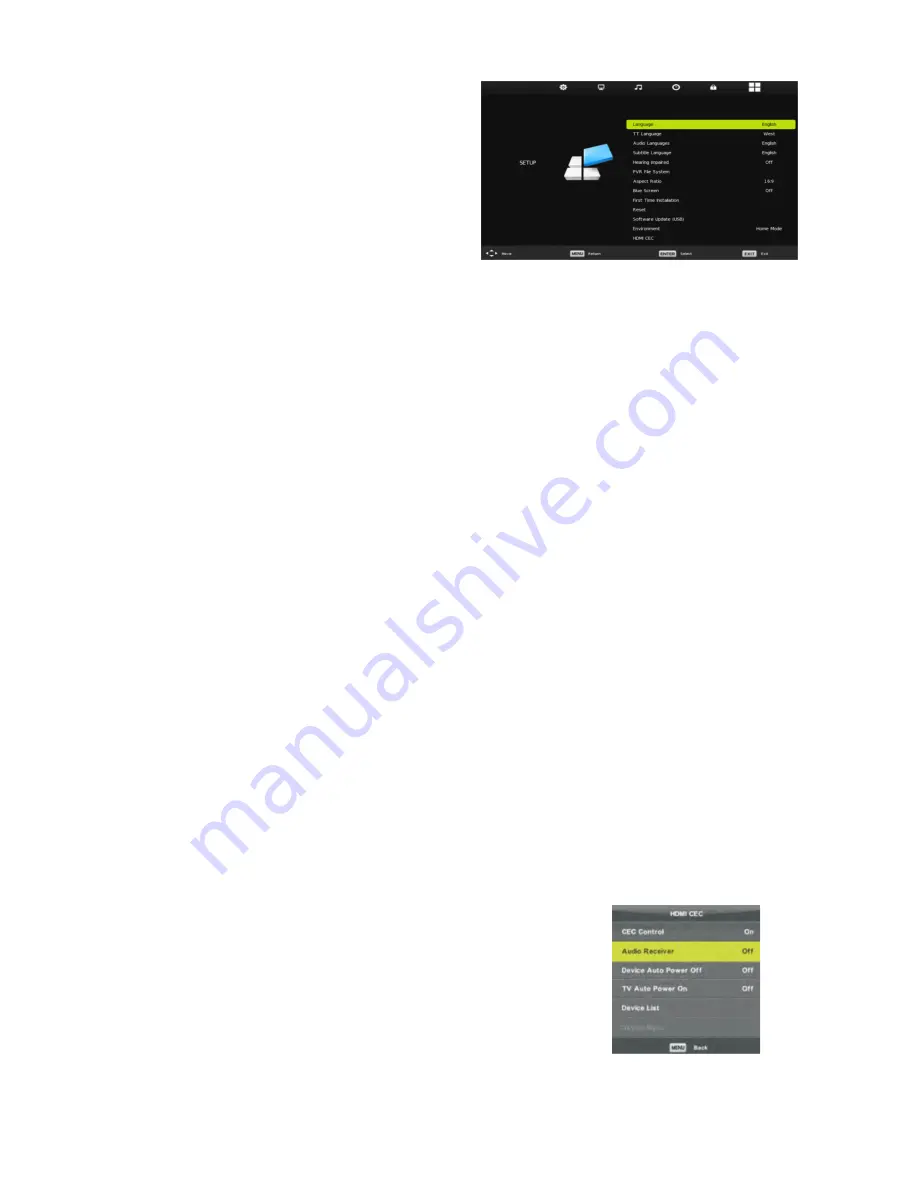
HDMI CEC

Press to select HDMI CEC, then press ENTER to enter the sub-menu.

HDMI CEC: Press to turn the HDMI CEC on or off.

Audio Receiver: Press to turn ARC on or off.

Auto Standby: Press to turn auto-standby on or off.

Device list: press to open the CEC device list.

14

Содержание KALED55CUHDUA

Страница 1: ......

Страница 2: ...rning the TV On 7 External Connections and Controls 8 Remote Control 9 Getting Started 10 Powering the TV 10 Select Input Source 10 First Time Installation 10 Menus 11 Channel Menu 11 Programme Edit 1...

Страница 3: ...wer outlet Contact the Kogan customer support team Never attempt to make repairs yourself Never push objects of any kind into the set through the cabinet slots as they may touch dangerous voltage poin...

Страница 4: ...hearing loss Always monitor the volume of noise from these devices especially when children are using them Installation Ventilation should not be impeded or limited by covering the ventilation slots w...

Страница 5: ...ub wash bowl kitchen sink laundry tub swimming pool or in a damp basement etc When moving the television to a warm location from a cold location allow some time for any dew or condensation inside the...

Страница 6: ...gonal Maximum Resolution 3840 x 2160 Power Supply 110 240V 50 60Hz TV Receive System PAL SECAM BG DK I DVB T Frequency Range DTV 5 12 21 69 Video In PAL NTSC SECAM Antenna Input Impedance 75ohm unbala...

Страница 7: ...e installation of the left leg stand Please mirror these steps for the right leg stand Locate the TV stand assembly points on the TV case Match the stand insert to the TV stand assembly then insert th...

Страница 8: ...ndicator light will remain lit for approximately 30 seconds after the TV has been turned off Please wait for the indicator light to go out before turning the TV back on again 2 Connect the antenna cab...

Страница 9: ...wer turn the power off at the power point External Connections Item Description 1 OPTICAL Connect an optical audio cable to a sound bar stereo system receiver etc 2 AV Connect the video and and video...

Страница 10: ...Remote Control 9...

Страница 11: ...f the TV the indicator will glow green Press it again to power off standby mode and the indicator will glow red Select Input Source Press the INPUT button to display the input source list Press or OK...

Страница 12: ...the values Press MENU to return to the previous menu page Press EXIT to exit the menu page Programme Edit This menu item is used to edit your channel list Press to select Programme Edit then press ENT...

Страница 13: ...e Options 1 10 Note the higher the backlight setting the higher the energy consumption is also Advanced Image Available options Native Standard Pro Sound Menu DTV Mode Sound mode Available options sta...

Страница 14: ...able options 10 15 20 30 seconds Lock Menu System Lock Press OK or to enter Input the factory default password 0000 using the numbers on the remote control NOTE if you forget your password the master...

Страница 15: ...te hearing impaired function works only when you are viewing programs that contain suitable captions Aspect Ratio Use this to adjust the aspect ratio of the image being displayed This should normally...

Страница 16: ...he USB drive and press OK Only photo files can be played in this menu category Use buttons to select the desired folder or file then press OK to open them Press PLAY to start playing the files Press t...

Страница 17: ...he on screen toolbar or button to hide the toolbar Use buttons then press OK to select a function such as Fast Rewind Previous Next Mute Repeat etc from the on screen toolbar Videos Press buttons to s...

Страница 18: ...720p 37 50 44 96 50 59 94 60 1080i 1920 x 1080i 28 13 33 75 50 59 94 60 1080p 1920 x 1080p 56 25 67 5 50 59 94 60 Component Video YpbPr Input Mode Resolution Horizontal Frequency KHz Vertical Frequenc...

Страница 19: ...e volume settings on any external speakers connected to your television Adjust the TV volume accordingly Check that MUTE hasn t been turned on No colour wrong colour or tints Make sure the program its...

Отзывы: