
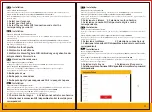

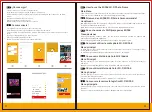
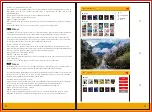


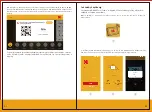

1. Select your language
2. Select your time zone
3. Select the available WIFI connection and enter the
corresponding password
1. Wählen Sie Ihre Sprache
2. Wählen Sie Ihre Zeitzone
3. Wählen Sie die verfügbare WIFI-Verbindung und geben Sie das
entsprechende Passwort ein
EN
Installation
11
12
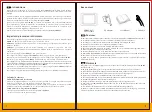
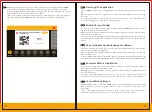
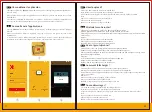
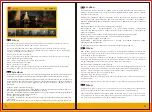
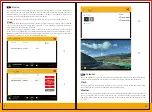
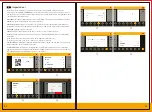
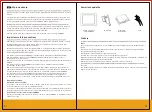
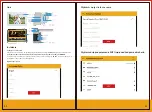
Step 1: Plug in the AC adapter
Connect the adapter to the power outlet, the KODAK WI-FI Photo Frame will automatically turn on.
Step 2: Follow the instructions to setup the KODAK WI-FI Photo Frame
Once the KODAK WI-FI Photo Frame displays the boot animation, please follow the instructions to
start the setup.
1. Selecione sua idioma 2. Selecione seu fuso horário
3. Selecione a conexão WIFI disponível e digite a senha
correspondente
PT
Instalação
Etapa 1: Conectar o adaptador AC.
Conecte o adaptador à tomada eléctrica, a Moldura de Foto WI-FI KODAK ligará automaticamente.
Etapa 2: Siga as instruções para configurar a Moldura de Foto WI-FI KODAK
Depois que a Moldura de Foto WI-FI KODAK mostrar a animação de inicialização, siga as instruções
para iniciar a configuração.
1. Seleccione su idioma 2. Seleccione su zona horaria
3. Seleccione la conexión WIFI disponible e introduzca la contraseña
correspondiente
ES
Instalación
Paso 1: Conecte el adaptador de AC.
Conecte el adaptador a la tomacorriente, el Marco de Fotos WI-FI KODAK se encenderá automática-
mente.
Paso 2: Siga las instrucciones para configurar el Marco de Fotos WI-FI KODAK.
Una vez que el Marco de Fotos WI-FI KODAK muestre la animación de inicio, siga las instrucciones
para iniciar los ajustes.
1. Selezionare la lingua 2. Selezionare il fuso orario
3. Selezionare la connessione WIFI disponibile e immettere la password
corrispondente
IT
Installazione
Fase 1: Collegare l'adattatore CA.
Collegare l'adattatore alla presa di corrente, la cornice fotografica WI-FI KODAK si alimenterà automatica-
mente
Fas 2: Seguire le istruzioni per configurare la cornice fotografica WI-FI KODAK
Dopo che la cornice fotografica WI-FI KODAK ha visualizzato l'animazione di avvio, seguire le
istruzioni per avviare la configurazione.
DE
Installation
Schritt 1: Schließen Sie den AC Adapter an.
Schließen Sie den Adapter an die Steckdose an, der KODAK WI-FI Fotorahmen schaltet sich
automatisch ein.
Schritt 2: Befolgen Sie bitte die Anweisungen zur Einstellung des KODAK WI-FI Fotorahmens
Nachdem der KODAK WI-FI Fotorahmen die Startanimation angezeigt haben, folgen Sie bitte den
Anweisungen zur Einstellung.
1. Выберите язык
2. Выберите часовой пояс
3. Выберите доступное соединение Wi-Fi и введите пароль
RU
Начало использования
Шаг 1: Подключите адаптер питания.
Подключите адаптер к розетке, WI-FI фоторамка KODAK автоматически включится.
Шаг 2. Следуйте инструкциям по настройке.
После того, как WI-FI фоторамка KODAK отобразит анимацию загрузки, следуйте
инструкциям, чтобы начать настройку.
1. Choisissez votre langue 2. Sélectionnez votre fuseau horaire
3. Sélectionnez la connexion WIFI disponible et entrez le mot de passe
correspondant
FR
Installation
Étape 1: Branchez l'adaptateur secteur
Connectez l'adaptateur à la prise secteur, le cadre photo WI-FI KODAK s'allumera automatiquement.
Étape 2: Suivez les instructions pour configurer le cadre photo WI-FI KODAK
Une fois que le cadre photo WI-FI KODAK affiche l'animation de démarrage,
veuillez suivre les instructions pour démarrer la configuration.
①