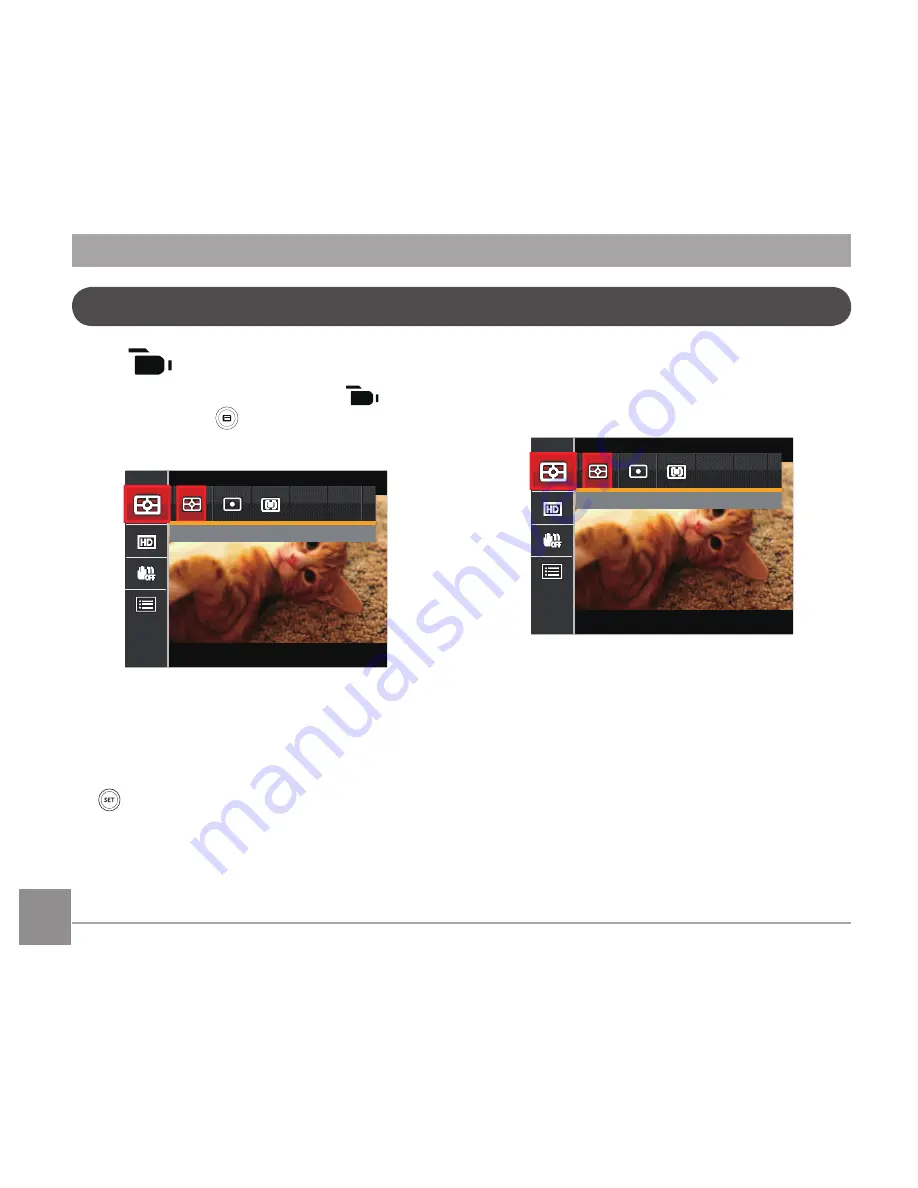
Kodak PIXPRO AZ501 Скачать руководство пользователя страница 65

4

5

4

5

Movie Menu

Mode:


.  Turn the mode dial, select the 

 mode 

and press the   button to enter the 

Movie Menu.

Expo Metering: AiAE

2.  Press the up/down arrow button to select 

the Movie Menu to be set.

.  Press the left/right arrow button to select 

the Movie Menu to be set and press the 

 button to confirm.

Expo Metering (Exposure Metering)

Use this setting to select the "target" size of 

the camera's field of view to be metered.

Expo Metering: AiAE

There are  options:

•  AiAE (Artificial Intelligence AE)  

targets the camera's entire field of 

view.

•  Spot metering targets a small area 

in the center of the camera's field of 

view.

•  Center metering targets a slightly 

larger area in the center of the  

cameras field of view.

Содержание PIXPRO AZ501

Страница 1: ...User Manual AZ501...

Страница 2: ...cept any interference received including interference that may cause undesired operation For Customers in Europe CE mark indicates that this product complies with the European requirements for safety...

Страница 3: ...written permission of JK Imaging Ltd All trademarks mentioned in this manual are used for identification purposes only and are properties of their respective owners This manual provides you with instr...

Страница 4: ...period time Turn the camera off remove the battery and the memory card and dry it within 24 hours if water accidentally comes in contact with the camera When you take the camera from a cold place to...

Страница 5: ...rging excessive heat or possible leakage Do not attempt to disassemble the battery Do not expose the battery to water Always keep the battery contacts dry Do not heat the battery or throw it into a fi...

Страница 6: ...d Store it in a dry environment Format the memory card using the camera before you use it or insert a new one We suggest buying only well known name brand memory cards to ensure peak performance Do no...

Страница 7: ...few dead or bright pixels These pixels do no effect the quality or performance of the camera photos or video Do not expose the LCD screen to water In a humid environment only wipe it with a soft and...

Страница 8: ...nguage Date Time after the first power on 22 Resetting your Language 22 Resetting Date Time 23 MODE OVERVIEW 24 Display Setting 24 LCD Screen Display 25 Overview of the screen icons in photo shooting...

Страница 9: ...47 ISO 48 Shutter Adjustment 48 Aperture Adjustment 49 Using Quick Recording 49 i Button Function Menu 50 PLAYBACK 51 Viewing Photos and Videos 51 Thumbnail View 52 Using Zoom Playback for still pictu...

Страница 10: ...Quality 65 OIS 65 Movie Setting Menu 66 Digital Zoom 66 Playback Menu 67 Playback 67 HDR 68 Red Eye Reduction 69 Rotate 70 Resize 71 i button playback function 72 Playback Setting Menu 73 Protect 74 D...

Страница 11: ...e Fi SD Card Connection Mode 86 Supported HDMI Connections 87 Connecting HDMI Ready TV 87 Connecting to a PictBridge Compatible Printer 88 Setting the USB Mode 88 Connecting to your Printer 89 Using t...

Страница 12: ...g with the following accessories If anything is missing or appears to be damaged please contact your retailer Accessories Included USB cable Warranty card AC adapter Neck strap Rechargeable Li ion bat...

Страница 13: ...12 12 Install lens cap and neck strap...

Страница 14: ...13 13 Part Names 1 2 3 1 AF Assist Beam Self timer Lamp 2 Flash Lamp 3 Lens...

Страница 15: ...st Video Recording Button 6 i Button 7 Menu Button 8 Display Button 9 Playback Button 10 AF Button Arrow Button Up 11 Flash Button Arrow Button Right 12 Delete Button Self timer Button Arrow Button Do...

Страница 16: ...5 23 24 22 17 16 15 18 Microphone 19 Power Button 20 LED Indicator Lamp 21 Mode Dial 22 Continuous Capture Button 23 Exposure Compensation Button 24 Shutter Button 25 Zoom Lever 15 Strap Eyelet 16 USB...

Страница 17: ...16 16 28 29 27 26 26 Flash Button 27 Speaker 28 Tripod Socket 29 Battery Cover...

Страница 18: ...17 17 2 Insert the battery into the battery slot in the correct position as shown in the following diagram LB 060 1 Open the battery cover 1 2 Installing Battery and Memory Card Battery lock knob...

Страница 19: ...card SD SDHC is optional and not included in all camera packaging If you have to purchase a memory card select one with storage capacity between 4GB and 32GB to ensure correct data storage To remove y...

Страница 20: ...ug shape of the power charger may vary depending on the country or region The actual item may vary from the drawing below 2 Insert the plug of the power charger into the wall outlet to charge the batt...

Страница 21: ...our PC using a USB cable to charge the battery Charging indicator Flashing red Charging Steady green Charging complete To have maximum battery life charge the battery for at least 4 hours the first ti...

Страница 22: ...N OFF Press and hold the Playback button to power on and enter Playback mode Symbol Description In the instructions below the following symbols may be used throughout this manual on how to operate the...

Страница 23: ...e Time after the first power on 1 When you turn the camera on for the first time the language selection screen appears 2 Press the arrow buttons to select your desired language 3 After you press the b...

Страница 24: ...utton to select and press the button or right ar row button to enter the menu 4 Press the up down arrow button to select Date Time and press the button or right arrow button to enter the menu 5 Press...

Страница 25: ...Displays the camera parameters on screen 0 3 EV 400 ISO 1234 SD 16M 1 50 00 56 00 F2 8 F2 8 Full Camera parameters with Grid and Histogram 0 3 EV 400 ISO 1234 SD 1 50 16M 00 56 00 F2 8 F2 8 Off Does n...

Страница 26: ...56 00 SD 16M 1 50 23 25 F2 8 F2 8 x3 6 x3 6 1 Shooting Mode Icons Auto Mode Face Beautifier Program AE Panorama Mode Shutter priority Scene Mode Aperture priority Custom Settings Manual Mode 2 Macro M...

Страница 27: ...age stabilization 18 Focus Frame 19 Expo Metering AiAE Spot Center 20 AF Mode Single AF Multi AF Object Tracking 21 Self Timer Self timer Off Self timer 2 sec Self timer 10 sec Self timer Smile 22 Fla...

Страница 28: ...ffect 8 Video Quality 9 Remaining Recording time 10 Exposure Compensation EV value 11 Image stabilization 12 Focus Frame 13 Eye Fi ON with signal 14 Expo Metering AiAE Spot Center 15 AF Mode For optim...

Страница 29: ...Date 3 Memory space indicating the current number of photos and total number of photos 10 Eye Fi ON with signal 4 SD Memory Card Built in Memory 11 Red Eye Reduction 5 Battery Status 12 HDR 6 Zoom Mag...

Страница 30: ...Setting allows you to choose a specific shutter speed so the camera will adjust the aperture automatically to ensure correct exposure Aperture priority Allows you to choose a specific aperture and the...

Страница 31: ...Follow these steps 1 Press the Power button to turn the camera on 2 Turn the Mode Dial to 3 Hold the camera steadily and aim at the subject The optimum scene mode will be selected automatically 4 Pre...

Страница 32: ...eir faces Backlit Portrait When the sun or any other light source is behind you will automatically adjust the foreground exposure to produce the best pictures possible Macro Mode To produce more detai...

Страница 33: ...ress the left right arrow button to select an adjustment item 3 Press the up down button to adjust the parameters 4 Press the button to confirm the settings and enter the shooting screen When Program...

Страница 34: ...Aperture Priority When selecting Aperture Priority mode you can adjust the aperture size EV value and ISO value Selecting a large aperture opening will emphasize the point of focus and show a blurry b...

Страница 35: ...he button and press the up down button to select 3 Press the left right arrow button to select Face Beautifier and press the button to confirm and return to photo shooting mode 1234 0 3 EV 400 ISO SD...

Страница 36: ...ic picture on the LCD screen and press the Shutter button to capture the image Save Cancel 4 After taking the first photo two guide icons will appear on both sides of the LCD screen Please move the ca...

Страница 37: ...fect in the panoramic mode please keep moving horizontally and reduce the shake in the process of camera movement In Panorama mode up to 4 photos can be captured when the image size is set at 2MP You...

Страница 38: ...not recommended for shooting indoors Night Portrait For portraits against night scenery Landscape For landscapes and outdoor shots Vivid reproduction of green and blue Portrait Most suitable for capt...

Страница 39: ...ess the left right arrow buttons to select a scene and press the button to enter the shooting screen 3 As shown in the above figure press the button and choose whether to continue the mode setting Or...

Страница 40: ...t the parameters in in restart or all modes Please enter the Custom Settings menu and select Yes after setup Otherwise the parameter settings are not retained in the case of switching on off or mode s...

Страница 41: ...of the camera to zoom in or out of the subject while taking pictures Using the Zoom Function BASIC OPERATION Zoom Lever 0 3 EV 400 ISO 1234 00 56 00 SD Zoom Indicator When the Optical Zoom reaches the...

Страница 42: ...modes Single AF The focus frame appears on the center of the LCD screen to focus on the subject Multi AF The camera automatically focuses the subject in a wide area to find the focus point Object Trac...

Страница 43: ...ess the left arrow button to enter the Marco Menu 2 Press the left right to select the following 2 modes Macro Off Select this option to disable Macro Macro On Select this option to make focusing on t...

Страница 44: ...onds after the Shutter Button is pressed Self Timer 10 sec A single picture is shot 10 seconds after the Shutter Button is pressed Self Timer Smile Press the Shutter Button and a picture will be taken...

Страница 45: ...utomatically based on existing light conditions Force Flash The flash will engage with each shot even if there is enough available light to take the photo without flash Slow Sync This allows for night...

Страница 46: ...e Menu AWB AWB 2 Press the left right to select the following 8 modes AWB Daylight Cloudy Fluorescent Fluorescent CWF Incandescent Manual WB Fully press the shutter button to detect the white balance...

Страница 47: ...le shot only Continuous Shot Shoot at the rate of 9 pictures per second with the maximum pixel setting 3 Shots Time Lapse Take pictures based on the preset interval 30sec 1min 5min 10min 3 Press the b...

Страница 48: ...w button to select the setting options F2 8 F2 8 1 50 100 ISO 1 50 100 ISO 2 0 EV 2 0 EV 3 Press the up down button to adjust the option values 4 Press button to complete the setting and enter shootin...

Страница 49: ...ettings will generally have more noise than those taken at lower ISO settings Adjustable in Mode F2 8 F2 8 1 50 1 50 0 7 EV 400 ISO 0 7 EV 400 ISO The camera s ISO settings include automatic 80 100 20...

Страница 50: ...eground A small aperture opening will keep both the background and main object in clear focus Adjustable in Mode Using Quick Recording In shooting mode press the Recording shortcut button to begin rec...

Страница 51: ...n to select the Image Color Setting Menu 2 Press the left right arrow button to select the Image Color Setting options Normal There are 7 Image Color options in photo shooting mode Normal Vivid Sepia...

Страница 52: ...clips stored in the internal memory or on the SD memory card 3 To play a selected video clip press the button to enter the Movie Playback Mode During video playback the operating instructions will app...

Страница 53: ...sition W Zoom Out T Zoom In 1 Slide the Zoom Lever to switch between 3x3 and 4x4 thumbnails 2 When a 3x3 or 4x4 thumbnail is displayed press the arrow buttons to select a picture or video clip to view...

Страница 54: ...vigate and select a part of the image to be zoomed in 6 Press the button to return the image to its original scale Movie images cannot be magnified x2 When playing back photos you can also use the Zoo...

Страница 55: ...mode 2 Press the left right arrow button to select the photos and videos to be deleted 3 Press the down arrow button and the deletion screen is displayed 4 Press the up down arrow button to select De...

Страница 56: ...k screen 2 Press button to enter the slide option except for vedio file 3 Press the left right button to select slideshow playing or Cancel to return to the playback screen Slideshow 4 Press the butto...

Страница 57: ...s about each setting Expo Metering Exposure Metering Use this setting to select the target size of the camera s field of view to be metered There are 3 options AiAE Artificial Intelligence AE targets...

Страница 58: ...ls is the better the image quality becomes As the number of recorded pixels lessen you will be able to record more images on a memory card OIS This mode can help reduce photo blur caused by unintentio...

Страница 59: ...ting to control wide dynamic image range when taking static pictures Photos with extreme contrast of bright and dark areas will still maintain distinguishable detail and depth Use of tripod is recomme...

Страница 60: ...autifier mode Face Beautifier Mode has 3 effects Effect 1 Skin Soften Effect 2 Skin Soften Eye Brightening Effect 3 Skin Soften Eye Brightening Eye Enlargement Scene Select the scene mode under the SC...

Страница 61: ...60 60 Shooting menu in the shooting mode O Optional X Not optional Options Shooting Modes 16M...

Страница 62: ...down arrow button to select the item to be set and press the button or right arrow button to enter the menu Photo Shooting Setting Menu 5 Press the up down arrow buttons to select an option and press...

Страница 63: ...Assist Beam In a darker environment AF Assist Beam can be turned on for better focus Digital Zoom Turn on or off the digital zoom Date Imprint Include a Date Time stamp on the photo image Off Date Da...

Страница 64: ...h photo is displayed on the LCD screen based on the selected time There are 4 options Off 1 sec 2 sec 3 sec Custom Settings Custom Settings stores the current photo shooting mode and its parameters Th...

Страница 65: ...Menu to be set and press the button to confirm Expo Metering Exposure Metering Use this setting to select the target size of the camera s field of view to be metered Expo Metering AiAE There are 3 opt...

Страница 66: ...ut 1 1280x720 30 Class 6 57 minutes 2 1280x720 15 Class 4 63 minutes 3 640x480 30 Class 4 72 minutes Recording time limit above 1280x720 30 fps format is under 29 minutes When recording in higher pixe...

Страница 67: ...utton to enter the menu Press SET To Enter Menu 3 Press up down arrow button to select and press the button or right arrow button to enter the menu 4 Select the items to be set and press the button or...

Страница 68: ...ect an option and press the button to confirm Normal Mode Press SET To Confirm Refer to the following pages for more details about each setting Playback 1 Press the button select the settings and pres...

Страница 69: ...the HDR function pictures that are overexposed may be corrected to optimize the highlights and lowlights captured to more accurately represent the actual scene 1 In Playback Mode press the left right...

Страница 70: ...on 1 In Playback Mode press the left right arrow button to select the photos to be edited 2 Press the button select the settings and press the button to display the settings screen 3 Press the left ri...

Страница 71: ...ects combined Rotate You can use this setting to change the orientation of the picture 1 In Playback Mode press the left right arrow button to select the photos to be edited 2 Press the button select...

Страница 72: ...d 2 Press the button select the settings and press the button to display the settings screen 3 Press the left right arrow button to select 1024X768 or 640X480 or select Cancel to return to the playbac...

Страница 73: ...eft right arrow button to select the photos to be edited 2 Press the button to select the Image Color Setting Menu 3 Press the left right button to select the corresponding menu or Cancel to return to...

Страница 74: ...button to select and press the button or right arrow button to enter the menu 4 Press the up down arrow button to select the item to be set and press the button or right arrow button to enter the menu...

Страница 75: ...he up down arrow buttons to select an option and press the button to confirm Protect To prevent any pictures or videos from being accidentally erased use this setting to lock one or all of the files T...

Страница 76: ...ngs screen There are 3 sub menus available One Delete one photo or video Date Folder Delete all photos in the Date Folder All Delete all photos or videos 3 Press the up down arrow buttons to select an...

Страница 77: ...prompt appears Select to change and save the picture Select to cancel changes and return to the trim prompt screen The image cannot be clipped trimmed again once it has been clipped to 640X480 DPOF D...

Страница 78: ...button to select and press the button or right arrow button to enter the menu 4 Press the up down arrow button to select the item to be set and press the button or right arrow button to enter the menu...

Страница 79: ...ve power and get the maximum possible running time for your camera s batteries Follow the steps below to turn the LCD screen and camera off automatically after a consecutive period of inactivity 1 Sel...

Страница 80: ...arture place and destination fields 3 Press the left right arrow button to select a city located in the same time zone as that of the field Press the button to confirm settings Date Time Refer to the...

Страница 81: ...n arrow button to select Format and press the button or right arrow button to enter the menu 4 Press the up down arrow buttons to select Yes or No and press the button to confirm File Software 5 If yo...

Страница 82: ...No and press the button to confirm If there is no card available in the camera this function will not be displayed File Numbering After you take a picture or video clip the camera will save it with a...

Страница 83: ...ton to enter the menu 4 When there is a new firmware version in the SD card select Yes to update Reset Use this setting to restore the camera to its original default settings 1 Press the button press...

Страница 84: ...you to ensure that the camera is correctly configured to con nect with a PC 1 Press the button press the up down arrow button to select and press the button to enter the menu 2 Press up down arrow but...

Страница 85: ...on your PC as you would copy any typical folder or file Follow the steps below to connect the camera to a computer 1 Make sure the computer is turned on 2 Connect one end of the supplied USB cable to...

Страница 86: ...ton to select TV System and press the button or right arrow button to enter the menu 4 Press the up down arrow buttons to select NTSC or PAL and press the button to confirm The video output system wou...

Страница 87: ...utton to enter the menu 2 Press up down arrow button to select and press the button or right arrow button to enter the menu 3 Press the up down arrow button to select Eye Fi and press the button or ri...

Страница 88: ...cable with high resolution output terminal which should be purchased separately to connect the camera to the television which meets HDMI standard 2 The camera will be automatically detected by the TV...

Страница 89: ...SB Mode The camera s USB port can be set to connect with either a PC or a Printer the following steps will ensure that the camera is correctly configured to connect with a Printer 1 Press the button p...

Страница 90: ...he USB port on the printer If the camera is not connected to a PictBridge compatible printer the following error message will appear on the LCD screen The error message above will also appear if the U...

Страница 91: ...efer to the following sections for more detailed information on each setting Print with Date If you have set the date and time on your camera the date and time will be recorded and saved with each pho...

Страница 92: ...ancel to cancel printing Print without Date Use this setting to print the photos without dates on them 1 In the PictBridge menu select Print without Date and the screen as shown below appears 2 Press...

Страница 93: ...t Cancel to cancel printing Print Index You can print all photos in the camera via this function 1 In the PictBridge menu select Print Index and the screen as shown below appears 2 Select Yes and pres...

Страница 94: ...on page 79 1 In the PictBridge menu select Print DPOF Images and the screen as shown below appears 2 Select Yes and press the button to confirm select Cancel to cancel printing Exit Select Exit to exi...

Страница 95: ...ivalent 24mm Wide 1200mm Tele F number F2 8 Wide F5 4 Tele Lens Construction 13 groups 15 elements Optical Zoom 50x Focusing Range Normal Wide 60cm Tele 300cm Macro 1cm Wide Only Anti Handshake Optica...

Страница 96: ...1 Support Yes File Format Still Image Exif 2 3 JPEG Movie MOV Image H 264 Audio Linear PCM Stereo Shooting Modes Auto Mode Program AE Shutter Priority Aperture pri ority Manual Mode Face Beautifier Pa...

Страница 97: ...AE AiAE Center Weighted Average Spot Fixed to Center of Frame Face AE Exposure Control Method Program AE AE Lock Available Shutter Prior AE Aperture Prior AE Exposure Compensation 2EV in 1 3 Step Incr...

Страница 98: ...ified and Traditional Japanese Korean French Spanish Portuguese Thai Indonesia Vietnamese Italian German Dutch Russian Polish Swedish Danish Finnish Norwegian Greek Turkish Hungarian Croatian Czech Ar...

Страница 99: ...m functioning properly Turn off the camera and restart it to reset the lens Built in memory error An error occurs in internal memory Try shutting down the camera and turning it on again The message wi...

Страница 100: ...ion Write Protect The SD card is locked Remove SD card and switch the lever on the side of card to UNLOCK The message will disappear after 2 seconds Card Full Indicates that the SD card is full Replac...

Страница 101: ...isappear after 2 seconds Cannot write to SD card The photo shooting or video recording has been interrupted so recording cannot continue Turn off the camera Then unload and reload the SD card and turn...

Страница 102: ...not supported or the file is corrupted so it cannot be properly read This image message disappears only after the file is deleted No Picture When you press the play button no image files exist in the...

Страница 103: ...high magnification above 15X optical zoom Images and video files cannot be saved The SD memory card is full The memory card is locked Use another memory card or delete unnecessary files Unlock the me...

Страница 104: ...card Use an SD card with write Class higher than 4 to improve performance Too many movies to process The number of pictures or folders in the SD memory card exceed the specifications so the playback o...

Страница 105: ...emark and trade dress are used under license from Kodak 2013 by JK Imaging Ltd All rights reserved JK Imaging Ltd 1411 W 190th Street Suite 550 Gardena CA 90248 USA www kodakcamera jkiltd com Licensed...

Отзывы: