Kodak M575 - Easyshare Digital Camera Скачать руководство пользователя страница 28

22

www.kodak.com/go/support

4

Reviewing and editing

Reviewing pictures/videos

1

Press the Review 

button.

2

Press 

 for previous/next picture/video.

To exit, press the Review button or press the 
Shutter button halfway down.

To view pictures/videos as thumbnails, press the 
Wide Angle (W) button. (For more information, 
see 

page 24

.)

Find your pictures like a pro...


See “A smarter way to find and enjoy your pictures” on page 25.
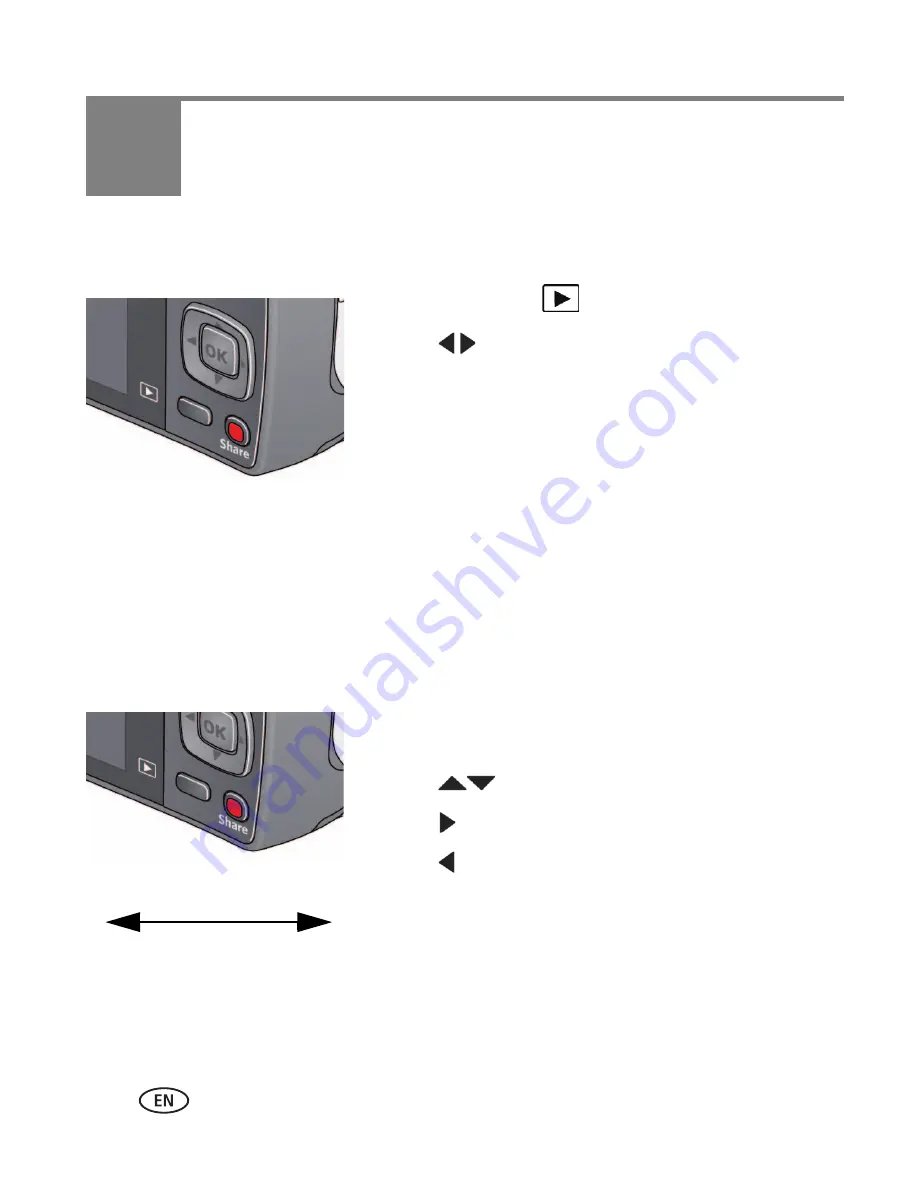
Playing a video

Press OK to play a video. Press OK to pause/resume. 
During playback:

Press 

 to adjust the volume.

Press   to play at 2X speed; press again for 4X.

Press   to reverse at 2X speed; press again for 4X.

4X

4X

1X

2X

2X

Playback speed

Содержание M575 - Easyshare Digital Camera

Страница 1: ...KODAK EASYSHARE M575 Digital Camera Extended user guide www kodak com For interactive tutorials www kodak com go howto For help with your camera www kodak com go m575support...

Страница 2: ...Eastman Kodak Company Rochester New York 14650 Eastman Kodak Company 2009 All screen images are simulated Kodak EasyShare and Pulse are trademarks of Eastman Kodak Company 4H6901_en...

Страница 3: ...Product features www kodak com go support i Front view NOTE To access your camera s Help system see page 43 Lens Microphone Flash Self timer Video light AF Assist Light Speaker...

Страница 4: ...To access your camera s Help system see page 43 OK Wide Angle Telephoto button Battery compartment SD SDHC Card slot Tripod socket LCD Share button USB port Power button Flash button Mode button Shutt...

Страница 5: ...erstanding the picture taking icons 8 Know when your battery needs charging 8 Using the optical zoom 9 Using the flash 10 Using different modes 11 Using shortcuts 13 Using the self timer 14 Using burs...

Страница 6: ...button to change settings 32 6 Transferring printing pictures 39 Transferring pictures to your computer 39 Printing pictures 40 Marking your pictures for print 42 7 Troubleshooting 43 Getting help fr...

Страница 7: ...tting up your camera Attaching the strap Loading the KLIC 7006 battery Purchase extra batteries for your special event www kodak com go m575accessories Charge the battery see page 2 Know when your bat...

Страница 8: ...er Using the external battery charger Purchase extra batteries www kodak com go m575accessories Know when your battery needs charging see page 8 Battery Charging light Blinking charging Steady finishe...

Страница 9: ...external battery charger Charge the battery whenever necessary Purchase extra batteries www kodak com go m575accessories Know when your battery needs charging see page 8 1 2 Battery Charging light Or...

Страница 10: ...urning on the camera Setting the language and date time NOTE To change language in the future use the Setup Menu see page 36 to change current field for previous next field OK to accept At the prompt...

Страница 11: ...or SDHC Card to conveniently store more pictures videos CAUTION A card can only be inserted one way forcing it may cause damage Inserting or removing a card while the camera is on may damage the pictu...

Страница 12: ...alfway to focus and set exposure When the framing marks turn green press the Shutter button completely down Using the framing marks Framing marks indicate the camera focus area 1 Press the Shutter but...

Страница 13: ...the Shutter button again To review and work with videos see page 22 Reviewing the picture video just taken After you take a picture video the LCD briefly displays the picture or the first frame of a...

Страница 14: ...e the gas gauge in your car but appears only when the battery requires your attention If you re viewing shortcuts the battery level is always displayed See page 13 Charge the battery whenever necessar...

Страница 15: ...E For focus distances see Specifications starting on page 49 Using digital zoom Use digital zoom to get up to 5X magnification beyond optical zoom Digital zoom is not available in Smart Capture mode P...

Страница 16: ...the lighting conditions Use when the subject is in shadow or is backlit when the light is behind the subject NOTE Not available in Smart Capture mode Red eye Reduction Choose a setting in the Setup me...

Страница 17: ...ty and ease of use Faces get focus and exposure priority The scene is analyzed for other content and for lighting You can choose the best picture size and aspect ratio for your needs just press the Me...

Страница 18: ...ama L R R L Stitching 2 or 3 pictures into 1 panoramic scene See page 15 Landscape Distant scenes High ISO People indoors in low light scenes Close up Close range Use available light instead of flash...

Страница 19: ...to focus You ll see different functions in different modes 3 Press to choose a setting Fireworks Fireworks For best results place the camera on a steady surface or tripod Self Portrait Close ups of yo...

Страница 20: ...irst picture is taken after a 10 second delay A second picture is taken 8 seconds later 3 Compose the scene Press the Shutter button halfway then completely down The camera takes the picture pictures...

Страница 21: ...to choose Panorama Left Right or Panorama Right Left depending on the direction you want to pan then press OK 3 Take the first picture After a quickview the LCD displays the liveview and an overlay fr...

Страница 22: ...Help screen appears 3 Press to choose a social networking site then press OK A check mark appears Repeat this step to choose more sites Press OK again to remove a check mark 4 Press to choose Done the...

Страница 23: ...own Manage email addresses and KODAK PULSE Digital Frames You can add edit or delete email addresses and KODAK PULSE Digital Frames on your camera 1 In Review press the Share button Press to choose Ma...

Страница 24: ...oose Apply Tags then press OK 4 Press to choose an existing name or New Name to add a new one see page 20 then press OK If more than one face is detected a name or question mark is assigned to each de...

Страница 25: ...to choose OK then press OK If prompted to Update People Tags press to choose Yes then press OK To return to picture taking mode press the Shutter button halfway down NOTE You can have up to 20 active...

Страница 26: ...her way to update pictures so that faces are matched to names 1 Press the Review button 2 Press the Menu button Press to choose Tag People then press OK 3 Press to choose Update People Tags then press...

Страница 27: ...ss to find a picture 2 Press the Share button 3 Press to choose an email address then press OK To mark other pictures videos with the same address press then press OK To send the pictures videos to mo...

Страница 28: ...view pictures videos as thumbnails press the Wide Angle W button For more information see page 24 Find your pictures like a pro See A smarter way to find and enjoy your pictures on page 25 Playing a v...

Страница 29: ...ately after you delete a picture Protecting pictures videos from deletion 1 Press the Review button 2 Press the Menu button 3 Press to choose Protect then press OK 4 Press to choose Protect then press...

Страница 30: ...ils 1 Press the Review button The camera shows the last picture that was taken 2 Press the Wide Angle W button to view pictures videos as thumbnails Press it again to see more smaller thumbnails To vi...

Страница 31: ...2 Press the Wide Angle W button to view pictures by thumbnail or choose View Thumbnails shortcut 3 Press to choose a tab and sort pictures by All Date People Favorite or Keyword 4 Press to choose a pi...

Страница 32: ...attery requires your attention If you re viewing shortcuts the battery level is always displayed See page 13 Charge the battery whenever necessary Purchase extra batteries for your special event www k...

Страница 33: ...portion of the picture remains 1 Press the Review button then to find a picture to crop 2 Press the Menu button then to choose the Edit tab Choose Crop then press OK 3 Press Telephoto T to shrink the...

Страница 34: ...prompts A picture is created The original video is saved Press the Shutter button halfway down to return to Capture mode To access your camera s Help system see page 43 Trimming a video You can remov...

Страница 35: ...in to remove a check mark You can now print transfer delete etc the selected pictures Copying pictures videos You can copy pictures videos from a card to internal memory or from internal memory to a c...

Страница 36: ...n the slide show 2 Press the Menu button If the Review tab is not highlighted press 3 Press to choose Multimedia Slide Show then press OK 4 Press to choose Preview Slide Show then press OK Each pictur...

Страница 37: ...connect the camera directly to a television use an A V cable may be sold separately NOTE Ensure that the Video Out setting NTSC or PAL is correct see page 37 The slide show stops if you connect or di...

Страница 38: ...NOTE Some modes offer limited settings For the most creative control use P mode See page 11 Some settings remain until you change them others until you change modes or turn off the camera 1 Press the...

Страница 39: ...you uncheck it Remember to uncheck the keyword after your event Exposure Compensation Make a picture lighter or darker Available in Program and Panorama modes To access this feature with a shortcut s...

Страница 40: ...e Use available light instead of flash if possible The camera automatically sets the focus distance depending on the zoom position Infinity For distant subjects auto focus framing marks are unavailabl...

Страница 41: ...deo resolution See Camera Specifications starting on page 49 AF Control Video Choose an auto focus setting Continuous AF Camera is always focusing Single AF Camera focuses once when the Shutter button...

Страница 42: ...ash fires to reduce the chance of red eye Digital correction The camera digitally corrects red eye after a picture is taken Processing time after taking a picture may increase Orientation Sensor Orien...

Страница 43: ...or other external device NTSC Used in North America and Japan most common format PAL Used in Europe and China Reset Camera Reset settings to their default Reset All Camera Settings Settings revert to...

Страница 44: ...otected Removing a card during formatting may damage the card Memory Card Deletes everything on the card formats the card Exit Exits without making a change Internal Memory Deletes everything in inter...

Страница 45: ...ftware 1 Turn off the camera 2 Use the KODAK Camera USB Cable Micro B 5 Pin to connect camera to computer Use only the cable included with this camera 3 Turn on the camera 4 After the software is inst...

Страница 46: ...idge logo is displayed followed by the current picture and menu If no pictures are found a message is displayed If the menu turns off press any button to redisplay it 2 Choose a printing option then p...

Страница 47: ...ly and friends Have prints photo greeting cards frames and albums delivered to your door Printing from an optional SD or SDHC Card Automatically print tagged pictures when you insert your card into a...

Страница 48: ...print 1 Press the Review button Press to find a picture 2 Press the Menu button 3 Press to choose Print then press OK 4 Press to choose the number of copies then press OK Press the Shutter button hal...

Страница 49: ...nd how to take the best possible pictures and videos Great news Your camera offers a built in Help system It describes every setting for every menu choice If you learn nothing else about your camera l...

Страница 50: ...not decrease after taking a picture Continue taking pictures The camera is operating normally The camera estimates the number of pictures remaining after each picture is taken based on picture size an...

Страница 51: ...ry see page 22 Status Solution Pictures do not transfer to computer Make sure the KODAK Camera USB Cable Micro B 5 Pin is connected to the camera and the computer see page 39 Then turn on the camera S...

Страница 52: ...t Use Fill flash see page 10 or change your position so light is not behind the subject Move so that the distance between you and the subject is within the effective flash range See Camera Specificati...

Страница 53: ...menu to change the image storage location The Direct printing menu interface turns off Press any camera button to redisplay the menu Cannot print pictures Make sure there is a connection between the...

Страница 54: ...ra firmware and software www kodak com go m575downloads See online demonstrations of your camera www kodak com go howto Register your camera www kodak com go register Chat email write or phone Kodak C...

Страница 55: ...on bytes Taking lens 5X optical zoom f 3 5 f 6 19 35 mm equivalent 28 140 mm Image stabilizer Lens shift type Digital zoom 5X continuous Focus system TTL AF through the lens auto focus Multi Zone Cent...

Страница 56: ...es Video Image file format Still EXIF 2 21 JPEG compression file organization DCF Video H 264 AAC LC mov with mono sound Picture size 14 MP 4 3 4288 x 3218 pixels 12 MP 3 2 4288 x 2818 pixels 11 MP 16...

Страница 57: ...ove dust and dirt Wipe gently with a soft lint free cloth or an untreated lens cleaning tissue Do not use cleaning solutions unless designed specifically for camera lenses Do not allow chemicals such...

Страница 58: ...azards If the LCD breaks do not touch the glass or liquid Contact Kodak customer support The use of an accessory that is not recommended by Kodak may cause fire electric shock or injury For approved a...

Страница 59: ...according to local and national regulations Visit www kodak com go kes Do not charge non rechargeable batteries For more information on batteries visit www kodak com go batterytypes Battery replacemen...

Страница 60: ...ak along with proof of the purchase price paid Repair replacement or refund of the purchase price are the sole remedies under the warranty If replacement parts are used in making repairs those parts m...

Страница 61: ...llow limitations on how long an implied warranty lasts so the above limitation may not apply to you This warranty gives you specific rights and you may have other rights which vary from state to state...

Страница 62: ...or accessories elsewhere defined to be used with the installation of the product they must be used in order to ensure compliance with FCC regulation The KODAK High Performance USB AC Adapter K20 AM c...

Страница 63: ...Kodak Company declares that this KODAK Product is in compliance with the essential requirements and other relevant provisions of Directive 1999 5 EC Australian C Tick VCCI Class B ITE Russian GOST R C...

Страница 64: ...58 www kodak com go support Appendix Korean Class B ITE Korean Li Ion Regulatory...

Страница 65: ...ess LCD 8 burst 14 button delete 7 telephoto zoom 9 C cable audio video 31 camera sounds 37 Canadian compliance 56 care and maintenance 51 charging the battery 2 children 12 clock setting 4 color mode...

Страница 66: ...ding 51 flash using 10 flower 12 focus framing marks 6 focus mode 34 format 38 framing marks 6 G guidelines battery 53 H help camera help 43 Web links 43 high ISO 12 I icons modes 11 image storage 36...

Страница 67: ...multiple selections 29 multi up 24 N night landscape 13 night portrait 13 O online prints ordering 41 optical zoom 9 orientation sensor 36 P panoramic pictures 15 people tagging 18 PICTBRIDGE enabled...

Страница 68: ...ne 34 auto focus 34 35 camera sounds 37 color mode 33 date and time 4 image storage 36 ISO 33 language 37 LCD brightness 36 long time exposure 33 37 orientation sensor 36 picture size 33 picture takin...

Страница 69: ...28 troubleshooting 43 turning camera on and off 4 typing 20 U undelete undo 23 upgrading software firmware 51 URLs Kodak Web sites 43 USB transfer pictures 39 V VCCI compliance 57 video copying 29 ed...

Отзывы: