Cleaning and Maintenance
For detailed cleaning and replacement procedures, see the
Maintenance
chapter in the User’s Guide.
Opening/closing the scanner cover
1. Turn off the scanner.
2. Lift up the scanner cover release to unlatch the
scanner cover.
3. Pull up to open the scanner cover.
4. Close the door when finished cleaning internal
components or replacing parts.
5. Turn on the scanner.
FEED MODULE
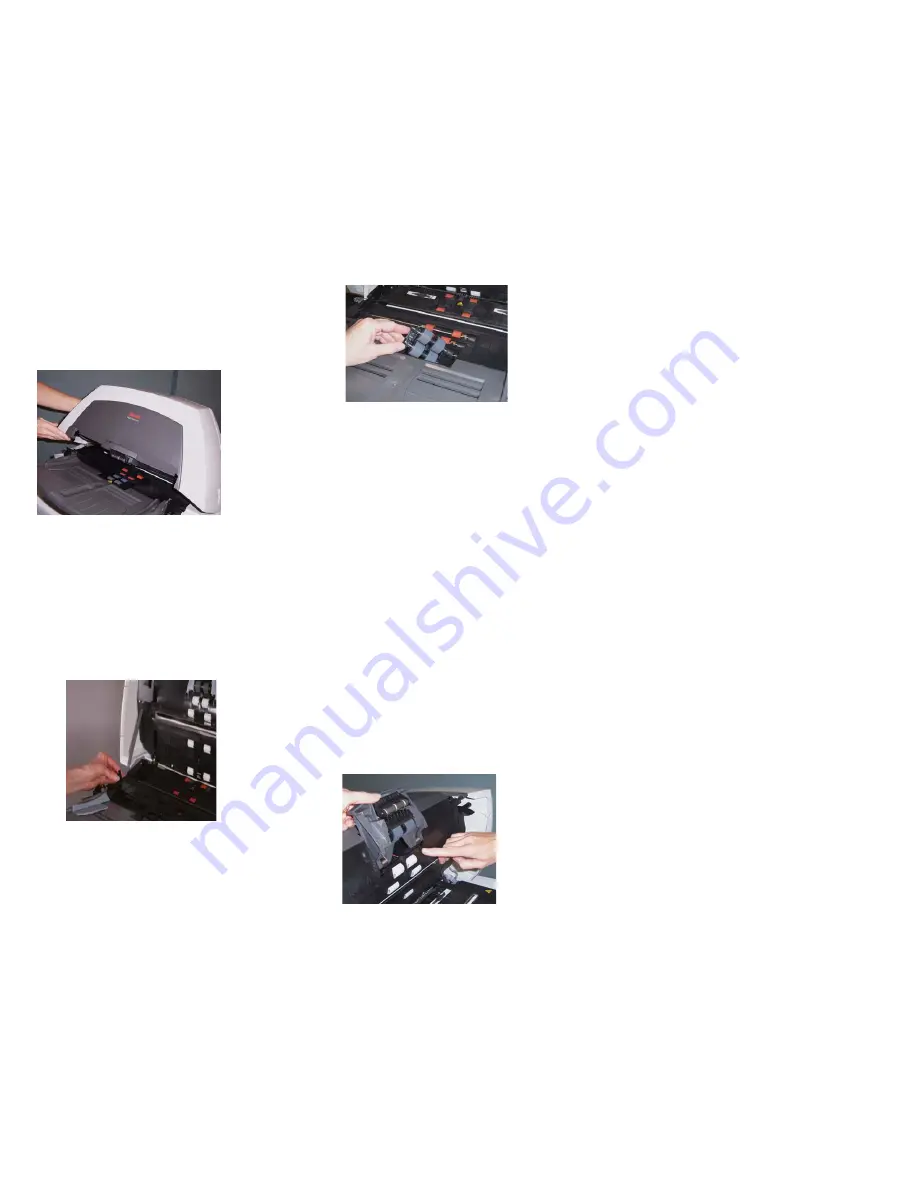
Cleaning and replacing the feed module
1.
Open the scanner cover.
2.
Push against the raised edge on the left side of the
front roller cover to the side and pull the cover up and
out to remove it.
NOTE: You may need to lift the input tray slightly to remove
the front roller cover.
3. Remove the feed module by pushing it to the right and
lifting it out.
4. Manually rotate and wipe the feed module rollers with a
roller cleaning pad.
5. Inspect the feed module. If the feed module tires show
signs of wear or damage, replace the tires or the feed
module.
6. Remove any dust or debris from the tray area under the
feed module and front roller cover.
7. Insert the new feed module by aligning the pins and
pushing it toward the right to fit it into position.
8. Reinstall the front roller cover.
SEPARATOR MODULE
Cleaning and replacing the separator module
1. Open the scanner cover.
2. Grasp the separator module and lift it up and out of
position.
NOTE: The separator module fits tightly in place,
therefore, you may need to pull hard to release
it.
3. Manually rotate and wipe the separator module tires
with a roller cleaning pad.
4. Inspect the tires. If the separator tires show signs of
wear or damage, replace the tires or the separator
module.
5. Insert the new separator module and align the shaft
ends..
6. Press until the separator module clicks into place.
PAPER PATH
1. Remove the wrapping from the Transport Cleaning
Sheet.
2. Adjust the side guides to fit the cleaning sheet.
3. Feed the cleaning sheet (adhesive side up) through the
scanner in portrait orientation until all residue is
removed from the drive rollers.
4. Adjust the sides guides to fit, feed the cleaning sheet
(adhesive side up) through the scanner in landscape
orientation until all reside is removed from the drive
rollers.
5. Using the same cleaning sheet, repeat Steps 3 and 4,
but feed the cleaning sheet through the scanner
adhesive side down until all reside is removed from the
drive rollers.
NOTE: When the cleaning sheet gets dirty, discard it and
use a new one.
IMAGING GUIDES
Cleaning the imaging guides
Clean the exposed (top side) surfaces of the imaging
guides. You do not need to remove the imaging guides for
cleaning unless there is dust or dirt on the underside of the
imaging guide.
1. Open the scanner cover.
2. Allow the scanner to cool, with the lamps off, for 5
minutes before proceeding.
3. Wipe the upper and lower imaging guides with a
Staticide wipe.
NOTE: The i1410 Scanner does not have an upper
imaging guide.
4. Dry the imaging guides with a dry Staticide wipe.
5. Lower the scanner cover and press it down firmly until it
latches into place.
To do a more thorough cleaning, remove the imaging
guides. Refer to the instructions in the
Maintenance
chapter of the User’s Guide.
IMPORTANT:
•
The Roller Cleaning Pad contains sodium lauryl ether
sulfate and sodium silicate which can cause eye
irritation.
•
S
taticide wipes contain isopropanol which can cause
eye irritation and dry skin. Wash your hands with soap
and water after performing maintenance procedures.
Refer to the User’s Guide for MSDS acquisition.


