KODAK EASYSHARE CD83
Digital Camera
Extended user guide
www.kodak.com
For interactive tutorials:
www.kodak.com/go/howto
For help with your camera:
www.kodak.com/go/CD83support
Страница 1: ...KODAK EASYSHARE CD83 Digital Camera Extended user guide www kodak com For interactive tutorials www kodak com go howto For help with your camera www kodak com go CD83support ...
Страница 2: ...Eastman Kodak Company Rochester New York 14650 Kodak 2010 All screen images are simulated Kodak EasyShare Max Perfect Touch and Pulse are trademarks of Eastman Kodak Company 4H7225_en ...
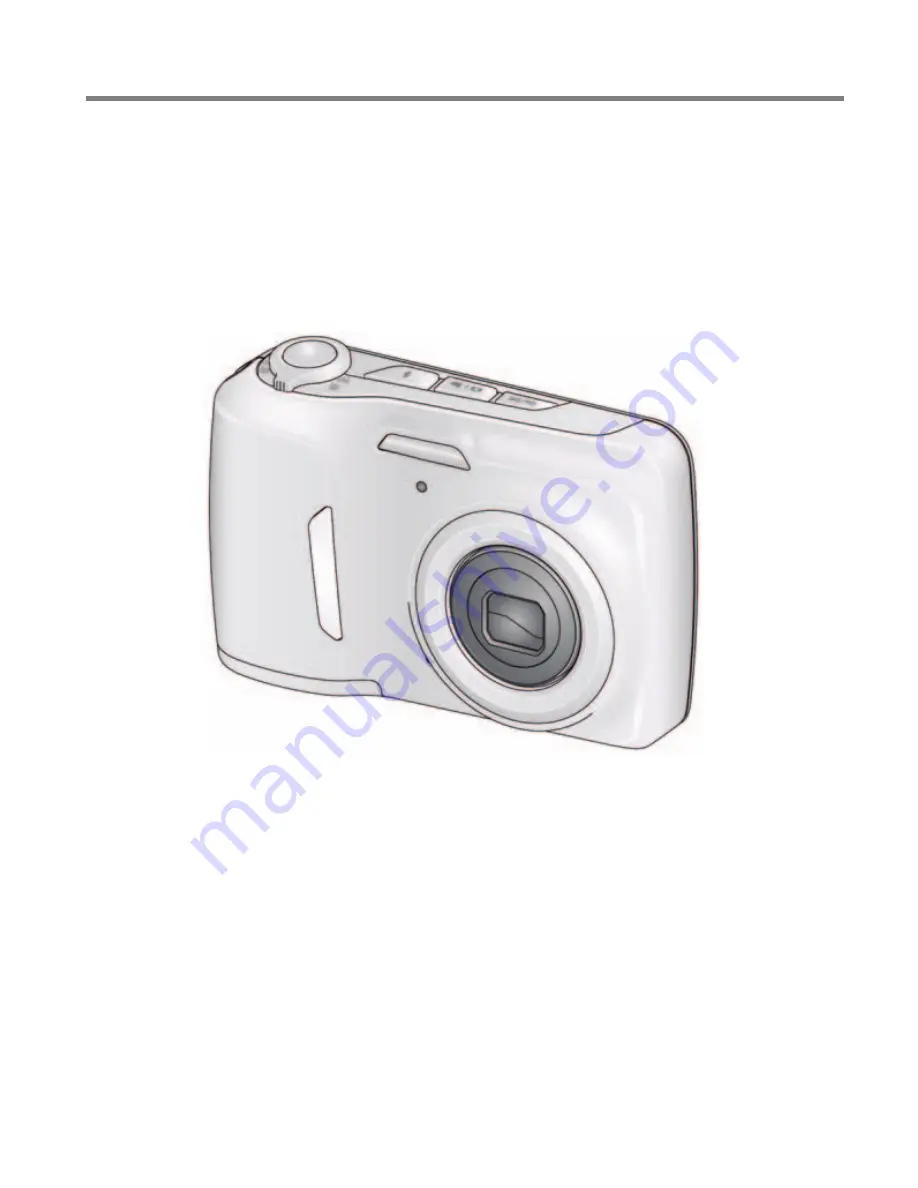
Страница 3: ...dak com go support i Front view NOTE To use the built in camera Help system see page 39 Shutter button Flash button Mode button Power button Lens Cover Microphone Self timer Video light Flash Zoom Telephoto Wide Angle buttons ...
Страница 4: ...ort Product features Back view NOTE To use the built in camera Help system see page 39 LCD Delete Menu buttons USB port Strap post OK button Share button SD SDHC Card slot Battery compartment Tripod socket Info Review buttons ...
Страница 5: ... 10 Using shortcuts 10 Using the self timer 11 Taking panoramic pictures 12 Understanding the picture taking icons 13 Know when your batteries need attention 13 3 Sharing and tagging pictures 14 Sharing pictures through social networks 14 Tagging pictures 16 Marking pictures videos as favorites and for email 18 4 Working with pictures videos 20 Reviewing pictures videos 20 Deleting pictures videos...
Страница 6: ...a 31 Using the menu button to change settings 31 6 Transferring printing tagging 36 Transferring pictures to your computer 36 Printing pictures 37 Marking your pictures for print 38 7 Getting help 39 Getting help from your camera 39 Troubleshooting 40 Getting help on the Web 43 8 Appendix 44 Specifications 44 Care and maintenance 46 Upgrading your software and firmware 47 Storage capacities 47 Imp...
Страница 7: ...www kodak com go support 1 1 Setting up your camera IMPORTANT For package contents see your product package Attaching the strap ...
Страница 8: ...om go support Setting up your camera Loading the AA batteries Turning on the camera Purchase cost effective rechargeable batteries and battery charger www kodak com go CD83accessories Extend battery life see page 48 ...
Страница 9: ...rt 3 Setting the language and date time NOTE To change language or date time in the future use the Setup menu see page 34 to change current field for previous next field OK to accept At the prompt press OK to change OK to accept Language Date Time ...
Страница 10: ...y store more pictures videos Maximum supported card size is 32 GB CAUTION A card can only be inserted one way forcing it may cause damage Inserting or removing a card while the camera is on may damage the pictures the card or the camera Purchase accessories www kodak com go CD83accessories 1 Turn off the camera 2 3 Turn on the camera Insert a card Push it until it clicks ...
Страница 11: ...us and set exposure When the framing marks turn green press the Shutter button completely down Using the framing marks Framing marks indicate the camera focus area 1 Press the Shutter button halfway If the camera is not focusing on the desired subject release the Shutter button and recompose the scene 2 Press the Shutter button completely down to take the picture NOTE Framing marks do not appear i...
Страница 12: ...es videos anytime see page 20 Using the optical and digital zoom 1 Use the LCD to frame your subject 2 To zoom in press Telephoto T To zoom out press Wide Angle W 3 Take the picture NOTE For focus distances see Specifications starting on page 44 Using digital zoom Use digital zoom to get up to 5X magnification beyond optical zoom when taking pictures videos Press Telephoto T until the slider on th...
Страница 13: ...ht is behind the subject In low light hold the camera steady or use a tripod Red Eye Choose a setting in the Setup menu see page 35 Preflash A preflash fires shrinking the eye pupil before the picture is taken Digital Correction The camera digitally corrects red eye after a picture is taken NOTE When using digital correction image processing takes longer than when using preflash Off Never Press th...
Страница 14: ...taking it offers excellent image quality and ease of use The scene is analyzed for other content and for lighting You can choose the best picture size and aspect ratio for your needs just press the Menu button and choose Picture Size Program Access to more manual settings than Smart Capture mode Scene Point and shoot simplicity when taking pictures in practically any situation See page 9 Video Cap...
Страница 15: ...t are in shadow or backlit Candle Light Subjects illuminated by candle light Children Action pictures of children in bright light Manner Museum Quiet occasions like a wedding or lecture Flash and sound are disabled Place the camera on a steady surface or tripod Text Documents Place the camera on a steady surface or tripod Beach Bright beach scenes Snow Bright snow scenes Fireworks Fireworks Place ...
Страница 16: ...en the video is played on a computer or when the camera is connected to a TV page 30 Using shortcuts Your camera has a clean uncluttered interface For quick access to the most popular functions 1 Press the Info button The shortcuts appear 2 Press to access functions like Exposure Compensation Self timer and Auto focus You ll see different functions in different modes 3 Press to choose a setting To...
Страница 17: ...to choose a setting 10 seconds A picture is taken after a 10 second delay so you have time to get into the scene 2 seconds A picture is taken after a 2 second delay for a steady shutter release on a tripod 2 shot The first picture is taken after a 10 second delay A second picture is taken 8 seconds later 3 Compose the scene Press the Shutter button halfway then completely down The camera takes the...
Страница 18: ... to choose Panorama Left Right or Panorama Right Left depending on the direction you want to pan then press OK 3 Take the first picture After a quickview the LCD displays the liveview and an overlay from the first picture 4 Compose the second picture Make the overlay from the first picture cover the same portion in the new picture 5 If you are taking stitching only 2 pictures press OK to stitch th...
Страница 19: ...e battery level icon appears when the batteries require your attention If you re viewing shortcuts the battery level is always displayed See page 10 Purchase cost effective rechargeable batteries and battery charger www kodak com go CD83accessories Battery level Capture mode Pictures time remaining Zoom slider Tag name Self timer Flash mode Focus mode Exposure compensation ...
Страница 20: ...appears 2 Press to choose a social networking site then press OK A check mark appears Repeat this step to choose more sites Press OK again to remove a check mark 3 Press to choose Done then press OK The picture is displayed with the Share icon When you transfer the picture to your computer it will be sent to the networking site s that you chose Tip Do you send pictures to the same sites each time ...
Страница 21: ...KODAK PULSE Digital Frames You can add edit or delete email addresses and KODAK PULSE Digital Frames on your camera See Using the keyboard page 18 1 Press the Share button Press to choose Manage Email Addresses or Manage Frames then press OK 2 To add an email address or frame press to choose New Email or New Frame then press OK Use the on screen keyboard to make the addition Example JohnDoe domain...
Страница 22: ...ly Tags then press OK 4 Press to choose an existing name or New Name to add a new one see Using the keyboard page 18 then press OK If more than one face is detected a name or question mark is assigned to each detected face To resolve an incorrect name or a question mark press to select a face then press OK 5 If prompted to Update People Tags press to choose Yes then press OK Other pictures are sca...
Страница 23: ...fy then press OK 5 Edit the name press to choose OK then press OK If prompted to Update People Tags press to choose Yes then press OK To return to picture taking mode press the Shutter button halfway down NOTE You can have up to 20 active names Tagging with keywords 1 Press the Review button then to find a picture 2 Press the Menu button Press to choose Keyword Tag then press OK 3 Press to choose ...
Страница 24: ...ictures so that faces are matched to names 1 Press the Review button 2 Press to find a picture 3 Press the Menu button Press to choose Tag People then press OK 4 Press to choose Update People Tags then press OK Marking pictures videos as favorites and for email Marking pictures videos as favorites To make your favorite pictures videos easier to locate you can assign the favorite mark 1 Press the R...
Страница 25: ... to find a picture 2 Press to choose Email then press OK 3 Press to find an email address then press OK To mark other pictures videos with the same address press then press OK To send the pictures videos to more than one address repeat step 4 To return to picture taking mode press the Shutter button halfway down When you transfer the marked pictures videos to your computer the software prompts you...
Страница 26: ... a picture 1 Press T to magnify 1X 8X 2 Press to view other parts of a picture Press OK to return to 1X Playing a video Press OK to play a video Press OK to pause resume During playback Press to play at 2X speed press again for 4X Press to reverse at 2X speed press again for 4X NOTE Audio is captured during video recording Audio can be heard when the video is played on a computer or when the camer...
Страница 27: ...This feature is only available immediately after you delete a picture Protecting pictures videos from deletion 1 Press the Review button 2 Press for previous next picture video 3 Press the Menu button 4 Press to choose Protect then press OK The picture video is protected and cannot be deleted The Protect icon appears with the protected picture video Press the Shutter button halfway down to return ...
Страница 28: ...ictures videos as thumbnails Press it again to see more smaller thumbnails To view all pictures videos highlight the All tab To sort by favorites date or tagged pictures videos press and highlight the appropriate tab 3 To see a single picture video press to choose it Then press the Telephoto T button To select multiple pictures videos see Selecting multiple pictures videos page 27 Press the Shutte...
Страница 29: ...ge 17 1 Press the Review button 2 Press the Wide Angle W button to view pictures by thumbnail or choose View Thumbnails shortcut 3 Press to choose a tab and sort pictures by All Date People Favorite or Keyword 4 Press to choose a face or keyword then press OK Pictures tagged with that name or keyword are displayed Press to view all pictures Press the Shutter button halfway down to return to Captur...
Страница 30: ...re pictures videos Edit to edit pictures videos Setup to control how your camera operates 3 Press to choose a setting then press OK 4 Choose an option then press OK To use the built in camera Help system see page 39 Email mark Favorite mark Print tag number of prints Protected Picture Video number Upload mark Video duration Select picture Battery level Text tag name Add text tag View thumbnails Pl...
Страница 31: ... 2 Press the Menu button then to highlight the Edit tab Choose Crop then press OK 3 Press Telephoto T to zoom in or to move the crop box Press OK 4 Follow the screen prompts The picture is cropped The original is saved Cropped pictures cannot be cropped again on the camera Press the Shutter button halfway down to return to Capture mode To use the built in camera Help system see page 39 Picture Cro...
Страница 32: ...een prompts A picture is created The original video is saved Press the Shutter button halfway down to return to Capture mode To use the built in camera Help system see page 39 Trimming a video You can remove an unwanted start or end from a video saving only the desired portion 1 Press the Review button then to find a video 2 Press the Menu button then to highlight the Edit tab Choose Trim then pre...
Страница 33: ... 7 equally spaced frames A 9 up picture is created Press the Shutter button halfway down to return to Capture mode To use the built in camera Help system see page 39 Selecting multiple pictures videos Use the multi select feature when you have two or more pictures to print transfer delete etc Multi select is used most effectively in Multi Up mode See Viewing as thumbnails multi up on page 22 1 Pre...
Страница 34: ...s OK Choose an option then press OK NOTE Pictures videos are copied not moved To remove pictures videos from the original location after copying delete them see page 21 Running a slide show Use Slide Show to display your pictures videos on the LCD 1 Press the Review button then press the Menu button 2 Press to choose Slide Show then press OK 3 Press to choose Begin Show then press OK Each picture ...
Страница 35: ...pture mode NOTE You cannot apply PERFECT TOUCH Technology to videos or to pictures to which PERFECT TOUCH Technology is already applied Rotating pictures You can rotate a picture to portrait or landscape orientation 1 Press the Review button then to find the previous next picture 2 Press the Menu button Press to highlight the Edit tab 3 Press to choose Rotate Picture then press OK 4 Press to choos...
Страница 36: ...evision use an A V cable may be sold separately NOTE To control the audio portion of a video use the TV or TV remote control volume controls Ensure that the Video Out setting NTSC or PAL is correct page 34 The slide show stops if you connect or disconnect the cable while the slide show is running Image quality on a television screen may not be as good as on a computer monitor or when printed Purch...
Страница 37: ...the camera 1 Press the Menu button 2 Press to highlight a tab Capture Video for the most common picture video taking settings Setup for other camera settings 3 Press to choose a setting then press OK 4 Choose an option then press OK Some options let you use Using the Capture tab Settings More information Exposure Compensation Make a picture lighter or darker Available in Smart Capture mode To use ...
Страница 38: ...utter button completely down and hold it to take pictures Self timer Take picture s after a timed delay 10 seconds Picture is taken after a 10 second delay so you have time to get into the scene 2 seconds Picture is taken after a 2 second delay for a steady shutter release on a tripod 2 shot First picture is taken after a 10 second delay A second picture is taken 8 seconds later Long Time Exposure...
Страница 39: ... for indoor pictures under fluorescent lighting without flash Open Shade For pictures in shade in natural lighting Exposure Metering Evaluate light levels at specific areas of a scene Multi Pattern Evaluates lighting conditions throughout the image to give an optimum picture exposure Ideal for general picture taking Center Weight Evaluates the lighting conditions of the subject centered in the len...
Страница 40: ...hoose a storage location for pictures videos Auto The camera uses the card if one is in the camera If not the camera uses internal memory Internal Memory The camera always uses internal memory even if a card is installed Camera Sounds Choose sound effects All On Shutter Only All Off Date Time Set date and time Video Out Choose the regional setting that lets you connect the camera to a television o...
Страница 41: ...Reset All Camera Settings Reset settings to their default Computer Connection Choose which application is downloaded or launched when you connect the camera to the computer IMPORTANT To use the sharing and social networking features you must download KODAK Software See page 36 KODAK Software Other Application APPLE IPHOTO etc Format CAUTION Formatting deletes all pictures videos including those th...
Страница 42: ...ly runs Follow the prompts to download and install KODAK Software 1 Turn off the camera 2 Use the KODAK Camera USB Cable Micro B 5 Pin to connect the camera to the computer Use only the cable included with this camera 3 Turn on the camera 4 After the software is installed follow the prompts to transfer pictures and videos to your computer If the downloader does not run find it here and launch it W...
Страница 43: ...a The PictBridge logo is displayed followed by the current picture and menu If no pictures are found a message is displayed If the menu turns off press any button to redisplay it 2 Choose a printing option then press OK Current Picture Press to choose a picture Tagged Pictures If your printer is capable print pictures that you marked for printing Index Print Print thumbnails of all pictures This o...
Страница 44: ...ged pictures when you insert your card into a printer with an SD SDHC Card slot See your printer user s guide for details Make prints at an SD SDHC Card capable KODAK Picture Kiosk Go to www kodak com go picturemaker Take the card to your local photo retailer for professional printing Marking your pictures for print 1 Press the Review button Press to find a picture 2 Press the Menu button 3 Press ...
Страница 45: ...a offers a built in Help system It describes every setting for every menu choice If you learn nothing else about your camera learn how to use on camera Help Turning on camera Help Scroll through a Help topic Press the Menu button then highlight a menu choice Press the Info 1 2 button ...
Страница 46: ...r taking a picture Continue taking pictures The camera is operating normally The camera estimates the number of pictures remaining after each picture is taken based on picture size and content Flash does not fire Check the flash setting and change as needed see page 7 NOTE The flash does not fire in all modes Memory card is almost or entirely full Transfer the pictures to the computer see page 36 ...
Страница 47: ...or in internal memory see page 20 Status Solution Computer does not communicate with the camera Make sure the batteries are charged and installed correctly see page 2 Turn on the camera Make sure the KODAK Camera USB Cable Micro B 5 Pin is connected to the camera and the computer see page 36 See KODAK Software Help at www kodak com go camerasw Status Solution Picture is not clear To automatically ...
Страница 48: ...he Shutter button completely down to take the picture Picture is too light Reposition the camera to reduce the amount of available light Turn the flash off see page 7 Move so that the distance between you and the subject is within the effective flash range See Specifications starting on page 44 To automatically set exposure and focus press the Shutter button halfway When the framing marks turn gre...
Страница 49: ...CD83accessories Download the latest camera firmware and software www kodak com go CD83downloads See online demonstrations of your camera www kodak com go howto Register your camera www kodak com go register Chat email write or phone Kodak Chat not available in all languages www kodak com go contact Download and get Help with KODAK Software www kodak com go camerasw Get support for cameras software...
Страница 50: ...aking lens 3X optical zoom f 2 9 f 5 2 35 mm equivalent 32 96 mm Lens protection Built in Digital zoom 5X continuous Focus system TTL AF through the lens auto focus Auto Multi Zone Center Zone Working range 0 6 m 2 ft infinity wide normal 0 6 m 2 ft infinity telephoto normal 0 1 0 7 m 0 3 2 3 ft wide Macro mode 0 35 0 7 m 1 1 2 3 ft telephoto Macro mode Auto focus control Still Continuous and Sing...
Страница 51: ...pture Program Scene modes Video Image file format Still EXIF 2 21 JPEG compression file organization DCF Video AVI CODEC Motion JPEG audio Law Picture size 14 MP 4 3 4288 x 3216 pixels 12 MP 3 2 4288 x 2848 pixels 10 MP 16 9 4288 x 2416 pixels 6 MP 4 3 2880 x 2160 pixels 3 MP 4 3 2048 x 1536 pixels 2 MP 16 9 1920 x 1080 pixels 1 MP 4 3 1280 x 960 pixels Color modes Vivid Color Full Color Basic Col...
Страница 52: ...nts to air dry for at least 24 hours before using the camera Blow gently on the lens or LCD to remove dust and dirt Wipe gently with a soft lint free cloth or an untreated lens cleaning tissue Do not use cleaning solutions unless designed specifically for camera lenses Do not allow chemicals such as suntan lotion to contact painted surfaces Service agreements may be available in your country Conta...
Страница 53: ...C Adapters and Battery Chargers are intended for indoor use only The use of controls adjustments or procedures other than those specified herein may result in exposure to shock and or electrical or mechanical hazards If the LCD breaks do not touch the glass or liquid Contact Kodak customer support The use of an accessory that is not recommended by Kodak may cause fire electric shock or injury For ...
Страница 54: ...upport See www kodak com go reach for information about the presence of substances included on the candidate list according to article 59 1 of Regulation EC No 1907 2006 REACH Dispose of batteries according to local and national regulations See www kodak com go kes Do not charge non rechargeable batteries For more information see www kodak com go batteries Battery replacement battery life KODAK MA...
Страница 55: ...bject to any conditions and or limitations stated herein Warranty service will include all labor as well as any necessary adjustments and or replacement parts If Kodak is unable to repair or replace a Product Kodak will at its option refund the purchase price paid for the Product provided the Product has been returned to Kodak along with proof of the purchase price paid Repair replacement or refun...
Страница 56: ...t of substitute equipment facilities or services or claims of your customers for such damages resulting from the purchase use or failure of the Product regardless of cause or for breach of any written or implied warranty is expressly disclaimed The limitations and exclusions of liability set forth herein apply to both Kodak and its suppliers Your rights Some states or jurisdictions do not allow ex...
Страница 57: ...he user is encouraged to try to correct the interference by one or more of the following measures 1 reorient or relocate the receiving antenna 2 increase the separation between the equipment and the receiver 3 connect the equipment to an outlet on a circuit different from that to which the receiver is connected 4 consult the dealer or an experienced radio TV technician for additional suggestions A...
Страница 58: ...52 www kodak com go support Appendix China RoHS Russian GOST R Korean Class B ITE VCCI Class B ITE Eastman Kodak Company Rochester NY 14650 ...
Страница 59: ... Cet appareil numérique de la classe B est conforme à la norme NMB 003 du Canada In Europe For human environmental protection it is your responsibility to dispose of this equipment and batteries at a collection facility established for this purpose separate from municipal waste For more information contact your retailer collection facility or appropriate local authorities or go to www kodak com go...
Страница 60: ...lete 6 C cable audio video 30 camera sounds 34 Canadian compliance 53 care maintenance 46 care and maintenance 46 children 9 clock setting 3 color mode 32 computer connecting camera 36 transfer to 36 connector USB A V 30 copy pictures card to memory 28 memory to card 28 to computer via USB cable 36 cropping pictures 25 customize camera 34 D date setting 3 deleting during quickview 6 from internal ...
Страница 61: ...framing marks 5 focus mode 32 format 35 framing marks 5 G guidelines battery 48 H help camera help 39 Web links 39 high ISO 10 I icons modes 8 image storage 34 installing battery 2 SD SDHC Card 4 ISO speed 33 K keyboard 18 keywords 17 Kodak EasyShare software upgrading 47 Kodak Perfect Touch technology 29 KODAK Software download 36 Kodak Web sites 39 L language 34 LCD brightness 34 reviewing pictu...
Страница 62: ...rints ordering 38 P panoramic pictures 12 people tagging 16 Perfect Touch technology 29 PICTBRIDGE enabled printer 37 picture size 31 pictures copying 28 cropping 25 emailing marked 18 Kodak Perfect Touch 29 marking 38 protecting 21 review icons 24 reviewing 20 taking modes 8 transfer via USB cable 36 pictures video deleting 21 playing a video 20 power camera 2 printing from a card 38 optimizing p...
Страница 63: ... ISO 33 language 34 LCD brightness 34 long time exposure 32 35 picture size 31 picture taking mode 8 self timer 11 sharpness 34 video out 34 video size 34 white balance 33 setting up the camera 1 setup menu 34 Share button 35 sharpness 34 shutter problems 41 self timer delay 11 slide show running 28 smart find 23 snow 9 software upgrading 47 software downloader 36 sounds 34 specifications camera 4...
Страница 64: ...s Kodak Web sites 39 USB transferring pictures 36 V video action print 27 copying 28 edit 26 emailing marked 18 out 34 playback 20 protecting 21 review icons 24 size 34 transfer to computer 36 viewing 20 video out 34 video size 34 viewing by multi up 22 picture after taking 6 20 W warranty 49 white balance 33 Z zoom digital 6 ...