background image


KODAK DIGITAL SCIENCE


ª


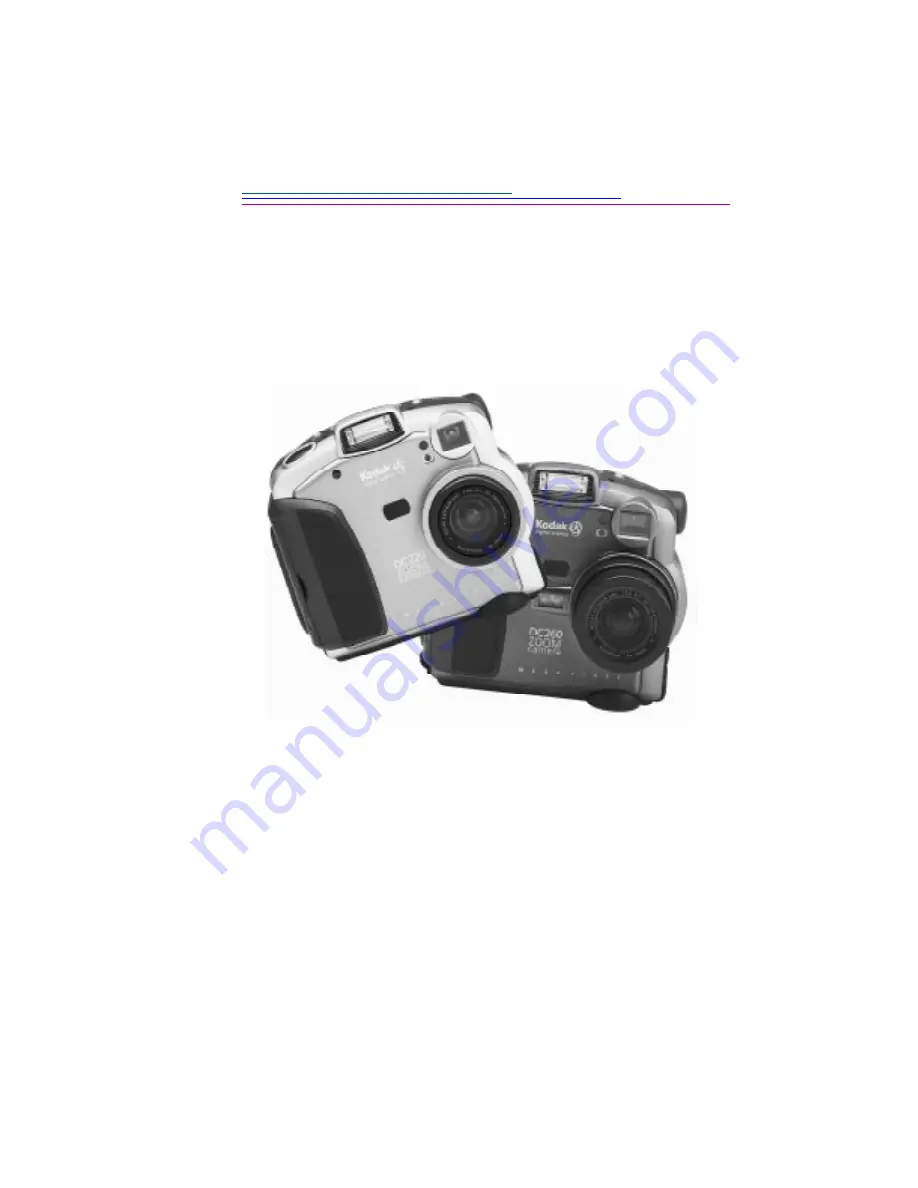
DC220 and DC260 Zoom Cameras


UserÕs Guide


for the cameras, KODAK Installation Software, 
KODAK Camera Properties Software, KODAK Mounter 
Software, and KODAK Acquire/TWAIN Software

Visit Kodak on the World Wide Web at www.kodak.com

Содержание DIGITAL SCIENCE DC220

Страница 1: ...DC220 and DC260 Zoom Cameras UserÕs Guide for the cameras KODAK Installation Software KODAK Camera Properties Software KODAK Mounter Software and KODAK Acquire TWAIN Software Visit Kodak on the World Wide Web at www kodak com ...

Страница 2: ...demark of FlashPoint Technology Incorporated The FlashPix format is defined in a specification and test suite developed and published by Kodak in collaboration with Microsoft Hewlett Packard and Live Picture Only products that meet the specification and pass the test suite may use the FlashPix name and logo ...

Страница 3: ...4 2 Meet your camera 2 1 Your Digital Camera 2 1 Softkeys 2 3 Mode dial 2 3 Four way controller 2 3 Your camera display 2 4 Removable memory card 2 10 Reformatting the memory card 2 10 Removing the memory card 2 11 Power management 2 11 Installing batteries 2 12 Using the AC adapter 2 13 3 Taking pictures 3 1 Turning the camera on 3 2 Entering the Capture mode 3 2 Defining settings 3 3 Defining se...

Страница 4: ...marked pictures from camera to camera 4 8 Opening albums 4 9 Expanding and collapsing pictures 4 10 Adding sound to pictures 4 11 Deleting one picture 4 12 Deleting multiple or all pictures 4 13 Playing sound bursts and timelapse sequences 4 14 Magnifying pictures 4 15 Viewing pictures on your TV 4 16 5 Setting camera properties 5 1 You ve got to connect first 5 1 Finding the Properties software 5...

Страница 5: ...g your pictures 7 3 Transferring pictures to your computer 7 4 Transferring pictures and scripts to your camera 7 4 Opening picture files in other software programs 7 6 Saving sound 7 6 Setting preferences 7 7 Exiting Mounter software 7 7 Placing the memory card in your computer 7 7 Picture Card Adapter 7 8 Memory Card Reader 7 9 8 Transferring pictures via TWAIN software 8 1 Installing TWAIN soft...

Страница 6: ...rinting 9 3 Troubleshooting 9 4 10 Getting help 10 1 Software help 10 1 Online services 10 1 Faxed information 10 1 Customer support 10 2 A KODAK Digital Access Software Plug In Acquire A 1 System and Software Requirements A 1 Installing Digital Access Software A 2 Connecting the Card Reader A 2 Digital Access Application Window A 3 Getting Pictures from the Camera Memory Card A 5 Select Pictures ...

Страница 7: ... Transferring Pictures A 13 Transfer Individual Pictures A 13 Transfer Thumbnails on a Contact Sheet A 13 Saving Pictures to Your Computer A 14 Save Individual Pictures A 15 Save the Audio Attached to a Picture A 15 Export an APPLE QuickTime Movie A 16 Setting Preferences A 17 Warranty Regulatory Information Index ...

Страница 8: ...ansfer your pictures to your computer and do things like e mail them to family and friends Camera features The DC220 DC260 Camera features built in flash with red eye reduction an easy to use status display of camera settings removable memory card infrared remote connection to compatible devices a 2X zoom lens 29 to 58mm on the DC220 and a 3X zoom lens 38 4 to 115 2mm on the DC260 to zoom in on su...

Страница 9: ...der bender See page 3 16 Review mode The Review mode lets you view edit and organize your pictures See page 4 1 6 Play back the pictureÕs One at a time in a continuous scroll or in a fast scroll See page 4 5 Get a close up view of your subject See page 4 15 You can also play a series of burst or timelapse pictures See page 4 14 your computer You can use a serial USB or infrared connection See page...

Страница 10: ... s Guide describes the DC220 DC260 Camera operation and the operation of software for use on WINDOWS PC computer systems For information about the Macintosh plug in software please refer to Appendix A System Requirements PC with 486 66MHz microprocessor or PENTIUM Processor 16 MB or more of RAM WINDOWS 95 32 MB RAM WINDOWS NT 4 0 50 MB hard disk space available available serial port IrDA connectio...

Страница 11: ...ting the DC220 DC260 software installation 2 Place the DC220 or DC260 CD into your CD ROM drive 3 Select the language in which you want to view menus and install the software The CD Browser menu appears 4 Click the INSTALL DC220 DC260 SOFTWARE button 5 Follow the instructions on your computer screen to complete the installation Camera Accessories Item Number KODAK DIGITAL SCIENCE Premium Accessory...

Страница 12: ...1596 N A N A These figures are based on the best quality and highest resolution in a Still Picture JPEG format These are approximate numbers because the actual numbers are determined by the detail in the scene of each picture KODAK DIGITAL SCIENCE Inkjet Quality Products Item Numbe r Snapshot Paper 36 sheet 4x6in 145 6979 Photographic Quality paper Photo Weight 15 sheet 8 5x11in 158 5199 Photo Pap...

Страница 13: ...er Perforated 6 up 57 1 x 88 9mm 15 sheet with Picture Easy Software CD 210x297 mm 802 1172 Photo Paper Perforated 10 up 2 x 3 5 20 sheet 8 5 x 11in 877 8151 Photo Paper Perforated 10 up 50 x 90mm 20 sheet 210x297 mm 863 9064 Photo Stickers Pre cut 6 up 3 75 x 3 25 15 sheet with Picture Easy Software CD 8 5 x 11 in 167 4647 Photo Stickers Pre cut 6 up 95 25 x 82 55mm 15 sheet with Picture Easy Sof...

Страница 14: ...CE DC220 or DC260 Zoom Camera s buttons displays and hardware features Your Digital Camera Viewfinder Flash Self timer Infrared Flash sensor Light sensor transceiver IR port light Lens Battery door Memory card door Shutter Auto Focus sensor DC260 only Shutter Power Status display Flash Self timer Close up DC220 only SCROLL button SELECT button ...

Страница 15: ... the camera shown the User s Guide will note it Viewfinder Ready light LCD screen Mode dial Zoom AC adapter Serial USB Video audio Softkeys Four way controller Audio volume Display button Menu button Audio Audio LED Record button Out External flash DC260 only Tripod socket ...

Страница 16: ...from four camera modes Capture the mode you ll use to take beautiful digital pictures Review this mode allows you to view edit and organize your pictures Connect the mode you ll use to connect your camera to your computer Once connected you can use Mounter TWAIN or KODAK DIGITAL SCIENCE Picture Easy Software to move your pictures from your camera to your computer Info this mode displays informatio...

Страница 17: ... Auto the flash fires automatically when you press the SHUTTER button and the camera determines that there is not enough light Red eye if the camera determines that there is not enough light the flash fires once when you press the SHUTTER button to reduce the chance of red eye and then flashes a second time 600 milliseconds later when the picture is taken Flash Quality Close up DC220 Self timer Ba...

Страница 18: ...ter 5 Setting camera properties for more information about each picture type and their preference settings Fill the flash fires every time you press the SHUTTER button Use this setting when the lighting is poor or when your subject is lit from behind Off the flash is turned off and will not fire If you turn the flash off the next time you turn the camera on the camera defaults to the Auto flash se...

Страница 19: ...ur digital pictures But everything has its price The more pixels you have or the better the resolution in other words the more space you use on the camera memory card To save space you can compress each picture When a picture is compressed some color and detail information is discarded More compression means a lower quality picture Less compression means a better quality picture Together compressi...

Страница 20: ...econd delay between the time you press the SHUTTER button and when the picture is taken This allows enough time for you to include yourself in the picture Close Up DC220 only The camera offers a Close Up setting which allows you to focus as close as 8 in 20 cm The viewfinder does not accurately display the subject in close up mode To accurately capture the picture close up the Preview option autom...

Страница 21: ...y to indicate the remaining number of pictures that can be stored at the current quality and resolution setting You may not select or change the Pictures Remaining icon The Pictures Remaining number does not always change when a picture is taken if the picture content is easily compressed When the card s memory is full the Status Display indicates Full You must delete existing pictures or change t...

Страница 22: ... 4 5 6 8 11 16 or 22 The default value is 5 6 and provides an appropriate depth of field for many identification or portraiture applications Long time mode The camera s flash is disabled as it is assumed that a long exposure time is necessary to obtain a proper exposure within the current ambient lighting environment You set the exposure time between 0 5 and 4 seconds in 0 5 second increments Init...

Страница 23: ...tains information until you either delete the data or re format the card Normal magnetic interference and airport x rays will not harm the stored data Reformatting the memory card In order to communicate with the camera and the PC the removable memory card requires the same standard DOS format that is used by floppy diskettes The DC220 and DC260 offer you the format option if the camera doesn t re...

Страница 24: ... subsections for information about battery and AC adapter use To conserve power usage the camera has a sleep mode After a specified period of inactivity the camera enters sleep mode by turning the LCD off You can set the amount of time before entering sleep mode through the Capture menu settings Refer to setting the Sleep Timeout preference on page 3 10 After 10 minutes of inactivity the camera tu...

Страница 25: ...al current which over time could cause your batteries to heat up significantly Should your camera become too hot inside it is designed with protective circuitry to turn itself off You should allow sufficient time for the camera to cool before turning it on again Consider using an AC adapter when using preview mode for extended periods Always follow your battery manufacturer s directions fully 1 Op...

Страница 26: ...standard electrical outlet This is especially useful when you are transferring pictures into your computer The adapter powers the camera but does not charge the batteries WARNING Only use the AC adapter designed for the DC220 or DC260 Use of any other adapter may void the warranty and can cause camera failure fire electric shock or injury 1 Insert the AC adapter into the AC power adapter connectio...

Страница 27: ...ion on page 3 2 Settings can be defined either through using the SCROLL and SELECT buttons or through the settings menus on the LCD Refer to the Defining settings section on page 3 3 Take a picture Define settings Enter the Capture mode You can take still burst or timelapse pictures Refer to the Taking pictures section on page 3 14 Make sure the Mode dial is pointing to CAPTURE Refer to the Enteri...

Страница 28: ...camera is ready to take pictures and the Status Display on the top of the camera turns on To turn the camera off press the POWER button again If the camera is turned off while a picture is being processed the camera will finish processing the picture before turning off 1 Turn the Mode dial to the CAPTURE setting The camera moves the lens to a point away from the camera You cannot take pictures wit...

Страница 29: ...es are divided into the following categories The Script icon only appears when a script is present on your camera It is possible for multiple script icons to appear in your menus As a first step in adjusting the Capture mode settings via the menus you need to display the Capture Mode Settings screen on the LCD Picture Type Album DC260 only White Balance Watermark Advanced Exposure Modes Advanced F...

Страница 30: ...y between each picture 2 Press the left and right arrows to highlight the icon representing the settings you want to adjust Some icons do not appear on the initial screen continue to press the right arrow to display these additional icons 3 Refer to the following subsections for information about each setting category 4 When you are satisfied with all your settings press the DONE softkey More info...

Страница 31: ...220 and DC260 can run DIGITA compatible scripts These scripts add new selections to existing menus or can create new menus and choices To remove an album highlight it and then press the DISSOLVE softkey The album is removed but its pictures are retained outside the album 1 Press the down arrow to select one of the following selections No Album your pictures are not stored in an album New Album all...

Страница 32: ...n script The chosen script may begin running or a screen containing subscripts may appear To stop a script that is running press the EXIT softkey which appears after you push the START softkey 1 Press the down arrow to highlight the type of White Balance you want to use Automatic Use this setting when taking pictures under a variety of lighting conditions This is the default Daylight Use this sett...

Страница 33: ...rk appears Date and Time The Date Time Stamp screen appears In the Date Time Stamp screen you can specify to use the date the time or both Text The Text Stamp screen appears When you select the text stamp you can select the EDIT softkey to change the text Logo The Logo Stamp screen appears When you select the logo stamp you can select the EDIT softkey to change the logo 3 Press the left and right ...

Страница 34: ...ed and the external flash sync is used to provide flash You set the camera aperture or f stop Choose from 3 4 5 6 8 11 16 or 22 The default value is 5 6 which provides an appropriate depth of field for many identification or portraiture applications To select an Advanced Exposure mode 1 Press the down arrow to choose the exposure mode you want to use 2 Press the SELECT softkey Programmed AE the pr...

Страница 35: ...ow to choose the focus mode you want to use 2 Press the SELECT softkey Multi Spot Auto Focus the camera uses a multi spot focus algorithm which determines the focus position using three positions on the lens Single Spot Auto Focus the camera uses a single spot focus algorithm which determines the focus position using the subject in the center of the lens Manual Focus the Manual Focus Setup screen ...

Страница 36: ...tes pictures to a vertical plane The Auto Rotate sensor does not function well when you are above the subject with the lens perpendicular to the floor In such cases Auto Rotate should be OFF System sounds plays shutter sounds when a picture is taken and alert sounds when an error occurs Sleep Timeout the number of minutes the camera will sit inactive with the LCD on before it goes into the low pow...

Страница 37: ...lect the date and time format you want to use 3 Press the SELECT softkey The Date and Time screen appears again 4 Press the up and down arrows to select a value for the highlighted field 5 Press the left and right arrows to move from one field to another 6 When you are satisfied with the settings press the DONE softkey ...

Страница 38: ...r case letters numbers symbols 2 Press the up and down arrows to select a character 3 Press the right arrow to add the selected character to the name Press the left arrow to backspace and press the center softkey to add a space to the name 4 Add additional characters until you have spelled the name you want using a maximum of 32 characters 5 When you are satisfied with the name press the DONE soft...

Страница 39: ...settings DC220 only To activate the Self Timer and Close up settings 1 Press the SCROLL button to scroll through the first four functions on the Status display Flash Exposure Picture Type and Quality 2 When the function you want to change is flashing press the SELECT button to toggle through the choices for the active function The new selection takes affect if you press the SCROLL button again to ...

Страница 40: ...in the LCD as well as the viewfinder press the DISPLAY button 2 Press the SHUTTER button If you are taking a still picture press and release the SHUTTER button If you are taking burst pictures hold down the SHUTTER button for as long as you want the camera to fire The camera stops firing when the available camera memory is used or when you release the SHUTTER button The resolution and quality of y...

Страница 41: ...lls with red Adding sound to a picture After taking a picture with Quickview turned on you can attach sound to the picture Once the picture disappears from Quickview you must enter the Review mode to record sound You can switch to Review mode and attach sound to a picture at any time If you have the Quickview setting turned on the camera displays the picture on the LCD and saves it to the memory c...

Страница 42: ...the RECORD button Delete Overlay and Play softkeys appear on the bottom of the screen If you press the RECORD button a second time you are given the option to delete the existing sound and record new sound for the picture 3 Press a softkey Delete Gives the option of deleting the picture and sound or just the sound Overlay Turns the Overlay off Play Plays the recorded sound ...

Страница 43: ...ng Digital zooming allows you to zoom in on a subject beyond the range provided by the optical zoom lens Digital zooming crops the center of the digital picture and resizes the new cropped picture to the size of the selected resolution You may see some pixel interpolation effects with digital zooming The camera s viewfinder cannot accurately depict a subject that is digitally zoomed You must use t...

Страница 44: ...ge 2 Press the DISPLAY button to turn on the LCD 3 Move and hold the ZOOM switch all the way to the right toward T to zoom to the camera s maximum range 4 View the subject through camera LCD The LCD displays an icon indicating that digital zoom is in effect Digital zoom is disabled when you turn the LCD off 5 Press the SHUTTER button to take the picture ...

Страница 45: ...essed With the DC220 and DC260 Cameras in the Review mode you ll know instantly Entering the Review mode 1 Set the Mode dial to Review The last picture taken appears on the LCD in a full screen view Pressing the DISPLAY button toggles between the thumbnail and full screen views Filmstrip of pictures stored on Highlighted picture Overlay from filmstrip memory card current picture position Memory ba...

Страница 46: ...iew and magnify pictures on the full LCD play back sound bursts and timelapse sequences Setting Review mode preferences The Review mode preferences allow you to set global parameters for this mode Review mode preferences include overlay slideshow video play As a first step in adjusting the Review mode settings you need to display the Review Mode Settings screen on the LCD 1 Press the MENU button T...

Страница 47: ...ictures in the 2 Press the right arrow to highlight the Review Preference icon 3 Press the down arrow to highlight the preference category you want to set 4 Press the ENTER softkey to enter the selected preference category 5 Refer to the following sections for information about each preference category 6 When you are satisfied with all your settings press the DONE softkey The LCD returns to the th...

Страница 48: ...ess the DISPLAY or MENU button or the STOP softkey to stop the slideshow Pressing the DONE softkey saves your settings and takes you back to the Review Preferences menu 1 Use the left and right arrows to choose between PAL and NTSC NTSC is generally used in the United States and Japan PAL in Europe 2 Press the DONE softkey to save your settings CANCEL takes you out of the menu without saving the c...

Страница 49: ...left arrow To review the pictures in a continuous scroll press and hold the right or left arrow The filmstrip scrolls until you release the arrow button To review the pictures in a fast scroll press and hold the right or left arrow After several pictures have scrolled by and the left softkey is labelled FASTER hold the left softkey while still holding the arrow The filmstrip scrolls until you rele...

Страница 50: ... indicator will be in the middle of the blue portion of the Memory Filled Status indicator At picture 20 the indicator will be all the way to the right of the blue area Marking pictures for an action When you want to select a number of pictures and carry out an action on them you must first mark each picture Marked pictures can be deleted copied from camera to camera or moved from album to album D...

Страница 51: ...fer to the next subsection for information about creating a new album 4 Press the MOVE softkey The marked pictures are moved to the selected album 1 Display the Album screen as described in the Placing marked pictures in an album section above 2 Press the down arrow to select New Album 3 Press the MOVE softkey The New Album Name screen appears 4 Press the left softkey to select the type of charact...

Страница 52: ...e press the DONE softkey The marked pictures are moved to the album you created and the Album screen appears 1 Place the two cameras facing each other aligning their infrared transceivers During Camera to Camera communication the cameras communicate via infrared port 2 Make sure both cameras are in the Review mode 3 Press the MENU button on the receiving camera 4 Press the down arrow key to highli...

Страница 53: ...OPEN To open an album 1 Scroll to view the picture you want to select Use any of the three methods described in the Viewing pictures section on page 4 5 2 Press the OPEN softkey The screen opens the album containing the selected picture and displays the other pictures that are stored in the album The related pictures are linked by a colored background When you have opened an album the OPEN softkey...

Страница 54: ...or timelapse picture the appropriate icon appears and the left softkey is labelled EXPAND To expand a burst or timelapse picture 1 Scroll to view the picture you want to select Use any of the three methods described in the Viewing pictures section on page 4 5 2 Press the EXPAND softkey The screen expands the selected burst or timelapse picture and displays its individual pictures on the filmstrip ...

Страница 55: ...ewing pictures section on page 4 5 2 Press and hold the RECORD button The microphone icon appears on the screen along with how long you have been recording Each picture can have only one attached sound clip If you attempt to attach a second sound clip to a picture a message appears allowing you to delete the existing sound 3 Speak into the microphone on the back of the camera 4 Release the RECORD ...

Страница 56: ...f the filmstrip 2 Press the DELETE softkey Delete Sound Only and Cancel softkeys appear 3 Press the softkey of your choice DELETE Deletes the picture and any attached sound SOUND ONLY Deletes only the attached sound This softkey appears only if the picture contains an attached sound clip CANCEL Cancels the delete operation ...

Страница 57: ...ow to mark pictures 2 Press the DELETE softkey Pressing and holding the DELETE softkey for 2 seconds will delete all the pictures on the memory card It is not necessary to mark pictures if you want to delete all your pictures A confirmation screen appears asking if you want to delete all the marked pictures 3 Press the softkey of your choice DELETE Deletes the pictures and any attached sound CANCE...

Страница 58: ...reen If you scroll to the picture as a thumbnail press the DISPLAY button to view it on a full screen 2 Press the PLAY softkey If the highlighted picture is a still picture with sound the camera plays the sound The softkeys remain DELETE MAGNIFY and PLAY when you play a sound clip If the highlighted picture is a burst or timelapse picture the camera plays back the sequence of pictures at the rate ...

Страница 59: ...on page 4 5 2 Press the MAGNIFY softkey The screen displays a magnified view of the selected picture Use the arrow keys to scroll to different parts of the picture 3 To return to a normal view press the REDUCE softkey If you use the arrow keys to move to different parts of the magnified picture the REDUCE softkey label disappears However you can still press the middle softkey to reduce the picture...

Страница 60: ...ay sound on your TV use a cable that has two connectors on the TV end Connect the yellow connector to the video in connection and the white connector to the audio in connection 4 Turn on the camera and TV 5 Set the Mode dial to Review 6 Set the TV to the correct channel for viewing video The pictures that are stored on the memory card appear on the TV screen as they appear on the LCD 7 Scroll thro...

Страница 61: ...ttings click Cancel We ll identify any properties that can also be set from the camera itself You can set camera properties for these categories General Camera Picture Type Albums DC260 only YouÕve got to connect Þrst Because you set the camera properties on your computer you first have to connect your camera to your computer Refer to Chapter 6 Connecting your camera to your computer for instructi...

Страница 62: ...unications Method Defines the type of connection you want to use between the camera and your computer Baud Rate Defines the rate at which the camera and the computer communicate This field is greyed out if USB or IrDA is selected as the communication method The GENERAL settings tab is selected by default 1 Specify the settings Refer to the following subsections for a brief description of each sett...

Страница 63: ...ture settings on the camera Camera Date and Time This date and time are assigned to each picture that you take You can set it to the same date and time as on your computer by clicking the Set to Computer Date and Time checkbox You can also set this setting through the Capture mode settings on the camera Computer Date and Time A read only display of the time and date as it is set on the computer to...

Страница 64: ... to operate Auto causes the flash to fire only when there is not enough light Fill causes the flash to fire for every picture Red eye Reduction causes the flash to fire twice once 600 milliseconds before the picture is taken to constrict the subject s pupils and once when the picture is taken Off turns the flash off You can also set this setting through the Capture mode settings and through the SC...

Страница 65: ...apture State Choose the type of picture Still Burst or Timelapse for which you want to set Picture Type settings The other fields on the screen change depending on the type of picture Picture quality Best compresses a picture the least and has the highest image quality Better compresses a picture more and has a lower image quality Good compresses a picture the most and has the lowest image quality...

Страница 66: ...cture Interval Timelapse The time between pictures in hours and minutes The minimum time between pictures is 60 seconds for both the DC220 and DC260 The maximum time between pictures is 1550 minutes for both cameras You can also set this setting through the Capture mode settings on the camera Number of Pictures Timelapse The total number of pictures to capture Approximate timelapse size Based on t...

Страница 67: ...n has pictures on it that were taken with 2 or more different DC260 Cameras Albums A display of the albums on the memory card You can create new albums or rename or delete existing albums 1 Click the ALBUMS SETTINGS tab 2 Specify the settings Refer to the following subsections for a brief description of each Albums setting 3 To apply these settings to the camera click the APPLY button ...

Страница 68: ... computer to conserve battery power While in Connect mode the camera is controlled by the computer Except for the Mode dial POWER SHUTTER and ZOOM buttons all other camera buttons are disabled The Ready light indicates when the camera is on Once software is installed and the camera is connected to a computer you are ready to transfer the pictures Refer to the appropriate chapters of this User s Gu...

Страница 69: ...n Option WINDOWS 95 WINDOWS 95a Serial IrDA 1 WINDOWS 95B also known as OSR2 Serial IrDA USB 2 WINDOWS NT 4 0 Serial 1 WINDOWS 95 and WINDOWS 95a require an IrDA Software Patch that is available from MICROSOFT s Web site Go to http www microsoft com and then search for irda Please read and understand all the instructions provided by MICROSOFT before proceeding 2 WINDOWS 95B requires the MICROSOFT ...

Страница 70: ...erify that there is at least one Communication Port If at least one Communications Port is present your computer supports an RS 232 Serial connection Connecting via a serial cable The camera can connect to a computer using the serial cable included in your camera package To connect to your computer with a serial cable 1 Plug one end of the serial cable into a COM port on the back of your PC If you...

Страница 71: ... user To determine if your computer supports a USB connection 1 Verify that a USB connector is present This connector is normally on the back of the computer 2 Click the right mouse button on the My Computer icon on your computer s desktop 3 Click on Properties in the pop up menu 4 Verify the operating system is 4 00 950b or greater 5 Click the Device Manager tab 6 Verify that the Universal Serial...

Страница 72: ...rough the air without cables or wires Like your television remote the camera requires a clear line of sight between its infrared transceiver and the infrared port on the computer IrDA Infrared Data Association compliant devices use both a transmitting mode and a receiving mode which allows these devices to acknowledge the information was received generate responses and even automatically detect th...

Страница 73: ... the Device Manager tab 4 Verify that an Infrared Devices entry exists 5 Double click on Infrared Devices 6 Verify that the Infrared port on laptops or desktop is present 7 On your computer click Start Settings Control Panel 8 Verify that the Infrared icon is present 9 Double click the Infrared icon 10Click the Options tab 11Verify that the Enable infrared communication on Com X and Search for and...

Страница 74: ...device is present 1 Place the camera facing the computer s infrared transceiver When the two infrared ports establish contact the PC emits a beep While in the Review mode you can transfer pictures from one camera to another using an infrared connection Refer to Copying marked pictures from camera to camera on page 4 8 ...

Страница 75: ...section of your computer s modem and or operating system s user s guide Some Advanced Power Management utilities on laptops can turn off ports to save battery life See the Power Management section of your laptop s user guide to disable this feature Camera is not connected to serial cable or cable is not connected to the computer s COM port Connect serial cable to camera and COM port See Connecting...

Страница 76: ... PCMCIA card adapter and placing it in your computer or a memory card reader Using the Mounter software Using Mounter software the DC220 or DC260 camera icon appears in the My Computer window dialog boxes and file browsers included in many software applications Mounter software presents the camera contents as though it were an extension of your hard drive For more detailed information on working w...

Страница 77: ...nd DC260 cameras album represents an album on your memory card DC260 only camera folders represents both the Camera Folder and the System folder The Camera Folder holds your pictures or albums The System folder holds scripts and camera firmware files burst represents burst pictures with and without attached sound timelapse represents timelapse pictures with and without attached sound picture file ...

Страница 78: ... picture files To view your pictures When the camera is correctly connected to and communicating with your computer the camera s Status Display is replaced with the following screen If the connection times out the Status Display returns 1 Double click on the My Computer icon The My Computer window appears 2 Double click on the Camera icon The Camera Folder icon appears 3 Double click on the Camera...

Страница 79: ...g to select nonadjacent pictures To transfer pictures Transferring pictures and scripts to your camera Mounter software allows you to drag and drop pictures and scripts from your computer to your camera 1 Double click on the My Computer icon The My Computer window appears 2 Double click on the Camera icon The Camera Name and System folder icons appear 3 Double click on the Camera Folder icon A win...

Страница 80: ...lbums on the camera DC260 only You can create rename and delete albums on your DC260 camera Because your computer treats the camera like another drive you can create rename and delete 1 Double click on the My Computer icon The My Computer window appears 2 Double click on the folder containing the pictures or scripts you want to write 3 Double click on the Camera icon The Camera Name and System fol...

Страница 81: ...f the file Through preferences Mounter software can Prompt you for a filename for each sound file Save the sound under the same filename as the picture with a wav extension Save no sound 1 Double click on the Camera Folder icon A window appears listing individual pictures 2 Perform one of the following operations To create a folder select File New Folder or position the cursor in the folder window...

Страница 82: ...d by placing the card in a PCMCIA ATA Card Adapter You can then place the Adapter Card in a PCMCIA drive if your computer is so equipped or into a memory card reader PCMCIA is an acronym for Personal Computer Memory Card International Association Using a PCMCIA card eliminates the need to have your camera tethered to your PC and provides a fast picture data transfer rate 1 Click the right mouse bu...

Страница 83: ... a removable memory card that complies with the CompactFlash standard Due to the size of the CompactFlash card most PCMCIA card readers do not accept the card as is but require an adapter card A KODAK DIGITAL SCIENCE Picture Card Adapter is available for your memory card to adapt the 50 pin Picture Card for use with 68 pin PCMCIA ATA compatible devices For information on ordering a Picture Card Ad...

Страница 84: ...tible PCMCIA controller is present 7 Double click on PCIC or compatible PCMCIA controller 8 Verify that device status is The device is working properly If the above conditions are met and you have a PCMCIA card for your camera you can use a PCMCIA connection A PCMCIA card is an optional accessory for the DC220 DC260 camera Memory Card Reader A memory card reader allows you to transfer pictures fas...

Страница 85: ... touch up some peeling paint add some text and insert an asking price Using KODAK Access TWAIN Acquire Software TWAIN for WINDOWS you can do just that TWAIN is special industry standard software that allows you to transfer pictures from your digital camera directly to TWAIN compliant software such as ADOBE PHOTODELUXE Installing TWAIN software If you have not installed the DC220 DC260 software ref...

Страница 86: ...amera needs to be connected to your computer and turned on Refer to Chapter 6 Connecting your Connect the camera to your computer Start the TWAIN software Select the source of your pictures Preview the picture Transfer the picture Refer to page 8 2 Refer to page 8 5 Refer to page 8 7 Refer to page 8 4 Refer to page 8 3 ...

Страница 87: ...main window of TWAIN software More detailed information is offered in the following sections When the camera is correctly connected to and communicating with your computer the camera s Status Display is replaced with the following screen If the connection times out the Status Display returns Select appropriate button to camera or computer retrieve pictures from your Picture viewing area Select Cam...

Страница 88: ...IN software displays the pictures stored on the camera s memory card If your DC260 Camera contains albums the screen displays album icons Click on an album to display its contents 2 Click on the pictures you want to select for transfer Refer to Previewing your pictures on page 8 5 1 Frame the subject of your picture in the camera s viewfinder 2 Click the TAKE PICTURE button on the TWAIN screen You...

Страница 89: ...r versions of your pictures To view your pictures as thumbnails click on the SHOW AS THUMBNAILS checkbox Viewing pictures as thumbnails will be slower than viewing pictures as files 1 Click the MY COMPUTER button on the TWAIN screen The TWAIN software displays a standard WINDOWS Open window 2 Navigate to find the pictures that you want to open 3 Click on the pictures you want and click OPEN The TW...

Страница 90: ...series of pictures taken at a specified interval TWAIN software displays both as single thumbnails with an icon indicating if the picture is a burst or a timelapse picture When you have expanded a selected picture the EXPAND button changes to a COLLAPSE button Opening a picture in full view You can also double click a picture to open it Opens any selected pictures in a full view Displays informati...

Страница 91: ...d which ones you want to transfer To play the picture s attached sound click the PLAY icon Name of the picture file Number of pictures burst and timelapse only Quality setting Resolution setting Size in bytes Date and time picture was taken Name of the album in which the picture is stored DC260 only Aperture information Exposure Time in seconds Flash information Audio attachment 1 Click on the pic...

Страница 92: ...TWAIN software can Prompt you for a filename for each sound file Save the sound under the same filename as the picture with a wav extension Save no sound 1 Click the PREFERENCES button on the TWAIN screen The Preferences screen appears 2 Specify how you want to save a picture s attached audio 3 Click the OK button to apply the settings ...

Страница 93: ...ould result in electrical shock If you notice smoke or a strange smell coming from the camera immediately turn the camera off wait a few minutes until the camera cools and then remove the batteries Cleaning the lens 1 Blow gently on the lens to remove dust and dirt 2 Moisten the lens by breathing lightly on it 3 Wipe the lens gently with a soft lint free cloth or an untreated lens cleaning tissue ...

Страница 94: ...mputer icon 2 Double click on the Control Panel icon 3 Double click on the Display icon and click on the Settings tab 4 Make note of the settings for the Color Palette and Desktop areas 5 From the Color Palette field select the highest available setting 256 High 16 bit or True 24 bit or 32 bit color and click the OK button 6 From the Desktop Area select 800 x 600 pixels Changing these values may c...

Страница 95: ...er screen Please consult your local computer dealer for more information Remember these few tips when it comes time to print your document color printing takes more time Increased complexity in your document increases the printing and drying time color printing is more memory intensive than black and white If your computer gives you an insufficient memory message you may need to close some applica...

Страница 96: ...ODAK DC220 DC260 folder Computer Monitor Problem Cause Solution The image on your monitor is jagged or inappropriately colored Monitor is not set correctly Adjust your monitor display settings See Monitor adjustment on page 9 2 Memory Card Problem Cause Solution The camera does not recognize your memory card The memory card may not be ATA compatible or CompactFlash CF certified Memory cards must b...

Страница 97: ...work Camera is not turned on Turn the camera on and verify that the green Ready light turns on Mode dial is not set to Capture Set the Mode dial to Capture Ready light is blinking Camera is processing picture Wait until Ready light stops blinking before attempting to take another picture The Status Display reads Full The memory card is full Transfer pictures to your computer or insert a memory car...

Страница 98: ...ct is in front of a bright light Change your position so the light is not behind the subject Picture is too light The flash is not needed Change to automatic flash See Flash on page 2 4 The subject is too close when the flash was used Move so there is at least 1 6 ft 0 5 m between the camera and the subject The light sensor is covered Hold the camera so your hands or other objects do not cover the...

Страница 99: ...cannot hold additional pictures Transfer pictures to your computer or insert a memory card that has available memory No Memory Card There is no memory card inserted in the camera Insert a memory card into the camera Cannot read memory card Memory card is corrupted Insert a new or reformat the memory card Camera did not establish connection The camera cannot communicate with the computer See Potent...

Страница 100: ...ictures was interrupted Not all pictures were sent An error has occurred before all pictures were transferred Try the transfer again Not enough memory There is not enough memory on the card to store the selected timelapse picture sequence Transfer pictures to your computer or insert a memory card that has available memory You can also change the timelapse sequence to one that requires less memory ...

Страница 101: ...orld Wide Web http www kodak com America Online keyword KODAK CompuServe GO KODAK Kodak Internet listserv photo cd info kodak com or ftp kodak com Faxed information Kodak offers automated support for digital imaging products and services Product information can be faxed to you by calling U S 1 800 508 1531 Canada 1 800 295 5531 Europe 44 131 458 6962 U K 44 0 131 458 6962 in Tips and Troubleshooti...

Страница 102: ... hours of 09 00 and 17 00 GMT CET Monday through Friday Outside the U S Canada and Europe call the number on the following pages that is associated with your location Country Help number Fax Argentina 54 1 808 300 54 1 808 3328 Australia 1 800 674 831 1 800 659 757 Austria 0 660 7348 44 131 458 6962 Belgium 0800 72247 44 131 458 6962 Brazil 0 800 15 0000 55 12 331 8571 Caribbean 78 7 757 5500 78 7...

Страница 103: ...therlands 06 0224428 44 131 458 6962 New Zealand 0800 500 135 64 9 302 8637 Norway 800 1 1848 44 131 458 6962 Panama 52 3 678 6200 52 3 678 6210 Peru 51 1 224 8610 51 1 224 8605 Philippines 63 2 810 0331 63 2 816 6718 Portugal 351 1 4149 500 351 14194 321 Russia 7 095 929 9166 7 095 929 9170 Singapore 65 470 9875 65 479 8397 South Africa 27 11 804 2852 27 11 804 5013 Spain 900 98 4485 44 131 458 6...

Страница 104: ... contact sheet as high resolution pictures in Preview view and in a slide show Play and save an audio attached to a picture Rotate and delete selected pictures View information on a selected picture burst folder or timelapse folder Export burst and timelapse pictures as an APPLE QuickTime movie System and Software Requirements To use Digital Access software you require the following system configu...

Страница 105: ...rt folder 6 Follow the on screen instructions to complete the installation If you do not have APPLE QuickTime installed on your system a message notifies you that you need to install it The APPLE QuickTime version 3 0 installer is located on the installation disc 7 When the software has been installed successfully a message appears prompting you to restart your computer Click Restart Digital Acces...

Страница 106: ...a memory card or a folder on your computer The Album pop up menu lets you display the contents of a DC260 album in the viewing area The view graphic icon indicates the source of the displayed pictures Indicates the picture source is the camera memory card Indicates the picture source is a DC260 camera album Indicates the picture source is a burst folder Indicates the picture source is a timelapse ...

Страница 107: ...elected pictures 90 degrees clockwise right Rotates selected pictures 90 degrees counterclockwise left Expands a burst or timelapse folder to display the pictures stored in the folder The icon changes to the Collapse icon Collapses the folder so only the first picture in the folder is displayed Plays the audio attached to a selected picture Displays the Preferences dialog box from which you can Se...

Страница 108: ...ages in the help system access an index of topics and conduct a full text search Transfer As radio buttons let you select the way in which pictures are transferred to the host application You can transfer pictures either as individual pictures or as thumbnails on a contact sheet Picture Information window displays information on a selected picture burst folder or timelapse folder The status bar in...

Страница 109: ...ansfer to the host application or save to your computer Change the display size of thumbnails on the contact sheet or pictures displayed in Preview view View pictures at a higher resolution in Preview view 2 Use the navigation pop up menu to select the camera folder 3 Click Select folder name The next time you start Digital Access software the contents of the last selected folder are displayed aut...

Страница 110: ... slide mount frame of the first thumbnail hold down the mouse button and drag the cursor across or down the contact sheet to the last thumbnail you want in the selection All the pictures Click the Select All icon on the status bar To deselect a picture Shift click it To deselect all the pictures click anywhere in the viewing area background but not on a picture Change Thumbnail and Picture Display...

Страница 111: ...e sizes The following tables show the picture display sizes for the DC220 camera and the DC260 camera DC220 Camera Percentage of Camera Resolution pixels 100 50 25 High resolution 1152 by 864 576 by 432 288 by 216 Standard resolution 640 by 480 320 by 240 160 by 120 ...

Страница 112: ...m resolution 1152 by 768 576 by 384 288 by 192 Standard resolution 768 by 512 384 by 256 192 by 128 2 From the View pop up menu select Preview 3 To change the display size choose an option from the Display Size pop up menu The actual display size depends on your camera model See the table in Change Thumbnail and Picture Display Size A single picture is displayed based on the selected display size ...

Страница 113: ...e folder as thumbnails on the contact sheet as high resolution pictures in Preview view or in a slide show Contact Sheet To view burst and timelapse pictures on a contact sheet Multiple pictures are displayed with a stack frame surrounding the pictures 1 In the application window viewing area click the burst or timelapse folder to select it 2 On the toolbar click the Expand icon You can also doubl...

Страница 114: ...g area click the burst or timelapse folder to select it and then click the Expand icon on the toolbar 2 From the View pop up menu select Preview The folder expands and a thumbnail of each picture in the folder is displayed in the viewing area The Expand icon changes to the Collapse icon To collapse the expanded folder and redisplay the contact sheet click the Collapse icon The pictures are display...

Страница 115: ...ictures 1 In the application window viewing area select the pictures you want to rotate To select multiple pictures Shift click each picture 2 On the toolbar click either the Rotate Clockwise right or Rotate Counterclockwise left icon The picture is rotated 90 degrees in the selected direction Delete Pictures To delete pictures from the picture source 1 In the application window viewing area selec...

Страница 116: ...tures in a burst or timelapse folder expand the folder and then select a picture Getting Pictures from Your Computer You can use Digital Access software to display FlashPixª and JPEG pictures saved on your computer 1 From the Source pop up menu select Change Folder The Change Folder dialog box appears The Picture Information window shows the following information for a single picture Width Height ...

Страница 117: ...hen select the pictures To transfer a single picture double click it For information on exporting the folder see Export an APPLE QuickTime Movie later in this appendix Transfer Thumbnails on a Contact Sheet To transfer thumbnails on a contact sheet 2 Use the navigation pop up menu to select the folder on your computer where the pictures are saved 3 Click Select folder name The pictures from the se...

Страница 118: ...e mount frame size you want transferred on the contact sheet The picture is sized to fit in the frame A Small frame is 3 4 inch a Medium frame is 1 5 inches and a Large frame is 3 inches In the Printable area type the width and height of your output media For information on setting the unit of measure for this section see Setting Preferences later in this appendix 5 Click OK A progress indicator a...

Страница 119: ...era memory card after they are saved to your computer click the Delete Originals checkbox 7 To save the pictures click Save Save the Audio Attached to a Picture To save the audio attached to a picture 1 In the application window viewing area select one or more pictures with an attached audio 2 Click Save As 3 In the Save As dialog box use the navigation pop up menu to select the folder where you w...

Страница 120: ...nd 6 To save the audio click Save Export an APPLE QuickTime Movie To save burst and timelapse pictures as an APPLE QuickTime movie 1 In the application window viewing area click a burst or timelapse folder to select it 2 Click Save As The Save As dialog box appears 5 Optionally in the Save Current Picture As text box type a filename 6 Click Save 3 Use the navigation pop up menu to select the folde...

Страница 121: ...tor appears as the movie is created Setting Preferences You use the Preferences dialog box to set picture transfer resolution show or hide tooltips in the application window set the unit of measure in the Transfer Contact Sheet dialog box and customize display elements on a transferred contact sheet 1 In the application window click the Preferences icon on the toolbar 7 In the Frame Interval secti...

Страница 122: ... do not want the slide mount frame or text displayed on the transferred contact sheet click the checkbox preceding the element label 6 To apply the preferences click OK 2 In the Transfer Resolution text box type a resolution The default is 300 pixels per inch ppi 3 To hide the tooltips displayed in the application window deselect the Show Tooltips checkbox 4 To display centimeters as the unit of m...

Страница 123: ...A 20 ...

Страница 124: ...purchased If the equipment does not function properly during the warranty period due to defects in either materials or workmanship Kodak will at its option either repair or replace the equipment without charge subject to the conditions and limitations stated herein Such repair service will include all labor as well as any necessary adjustments and or replacement parts If replacement parts are used...

Страница 125: ...G MAINTENANCE OR REPACKAGING INSTRUCTIONS OR FAILURE TO USE ITEMS SUPPLIED BY KODAK SUCH AS ADAPTERS AND CABLES KODAK MAKES NO OTHER WARRANTIES EXPRESS IMPLIED OR OF MERCHANTABILITY OR FITNESS FOR A PARTICULAR PURPOSE FOR THIS EQUIPMENT OR SOFTWARE REPAIR OR REPLACEMENT WITHOUT CHARGE ARE KODAK S ONLY OBLIGATION UNDER THIS WARRANTY KODAK WILL NOT BE RESPONSIBLE FOR ANY SPECIAL CONSEQUENTIAL OR INC...

Страница 126: ...ith the equipment If the original packaging has been discarded or is not available packing will be at the owner s expense The repaired or replaced unit will be shipped from Kodak within five business days from the date of the camera receipt at the service center Unless a specific Kodak warranty is communicated to the purchaser in writing by a Kodak company no other warranty or liability exists bey...

Страница 127: ...or more of the following measures 1 reorient or relocate the receiving antenna 2 increase the separation between the equipment and the receiver 3 connect the equipment to an outlet on a circuit different from that to which the receiver is connected 4 consult the dealer or an experienced radio TV technician for additional suggestions Any changes or modifications not expressly approved by the party ...

Страница 128: ...ate 5 2 burst capture rate 5 6 expanding and collapsing 4 10 pictures 2 5 playing 4 14 buttons 2 3 C camera accessories 1 4 arrow keys 2 3 buttons 2 3 connecting to your computer 6 1 infrared 6 5 IrDA 6 5 serial 6 2 USB 6 4 creating albums 7 5 date 5 3 display 2 4 batteries 2 8 close up 2 7 exposure compensation 2 5 flash 2 4 infrared communication 2 9 manual mode 2 9 picture type 2 5 pictures rem...

Страница 129: ...melapse picture settings interval 5 6 number of pictures to capture 5 6 picture size 5 6 settings 5 4 softkeys 2 3 software 1 3 time 5 3 to camera copy 4 8 troubleshooting 9 2 9 3 9 4 9 5 9 6 9 7 turning on 3 2 typical uses 1 2 zoom 3 17 digital 3 17 camera memory card getting pictures from 9 10 camera name preferences settings 3 12 Capture mode 2 3 entering 3 2 settings advanced exposure modes 3 ...

Страница 130: ... 6 8 serial 6 2 USB 6 4 creating new albums 4 7 D date and time settings 3 11 defining Capture mode settings 3 3 advanced exposure modes 3 8 advanced focus modes 3 9 album 3 5 close up 3 13 exposure 3 13 flash 3 13 picture type 3 4 3 13 preferences 3 9 quality 3 13 script 3 5 self timer 3 13 via menus 3 3 via SCROLL and SELECT buttons 3 13 watermark 3 7 white balance 3 6 deleting multiple or all p...

Страница 131: ...3 13 flash mode 5 4 focus 5 4 modes manual 3 9 multi spot 3 9 settings 3 9 single spot 3 9 four way controller 2 3 G getting help or information 10 1 10 2 H help getting 10 1 10 2 I Info mode 2 3 information getting 10 1 infrared 6 5 infrared communication 2 9 infrared connection 6 5 installing software 1 4 IR communication 2 9 IR port 6 5 IrDA 6 5 J K Kodak contacting 10 1 getting help from 10 2 ...

Страница 132: ...s 3 9 quality 3 13 script 3 5 self timer 3 13 via menus 3 3 via SCROLL and SELECT buttons 3 13 watermark 3 7 white balance 3 6 Connect 6 1 entering 6 1 manual external flash 2 9 long time 2 9 Review 4 1 setting preferences 4 2 overlay 4 3 playback 4 4 slideshow 4 3 video 4 4 mode dial 2 3 monitor problems 9 4 monitor settings 9 2 Mounter software 7 1 creating albums 7 5 exiting 7 7 opening picture...

Страница 133: ...s in TWAIN soft ware 8 4 still picture size 5 6 taking 3 14 steps for 3 1 timelapse number to capture 5 6 timelapse interval 5 6 timelapse picture size 5 6 transferring with Mounter software 7 4 transferring with TWAIN software 8 7 saving sound 8 8 type burst 2 5 settings 3 4 3 13 still 2 5 timelapse 2 5 type settings 5 4 viewing 4 1 4 5 on TV 4 16 viewing with Mounter software 7 3 Picture Card Ad...

Страница 134: ...n 5 5 still picture advanced capture mode 5 5 flash mode 5 4 focus 5 4 macro 5 4 picture size 5 6 zoom 5 5 timelapse picture interval 5 6 number of pictures to capture 5 6 picture size 5 6 Q quality 2 6 5 5 settings 3 13 quality vs resolution 2 6 R reformatting the memory card 2 10 removable memory card 2 10 reformatting 2 10 removing 2 11 removing the memory card 2 11 resolution 5 5 5 6 Review mo...

Страница 135: ...nced focus modes 3 9 album 3 5 close up 3 13 defining 3 3 via menus 3 3 via SCROLL and SELECT buttons 3 13 exposure 3 13 flash 3 13 focus modes manual 3 9 multi spot 3 9 single spot 3 9 picture type 3 4 3 13 preferences 3 9 camera name 3 12 capture 3 10 date and time 3 11 quality 3 13 Review mode 4 2 overlay 4 3 playback 4 4 slideshow 4 3 video 4 4 script 3 5 self timer 3 13 watermark 3 7 white ba...

Страница 136: ...orage status 5 6 system requirements 1 3 software installing 1 4 system requirements 1 3 T taking pictures 3 14 steps 3 1 telephoto 3 17 television viewing pictures on 4 16 time 5 3 timelapse 5 6 expanding and collapsing 4 10 playing 4 14 timelapse interval 5 6 timelapse pictures 2 5 time out settings 5 3 timer 2 7 tips adjusting the monitor settings 9 2 printing 9 3 transceiver 6 5 transfer pictu...

Страница 137: ...ferring pictures 8 7 saving sound 8 8 workflow 8 2 typical uses for the camera 1 2 U Universal Serial Bus connection 6 4 USB connection 6 4 V video preferences 4 4 viewing pictures 4 5 on TV 4 16 pictures with Mounter software 7 3 remaining memory 4 6 W watermark settings 3 7 white balance 5 4 settings 3 6 wide angle 3 17 WINDOWS camera communication problems 9 4 Z zoom 3 17 5 5 digital 3 17 macro...

Страница 138: ... A 10 11 in Preview view A 10 information A 12 on a contact sheet A 9 10 C camera memory card as picture source A 3 deleting pictures from A 11 getting pictures from A 5 6 view graphic A 3 card reader connecting A 2 collapsing burst or time lapse folder A 10 computer folder as picture source A 3 deleting pictures from A 11 12 getting pictures from A 12 13 view graphic A 3 contact sheet changing th...

Страница 139: ...ictures getting from computer folder A 12 13 L Large thumbnails A 7 M Medium resolution pictures A 8 N navigation bar in application window A 4 O on line help A 5 Open dialog box A 6 P PCMCIA card reader A 1 Picture Information window A 5 picture source pop up menu A 3 pictures See also burst pictures time lapse pictures deleting A 11 12 A 15 deselecting A 7 displaying burst and time lapse A 9 10 ...

Страница 140: ...re requirements A 1 2 Standard resolution pictures A 7 starting Digital Access software A 5 status bar in application window A 5 system requirements A 1 T text on transferred contact sheet changing color A 17 displaying and hiding A 17 time lapse pictures See also pictures collapsing expanding folder A 10 exporting as QuickTime movie A 16 17 selecting in expanded folder A 7 view graphicA 3 viewing...

Отзывы: