background image

32

www.kodak.com/go/support

Transferring, printing, tagging

Tagging your pictures

You can tag your pictures so they are easy to:

Print

Email

Organize with a favorite tag 

Organize with a tag name that you create

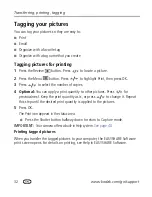
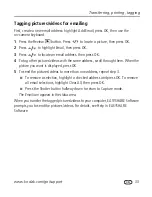
Tagging pictures for printing

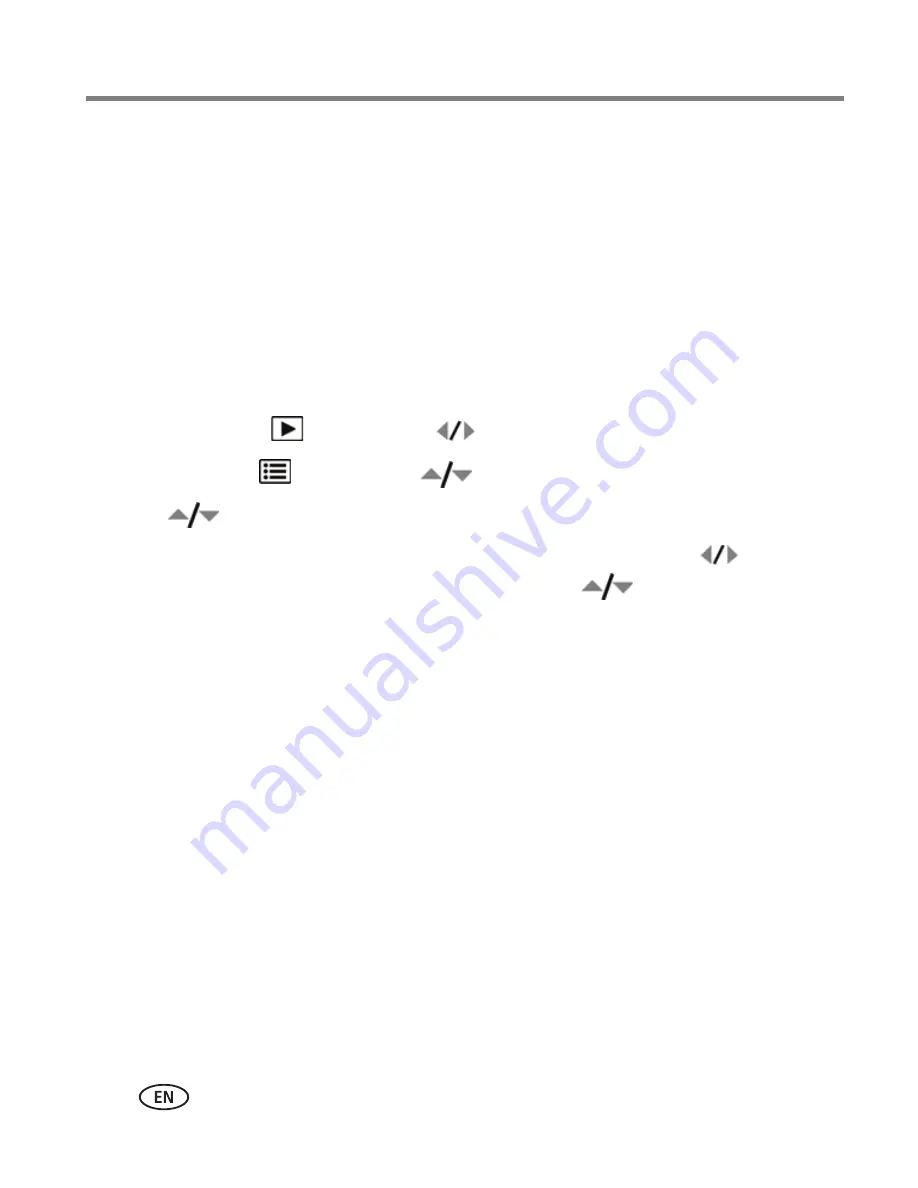
1

Press the Review 

 button. Press 

 to locate a picture. 

2

Press the Menu 

 button. Press 

 to highlight Print, then press OK.

3

Press 

 to select the number of copies. 

4 Optional:

 You can apply a print quantity to other pictures. Press 

 for 

previous/next. Keep the print quantity as is, or press 

 to change it. Repeat 

this step until the desired print quantity is applied to the pictures.

5

Press OK.

The Print icon appears in the status area.

Press the Shutter button halfway down to return to Capture mode.

IMPORTANT: 

Your camera offers a built-in Help system. 

See page 40

.

Printing tagged pictures

When you transfer the tagged pictures to your computer, the EASYSHARE Software 
print screen opens. For details on printing, see Help in EASYSHARE Software.

Содержание Cd80 - Easyshare 10.2 Mp

Страница 1: ...KODAK EASYSHARE CD80 Digital Camera Extended user guide www kodak com For interactive tutorials www kodak com go howto For help with your camera www kodak com go CD80support ...

Страница 2: ...Eastman Kodak Company Rochester New York 14650 Eastman Kodak Company 2009 All screen images are simulated Kodak EasyShare Max and Perfect Touch are trademarks of Eastman Kodak Company 4H6633_en ...

Страница 3: ...Product features www kodak com go support i Front view 1 Shutter button 5 Lens Lens cover 2 Mode dial 6 Microphone 3 Flash button 7 Self timer light 4 Power button 8 Flash 6 3 1 4 2 7 8 5 ...

Страница 4: ...roduct features Back view 1 LCD 6 OK button 2 Delete Menu Info Review buttons 7 Share button 3 Zoom Telephoto Wide Angle button 8 SD SDHC Card slot 4 Strap post 9 Battery compartment 5 USB port 10 Tripod socket 2 1 4 6 5 10 7 8 9 3 ...

Страница 5: ...sh 6 Using different modes 7 Taking a video 9 Using shortcuts 9 Using the self timer 10 Understanding the picture taking icons 11 3 Working with pictures videos 12 Reviewing pictures videos 12 Deleting pictures videos 13 Viewing pictures videos in different ways 14 Selecting multiple pictures videos 14 Running a slide show 15 Using the menu button in review 16 Cropping pictures 17 Using KODAK PERF...

Страница 6: ...es videos 29 Printing pictures 30 Tagging your pictures 32 6 Troubleshooting 36 7 Getting help 40 Getting help from your camera 40 Getting help on the Web 41 Getting help on the telephone 42 8 Appendix 43 Camera specifications 43 Care and maintenance 45 Upgrading your software and firmware 46 Storage capacities 46 Important safety instructions 46 Battery replacement battery life 47 Limited warrant...

Страница 7: ... support 1 1 Setting up your camera IMPORTANT For package contents see your product package Attaching the strap Loading the AA batteries For information on replacing the batteries and extending battery life see page 47 ...

Страница 8: ...Setting the language and date time NOTE To change language or date time in the future use the Setup menu see page 26 Press the Power button to change current field for previous next field OK to accept At the prompt press OK to change OK to accept Language Date Time OK press ...

Страница 9: ...tore more pictures videos Maximum supported card size is 32 GB CAUTION A card can only be inserted one way forcing it may cause damage Inserting or removing a card while the camera is on may damage the pictures the card or the camera Purchase accessories www kodak com go CD80accessories optional 1 Turn off the camera 2 Insert or remove the optional card 3 Turn on the camera ...

Страница 10: ...or more about framing marks page 4 Using the framing marks Framing marks indicate the camera focus area 1 Press the Shutter button halfway If the camera is not focusing on the desired subject release the Shutter button and recompose the scene 2 Press the Shutter button completely down to take the picture NOTE Framing marks do not appear in all modes Multiple framing marks may appear when faces are...

Страница 11: ...photo T To zoom out press Wide Angle W 3 Take the picture or video NOTE For focus distances see Camera Specifications starting on page 43 Using digital zoom Use digital zoom to get up to 5X magnification beyond optical zoom Press Telephoto T until the slider is at the end of the optical zoom range Release Telephoto T then press it again NOTE You may notice decreased image quality when using digita...

Страница 12: ...cklit when the light is behind the subject In low light hold the camera steady or use a tripod Red Eye Your camera can correct red eye using 2 methods To choose a red eye setting see see page 26 Preflash A preflash fires shrinking the eye pupil before the picture is taken Digital Correction A preflash does not fire the camera corrects red eye Off Never Press the flash button repeatedly to scroll t...

Страница 13: ...our needs just press the Menu button and choose Picture Size 3 2 the best choice when making 4 x 6 prints 16 9 wide screen 4 3 the default setting Close Up Close range Use available light instead of flash if possible Sport Subjects that are in motion Scene Point and shoot simplicity when taking pictures in practically any situation See page 8 Blur Reduction Reducing blur caused by camera shake or ...

Страница 14: ... or backlit when light is behind the subject Candle Light Subjects illuminated by candle light Children Action pictures of children in bright light Manner Museum Quiet occasions like a wedding or lecture Flash and sound are disabled Place the camera on a steady surface or tripod Text Documents Place the camera on a steady surface or tripod Beach Bright beach scenes Snow Bright snow scenes Firework...

Страница 15: ...OTE Sound cannot be played on the camera Sound is heard after the video is transferred to your computer Using shortcuts Your camera has a clean uncluttered interface For quick access to the most popular functions 1 Press the Info button The shortcuts appear 2 Press to access functions like Exposure Compensation Self timer and Auto focus You ll see different functions in different modes 3 Press to ...

Страница 16: ...ess to choose a setting 10 seconds A picture is taken after a 10 second delay so you have time to get into the scene 2 seconds A picture is taken after a 2 second delay for a steady shutter release on a tripod 2 shot The first picture is taken after a 10 second delay A second picture is taken 8 seconds later 3 Compose the scene Press the Shutter button halfway then completely down The camera takes...

Страница 17: ...m go support 11 Understanding the picture taking icons To learn more about shortcuts see page 9 Battery level Capture mode Pictures time remaining Date stamp Zoom indicator Tag name Self timer Flash mode Focus mode Exposure compensation ...

Страница 18: ...s see page 14 Magnifying a picture 1 Press T to magnify 1X 8X 2 Press to view other parts of a picture Press OK to return to 1X Playing a video Press OK to play a video Press OK to pause resume During playback Press to play at 2X speed press again for 4X Press to reverse at 2X speed press again for 4X NOTE Sound cannot be played on the camera Sound is heard after the video is transferred to your c...

Страница 19: ...e immediately after you delete a picture Protecting pictures videos from deletion 1 Press the Review button 2 Press for previous next picture video 3 Press the Menu button 4 Press to highlight Protect then press OK The picture video is protected and cannot be deleted The Protect icon appears with the protected picture video Press the Shutter button halfway down to return to Capture mode IMPORTANT ...

Страница 20: ...ideo press to highlight it Then press the Telephoto T button To select multiple pictures videos see Selecting multiple pictures videos page 14 Press the Shutter button halfway down to return to Capture mode Selecting multiple pictures videos Use the multi select feature when you have two or more pictures to print transfer delete etc Multi select is used most effectively in Multi Up mode Viewing as...

Страница 21: ... built in Help system See page 40 Displaying pictures videos on a television You can display pictures videos on a television computer monitor or any device equipped with a video input To connect the camera directly to a television use an A V cable may be sold separately NOTE Ensure that the Video Out setting NTSC or PAL is correct see page 27 The slide show stops if you connect or disconnect the c...

Страница 22: ...utton then the Menu button 2 Press to highlight a tab Review to view and share pictures videos Edit to edit pictures videos Setup to control how your camera operates 3 Press to highlight a setting then press OK 4 Highlight an option then press OK IMPORTANT Your camera offers a built in Help system See page 40 ...

Страница 23: ...to Capture mode IMPORTANT Your camera offers a built in Help system See page 40 Using KODAK PERFECT TOUCH Technology KODAK PERFECT TOUCH Technology helps ensure better brighter pictures 1 Press the Review button then for previous next picture 2 Press the Menu button then to highlight the Edit tab Highlight PERFECT TOUCH Tech then press OK The enhancement is previewed Press to view other parts of t...

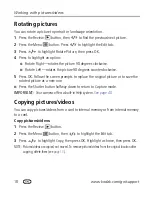
Страница 24: ...s OK Follow the screen prompts to replace the original picture or to save the rotated picture as a new one Press the Shutter button halfway down to return to Capture mode IMPORTANT Your camera offers a built in Help system See page 40 Copying pictures videos You can copy pictures videos from a card to internal memory or from internal memory to a card Copy pictures videos 1 Press the Review button ...

Страница 25: ...ompts A picture is created The original video is saved Press the Shutter button halfway down to return to Capture mode IMPORTANT Your camera offers a built in Help system See page 40 Trimming a video You can remove an unwanted start or end from a video saving only the desired portion 1 Press the Review button then to find a video 2 Press the Menu button then to highlight the Edit tab Highlight Tri...

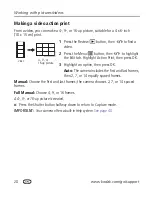
Страница 26: ...t tab Highlight Action Print then press OK 3 Highlight an option then press OK Auto The camera includes the first and last frames then 2 7 or 14 equally spaced frames Manual Choose the first and last frames the camera chooses 2 7 or 14 spaced frames Full Manual Choose 4 9 or 16 frames A 4 9 or 16 up picture is created Press the Shutter button halfway down to return to Capture mode IMPORTANT Your c...

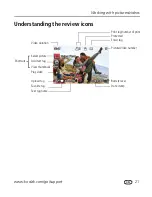
Страница 27: ...pport 21 Understanding the review icons Email tag Favorite tag Print tag number of print Protected Picture Video number Upload tag Video duration Select picture Battery level Text tag name Add text tag View thumbnails Play video Shortcuts Date stamp ...

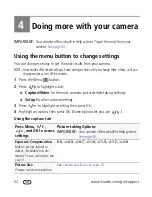
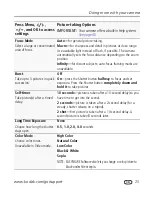
Страница 28: ...ss the Menu button 2 Press to highlight a tab Capture Video for the most common picture video taking settings Setup for other camera settings 3 Press to highlight a setting then press OK 4 Highlight an option then press OK Some options let you use Using the capture tab Press Menu and OK to access settings Picture taking Options IMPORTANT Your camera offers a built in Help system See page 40 Exposu...

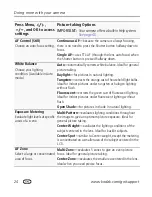
Страница 29: ...nd hold it to take pictures Self timer Take picture s after a timed delay 10 seconds picture is taken after a 10 second delay so you have time to get into the scene 2 seconds picture is taken after a 2 second delay for a steady shutter release on a tripod 2 shot first picture is taken after a 10 second delay A second picture is taken 8 seconds later Long Time Exposure Choose how long the shutter s...

Страница 30: ...indoor pictures under fluorescent lighting without flash Open Shade for pictures in shade in natural lighting Exposure Metering Evaluate light levels at specific areas of a scene Multi Pattern evaluates lighting conditions throughout the image to give an optimum picture exposure Ideal for general picture taking Center Weight evaluates the lighting conditions of the subject centered in the lens Ide...

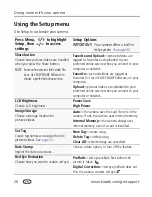
Страница 31: ...ness Control picture sharpness Sharp Normal Soft Press Menu and OK to access settings Video Options IMPORTANT Your camera offers a built in Help system See page 40 Video Size Choose a video resolution 640 x 480 30 fps VGA 320 x 240 30 fps QVGA Press Menu and OK to access settings Picture taking Options IMPORTANT Your camera offers a built in Help system See page 40 ...

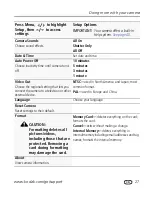
Страница 32: ...are on your computer Upload pictures videos are uploaded to your preferred online service when you connect to your computer or network LCD Brightness Choose LCD brightness Power Save High Power Image Storage Choose a storage location for pictures videos Auto the camera uses the card if one is in the camera If not the camera uses internal memory Internal Memory the camera always uses internal memor...

Страница 33: ...sed in Europe and China Language Choose your language Reset Camera Reset settings to their default Format CAUTION Formatting deletes all pictures videos including those that are protected Removing a card during formatting may damage the card Memory Card deletes everything on the card formats the card Cancel exits without making a change Internal Memory deletes everything in internal memory includi...

Страница 34: ...lications before starting the installation IMPORTANT If running WINDOWS OS do not close the WinZip application If prompted allow EASYSHARE Software to access the Internet 3 Follow the on screen instructions to install the software NOTE When prompted register your camera and software Registering lets you sign up for information that keeps your system up to date To register later visit www kodak com...

Страница 35: ...videos Using the USB cable Using other options You can also use a KODAK Card Reader to transfer your pictures videos Purchase accessories www kodak com go CD80accessories Learn more about connecting www kodak com go howto Connect a KODAK USB Cable Model U 8 Then turn on the camera ...

Страница 36: ... picture and menu If no pictures are found a message is displayed If the menu turns off press any button to redisplay it 2 Highlight a printing option then press OK Current Picture Press to choose a picture Choose the number of copies Tagged Pictures If your printer is capable print pictures that you tagged for printing and choose a print size Index Print Print thumbnails of all pictures This opti...

Страница 37: ...one of the many online print services offered in EASYSHARE Software You can easily Upload your pictures Edit enhance and add borders to your pictures Store pictures and share them with family and friends Have prints photo greeting cards frames and albums delivered to your door Printing from an optional SD or SDHC Card Automatically print tagged pictures when you insert your card into a printer wit...

Страница 38: ...r of copies 4 Optional You can apply a print quantity to other pictures Press for previous next Keep the print quantity as is or press to change it Repeat this step until the desired print quantity is applied to the pictures 5 Press OK The Print icon appears in the status area Press the Shutter button halfway down to return to Capture mode IMPORTANT Your camera offers a built in Help system See pa...

Страница 39: ...res videos with the same address scroll through them When the picture you want is displayed press OK 5 To send the pictures videos to more than one address repeat step 3 To remove a selection highlight a checked address and press OK To remove all email selections highlight Clear All then press OK Press the Shutter button halfway down to return to Capture mode The Email icon appears in the status a...

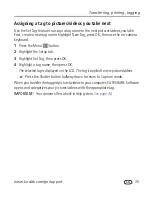
Страница 40: ... tags to pictures videos First create a new tag name highlight New Tag press OK then use the on camera keyboard 1 Press the Review button then locate a picture video 2 Press the Menu button 3 Highlight Tag then press OK 4 Highlight a tag name then press OK 5 To assign the tag to other pictures press to locate a picture then press OK The tag name appears with the picture A plus means the picture ha...

Страница 41: ... Press the Menu button 2 Highlight the Setup tab 3 Highlight Set Tag then press OK 4 Highlight a tag name then press OK The selected tag is displayed on the LCD The tag is applied to new pictures videos Press the Shutter button halfway down to return to Capture mode When you transfer the tagged pictures videos to your computer EASYSHARE Software opens and categorizes your pictures videos with the ...

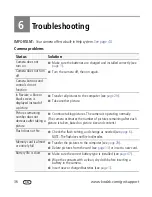
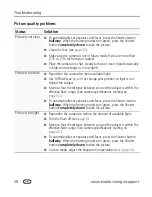
Страница 42: ...number does not decrease after taking a picture Continue taking pictures The camera is operating normally The camera estimates the number of pictures remaining after each picture is taken based on picture size and content Flash does not fire Check the flash setting and change as needed see page 6 NOTE The flash does not fire in all modes Memory card is almost or entirely full Transfer the pictures...

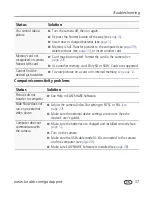
Страница 43: ...HC Cards are supported Cannot find the desired picture video To view pictures on a card or in internal memory see page 12 Status Solution Pictures do not transfer to computer See Help in EASYSHARE Software Slide Show does not run on an external video device Adjust the camera Video Out setting to NTSC or PAL see page 27 Make sure the external device settings are correct See the device s user s guid...

Страница 44: ...ion so light is not behind the subject Move so that the distance between you and the subject is within the effective flash range See camera specifications starting on page 43 To automatically set exposure and focus press the Shutter button halfway When the framing marks turn green press the Shutter button completely down to take the picture Picture is too light Reposition the camera to reduce the ...

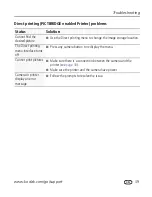
Страница 45: ...ng menu to change the image storage location The Direct printing menu interface turns off Press any camera button to redisplay the menu Cannot print pictures Make sure there is a connection between the camera and the printer see page 30 Make sure the printer and the camera have power Camera or printer display an error message Follow the prompts to resolve the issue ...

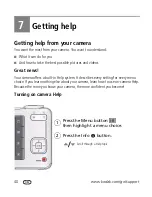
Страница 46: ...ctures and videos Great news Your camera offers a built in Help system It describes every setting for every menu choice If you learn nothing else about your camera learn how to use on camera Help Because the more you know your camera the more confident you become Turning on camera Help Scroll through a Help topic Press the Menu button then highlight a menu choice Press the Info 1 2 button ...

Страница 47: ... software www kodak com go CD80downloads See online demonstrations of your camera www kodak com go howto Register your camera www kodak com go register Get information on EASYSHARE Software www kodak com go easysharesw or see Help in EASYSHARE Software Get help with the WINDOWS Operating System and working with digital pictures www kodak com go pcbasics Get support for cameras software accessories...

Страница 48: ...Republic 00 800 56325000 Russia 8 495 929 9166 Denmark 3 848 71 30 Singapore 800 6363 036 Finland 0800 1 17056 Slovakia 00 800 56325000 France 01 55 1740 77 Spain 91 749 76 53 Germany 069 5007 0035 Sweden 08 587 704 21 Greece 00800 44140775 Switzerland 044 838 53 51 Hong Kong 800 901 514 Taiwan 0800 096 868 Hungary 06 80 456 325 Thailand 001 800 631 0017 India 91 80 41374555 toll free 000800 440 1...

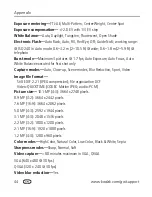
Страница 49: ...cal zoom f 2 9 f 5 5 35 mm equivalent 32 96 mm Lens protection Built in Digital zoom 5X continuous Focus system TTL AF through the lens auto focus Auto Multi Zone Center Zone Working range 60 cm 23 6 in infinity wide normal 60 cm 23 6 in infinity telephoto normal 10 70 cm 3 9 27 6 in wide Macro mode 35 70 cm 13 8 27 6 in telephoto Macro mode 10 m 32 8 ft infinity wide Landscape mode Auto focus con...

Страница 50: ...shot only Capture modes Auto Close up Scene modes Blur Reduction Sport Video Image file format Still EXIF 2 21 JPEG compression file organization DCF Video QUICKTIME CODEC Motion JPEG audio PCM Picture size 10 1 MP 4 3 3664 x 2748 pixels 8 9 MP 3 2 3664 x 2442 pixels 7 6 MP 16 9 3664 x 2062 pixels 5 0 MP 4 3 2592 x 1944 pixels 3 1 MP 4 3 2048 x 1536 pixels 2 2 MP 3 2 1800 x 1200 pixels 2 1 MP 16 9...

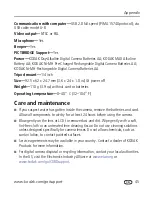
Страница 51: ... 104 F Care and maintenance If you suspect water has gotten inside the camera remove the batteries and card Allow all components to air dry for at least 24 hours before using the camera Blow gently on the lens or LCD to remove dust and dirt Wipe gently with a soft lint free cloth or an untreated lens cleaning tissue Do not use cleaning solutions unless designed specifically for camera lenses Do no...

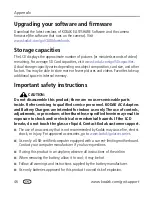
Страница 52: ...e Refer servicing to qualified service personnel KODAK AC Adapters and Battery Chargers are intended for indoor use only The use of controls adjustments or procedures other than those specified herein may result in exposure to shock and or electrical or mechanical hazards If the LCD breaks do not touch the glass or liquid Contact Kodak customer support The use of an accessory that is not recommend...

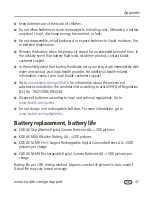
Страница 53: ...health related information contact your local Kodak customer support Go to www kodak com go REACH for information about the presence of substances included on the candidate list according to article 59 1 of Regulation EC No 1907 2006 REACH Dispose of batteries according to local and national regulations Go to www kodak com go kes Do not charge non rechargeable batteries For more information go to ...

Страница 54: ... from within the country where the Products were originally purchased You may be required to ship Products at your expense to the authorized service facility for the country where the Products were purchased Kodak will repair or replace Products if they fail to function properly during the warranty period subject to any conditions and or limitations stated herein Warranty service will include all ...

Страница 55: ...r such longer period as required by law The option of repair replacement or refund is Kodak s only obligation Kodak will not be responsible for any special consequential or incidental damages resulting from the sale purchase or use of this product regardless of the cause Liability for any special consequential or incidental damages including but not limited to loss of revenue or profit downtime co...

Страница 56: ...rmful interference to radio communications However there is no guarantee that interference will not occur in a particular installation If this equipment does cause harmful interference to radio or television reception which can be determined by turning the equipment off and on the user is encouraged to try to correct the interference by one or more of the following measures 1 reorient or relocate ...

Страница 57: ...se of this product in any manner that complies with the MPEG 4 visual standard is prohibited except for use by a consumer engaging in personal and non commercial activities China RoHS Russian GOST R Eastman Kodak Company Rochester NY 14650 AIO 40 ...

Страница 58: ...ervation des normes Classe B Cet appareil numérique de la classe B est conforme à la norme NMB 003 du Canada In Europe For human environmental protection it is your responsibility to dispose of this equipment at a collection facility established for this purpose separate from municipal waste For more information contact your retailer collection facility or appropriate local authorities or visit ww...

Страница 59: ... 5 review ii C cable audio video 15 USB 29 camera sounds 27 Canadian compliance 52 care maintenance 45 care and maintenance 45 children 8 clock setting 2 color mode 23 computer connecting camera 28 transfer to 28 connector USB A V 15 29 copy pictures card to memory 18 memory to card 18 to computer via USB cable 28 cropping pictures 17 customer support 42 customize camera 26 D date setting 2 date s...

Страница 60: ...6 flash button i flash using 6 flower 8 focus framing marks 4 focus mode 23 format 27 framing marks 4 G guidelines battery 48 H help camera help 40 Web links 40 high ISO 8 I icons modes 7 image storage 26 installing battery 1 SD SDHC Card 3 software 28 ISO speed 25 K Kodak EasyShare software installing 28 upgrading 46 Kodak Perfect Touch technology 17 Kodak Web sites 40 L language 27 LCD ii bright...

Страница 61: ... multi up 14 N night landscape 8 night portrait 8 O online prints ordering 31 P Perfect Touch technology 17 PICTBRIDGE enabled printer 30 picture size 22 pictures copying 18 cropping 17 emailing tagged 33 Kodak Perfect Touch 17 printing 31 printing tagged 32 protecting 13 review icons 21 reviewing 12 tagging 32 taking modes 7 transfer via USB cable 28 pictures video deleting 13 playing a video 12 ...

Страница 62: ...telephone numbers 42 set tag 26 setting AF zone 24 auto power off 27 auto focus 24 camera sounds 27 color mode 23 date and time 2 date stamp 26 exposure metering 24 image storage 26 ISO 25 language 27 LCD brightness 26 long time exposure 23 26 picture size 22 picture taking mode 7 self timer 10 sharpness 25 video out 27 video size 25 white balance 24 setting up the camera 1 setup menu 26 Share but...

Страница 63: ...rimming a video 19 troubleshooting 36 turning camera on and off 2 U undelete undo 13 upgrading software firmware 46 URLs Kodak Web sites 40 USB transferring pictures 28 V VCCI compliance 52 video action print 20 copying 18 edit 19 emailing tagged 33 out 27 playback 12 protecting 13 review icons 21 size 25 transfer to computer 28 viewing 12 video out 27 video size 25 viewing by multi up 14 picture ...

Отзывы: