Kodak 1079094 Скачать руководство пользователя страница 21

www.kodak.com/go/aiosupport

 15

3

Handling Paper

For the best photo printing results, use KODAK Photo Papers, which are optimized to 
work with KODAK All-in-One Printers. 

For the best document printing results, use KODAK Document Papers or a paper 
with the COLORLOK Technology logo on the package. Use only paper that is 
designed for inkjet printers.

Paper types

You can use: 

• Plain paper — 20 to 24 lb / 75 to 90 gsm

• Photo paper — 6.5 to 12 mils (up to 290 gsm)

• Card stock — 110 lb / 200 gsm, max

• Envelopes — 20 to 24 lb / 75 to 90 gsm

• Transparencies — inkjet variety with white stripe

• Labels — all commercially available inkjet varieties on 8.5 x 11-in. or A4 sheets
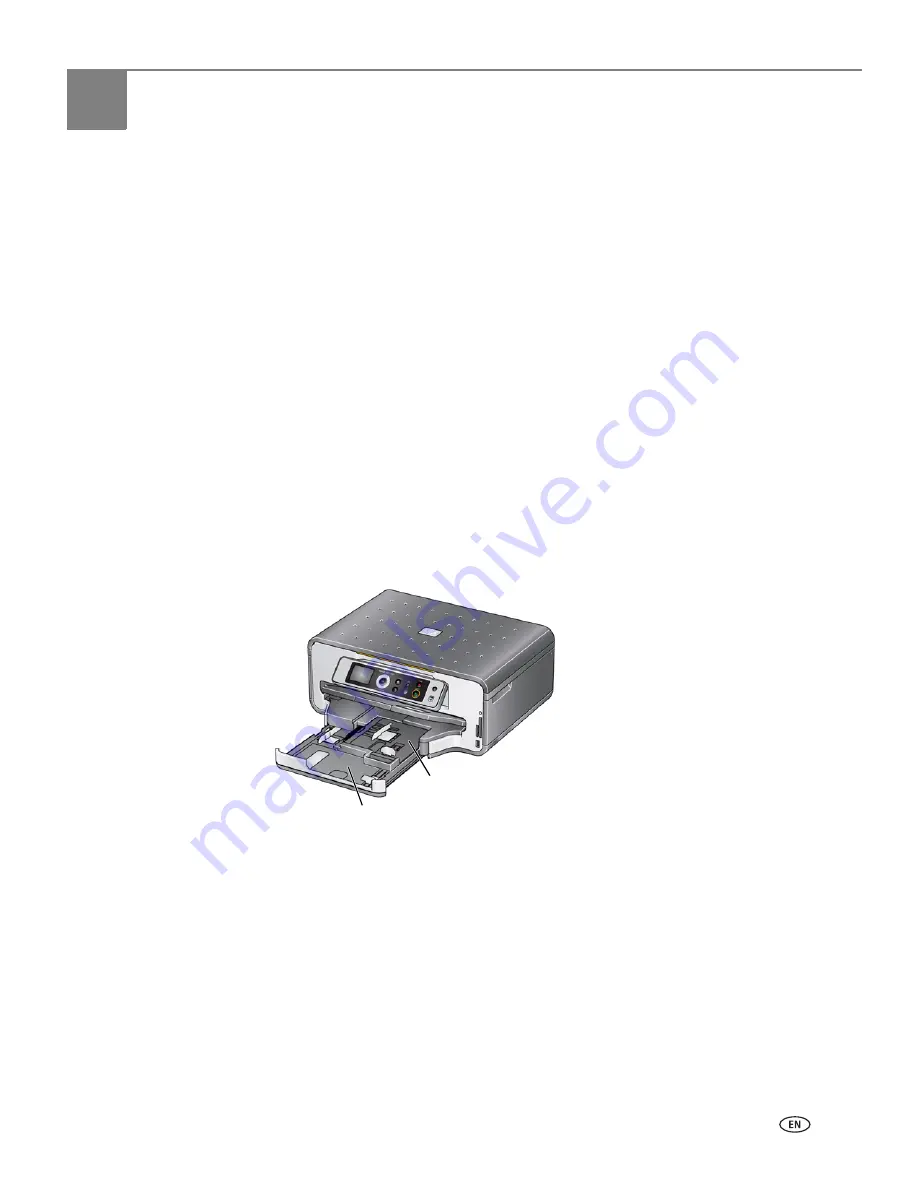
Paper sizes

This printer has two paper trays, which accept different sizes of paper.

Main (bottom) paper tray 

Photo (top) paper tray

Содержание 1079094

Страница 1: ...KODAK ESP 7200 Series All in One Printer Extended User Guide...

Страница 2: ...Kodak Company Rochester NY 14650 Eastman Kodak Company 2009 Kodak EasyShare and Perfect Touch are trademarks of Eastman Kodak Company Specifications subject to change without notice P N 1K5928 Septemb...

Страница 3: ...n to a USB connected computer 12 Changing from USB to a wireless connection 12 Changing from USB to an Ethernet connection 13 3 Handling Paper Paper types 15 Paper sizes 15 Envelope sizes 16 Loading p...

Страница 4: ...you begin scanning 50 Changing the scan settings for scanning from the control panel 50 Scanning from the computer 51 Scanning multiple pictures simultaneously 52 Scanning from the control panel 53 7...

Страница 5: ...Output paper tray 74 Ink cartridges 74 Connectivity 74 Software support 75 Physical specifications 75 Warranty 75 System requirements 76 Safety information 79 Regulatory compliance 80 FCC statement 80...

Страница 6: ......

Страница 7: ...2 Power cord port 13 Output tray extender with paper stop 3 USB port 14 Output tray 4 Ethernet port 15 Scanner glass 5 Rear access cleanout area 16 Scanner lid 6 Duplexer pulled out 17 Front paper edg...

Страница 8: ...the main menu toggles between screens 6 Zoom buttons Enlarge or reduce the size of the displayed picture 7 Start button Begins copying scanning printing maintenance task and file transfer 8 Cancel but...

Страница 9: ...this icon to start Home Center Software On a computer with WINDOWS Operating System OS you can use Home Center Software to browse crop enhance and edit pictures print and scan upgrade your printer wit...

Страница 10: ...nter date and time to your computer using the Home Center software Button Sounds Press to select On or Off Time to Low Power Press to change the time to energy saving low power select from 1 to 4 hour...

Страница 11: ...e router s embedded Web server See the manufacturer s documentation provided with your wireless system for more information IMPORTANT The SSID is case sensitive Your Wired Equivalent Privacy WEP key o...

Страница 12: ...you also need to know the security string which may be a Wired Equivalent Privacy WEP or a Wi Fi Protected Access WPA WPA2 passphrase Record your network information using the correct uppercase and lo...

Страница 13: ...name of the printer plus a number for example KodakESP7200 0229 Connecting to a WPS wireless router If your router supports Wi Fi Protected Setup WPS you can use WPS Connect WPS lets you configure yo...

Страница 14: ...m with connecting Typically it is not necessary to set up an IP address This procedure is for advanced users who know how to obtain the IP address for the printer All IP address entries have the follo...

Страница 15: ...t of the numbers Consult your Internet service provider or network administrator for more information Viewing the network configuration To view the network configuration and verify that you are connec...

Страница 16: ...must install the software for the newer model If you are connecting to another ESP 7250 printer or to a previous model On a computer with WINDOWS OS 1 Select Start All Programs Kodak Kodak Printer Net...

Страница 17: ...is successfully installed and communicating For information go to www kodak com go inkjetnetworking To connect to an Ethernet network 1 Connect the Ethernet cable to the Ethernet port on the back of t...

Страница 18: ...isable any firewall you have installed until you have successfully completed the installation For more information on firewalls go to www kodak com go inkjetnetworking 7 Select Start All Programs Koda...

Страница 19: ...ss connection is listed as the name of the printer plus a number for example Kodak ESP 7200 0229 Changing from USB to an Ethernet connection Before you connect you need An Ethernet network that includ...

Страница 20: ...hen click Next 3 Select ESP 7200 Series from the printer drop down list 4 Select Network Ethernet cable then click Next The Printer Setup Utility searches for your printer and connects automatically 5...

Страница 21: ...package Use only paper that is designed for inkjet printers Paper types You can use Plain paper 20 to 24 lb 75 to 90 gsm Photo paper 6 5 to 12 mils up to 290 gsm Card stock 110 lb 200 gsm max Envelop...

Страница 22: ...6 9 x 9 8 in 18 x 25 cm The photo paper tray accepts the following paper sizes 4 x 6 in 10 x 15 cm 4 x 7 in 10 x 18 cm 5 x 7 in 13 x 18 cm A6 4 1 x 5 8 in 11 x 15 cm NOTE Do not load paper smaller tha...

Страница 23: ...1 Raise the output tray and pull out the main paper tray 2 Make sure the left paper edge guide is to the far left 3 Move the front paper edge guide forward 4 Fan and stack the paper then insert it in...

Страница 24: ...er tray until it clicks into place and lower the output tray 8 Pull out the output tray extender until it is fully extended 9 Lift the paper stop NOTE You may also load photo paper as small as 4 x 6 i...

Страница 25: ...capacity is 100 sheets of legal size 8 5 x 14 in 22 x 36 cm paper To load legal size paper 1 Raise the output tray and pull out the main paper tray 2 Make sure the left paper edge guide is to the far...

Страница 26: ...tray extender and pull the paper tray forward until it is fully extended 5 Fan and stack the paper then insert it into the tray 6 Move the paper forward until it stops 7 Move both the left and front p...

Страница 27: ...7200 Series All in One Printer 8 Push in the main paper tray until it clicks into place and lower the output tray 9 Pull out the output tray extender until it is fully extended but do not lift the pa...

Страница 28: ...aper tray capacity is 40 sheets of photo paper To load photo paper 1 Raise the output tray and pull out the photo paper tray 2 Move the left paper edge guide to the far left 3 Move the front paper edg...

Страница 29: ...de facing up and the glossy side down IMPORTANT If the photo paper is loaded the wrong way the ink on your pictures will be wet and the image quality will be affected 5 Move the paper forward until it...

Страница 30: ...load envelopes with cutout or clear windows To load envelopes 1 Raise the output tray and pull out the main paper tray 2 Remove any paper from the tray 3 Make sure the left paper edge guide is to the...

Страница 31: ...nvelopes into the tray with the flap up and against the right side of the tray 6 Move the envelopes forward until they stop 7 Move both the left and front paper edge guides until they touch the envelo...

Страница 32: ...In the General tab under Paper tray click then select Bottom Tray or Top Tray 4 Click OK to close the Properties dialog box 5 Click OK to begin printing To change paper trays when printing from a com...

Страница 33: ...plain paper standard paper sizes letter 8 5 x 11 in 22 x 28 cm A4 8 3 x 11 7 in 21 x 30 cm executive 7 3 x 10 5 in 18 x 27 cm B5 6 9 x 9 8 in 18 x 25 cm NOTE The paper width must be 3 9 to 8 5 in 10 t...

Страница 34: ...er manually IMPORTANT Manual two sided printing will not work on bar coded photo paper the bar code is on the back side Manual two sided printing can only be done on media that can absorb ink on both...

Страница 35: ...rint 8 When the odd pages have finished printing remove the printed pages from the output tray 9 Rotate the printed pages 180 degrees and place them into the paper tray printed side up 10 Select File...

Страница 36: ...ns On a computer with either MAC OS or WINDOWS OS you can print pictures from KODAK EASYSHARE Software or any picture editing or photo management software Printing from a memory card or USB connected...

Страница 37: ...15 cm picture IMPORTANT To prevent loss of data from your memory card do not remove it from the printer while printing Changing the settings and printing a picture You can change the print photos opt...

Страница 38: ...Photos Option Settings Description View Photos Scroll through the pictures on the memory card Transfer All to PC To transfer all the pictures on the memory card to your computer press OK then Start Y...

Страница 39: ...t prints faster than Best Best The highest quality but the slowest print speed eliminates the banding effect that sometimes occurs when printing Draft or Normal Draft The fastest print speed but the l...

Страница 40: ...oose to print tagged pictures they will be printed according to the default settings on your printer unless otherwise specified by the tag from the camera NOTE Refer to your camera user guide to deter...

Страница 41: ...ive to the front USB port IMPORTANT Use only one slot or port at a time 2 Press or to select the picture you want to print then press OK 3 Press Home 4 Press to select View and Print Photos then press...

Страница 42: ...rinted NOTE You can press Zoom repeatedly to enlarge the picture in increments of 0 25 up to a magnification of 5X Press Zoom to decrease the magnification in increments of 0 25 down to 1X 4 Use the n...

Страница 43: ...printer and the device so they can communicate NOTE You must pair from your device s interface For instructions see the user manual for your device 3 Select the picture you want to print then select S...

Страница 44: ...the printer 2 Press Back 3 Press to select View and Print Photos then press OK 4 Press to select Transfer All to PC then press OK 5 Press Start 6 If your computer is connected to a wireless network an...

Страница 45: ...d brightness of your copies When you copy a document the printer will always use paper from the main bottom paper tray Using the default settings to copy a document The default settings are either the...

Страница 46: ...hen press or to change the setting Copy Document Option Setting Description Quantity 1 default to 99 The number of copies that print Color Color default Prints full color Black White Prints black and...

Страница 47: ...highest quality but the slowest print speed eliminates the banding effect that sometimes occurs when printing Draft or Normal Draft The fastest print speed but the lowest quality Photo Paper Quality...

Страница 48: ...ing or reducing a document To enlarge or reduce the size of the copy 1 Lift the scanner lid and place the document face down in the right front corner of the scanner glass 2 Close the lid 3 Press Home...

Страница 49: ...the scanner lid and place the document face down in the right front corner of the scanner glass 2 Close the lid 3 Press Home 4 With Copy Document selected press OK 5 Press to select Brightness 6 Pres...

Страница 50: ...specify otherwise Using the default settings to copy a photograph The default settings are either the factory default settings see Resetting factory defaults page 67 or defaults that you have set on t...

Страница 51: ...er of the scanner glass 2 Close the lid 3 Press Home 4 Press to select Copy Photo then press OK 5 Press to select an option then press or to change the setting Copy Photo Option Setting Description Qu...

Страница 52: ...t Good quality output prints faster than Best Best The highest quality but the slowest print speed eliminates the banding effect that sometimes occurs when printing Draft or Normal Draft The fastest p...

Страница 53: ...tograph To change the number of copies 1 Lift the scanner lid and place the photograph face down in the right front corner of the scanner glass 2 Close the lid 3 Press Home 4 Press to select Copy Phot...

Страница 54: ...nner glass 2 Close the lid 3 Press Home 4 Press to select Copy Photo then press OK 5 Press to select Copy Size 6 Press or to select the copy size NOTE If you select a copy size larger than 5 x 7 in 13...

Страница 55: ...Lift the scanner lid and place the photograph face down in the right front corner of the scanner glass 2 Close the lid 3 Press Home 4 Press to select Copy Photo then press OK 5 Press to select Bright...

Страница 56: ...our Printer page 5 Changing the scan settings for scanning from the control panel Make sure that Home Center Software is installed on the computer then change the scan settings in the Home Center Soft...

Страница 57: ...der where the scanned files will be saved Before saving a scanned file you can preview it in Home Center Software crop and sharpen the image and adjust color if desired See the Home Center Software He...

Страница 58: ...icture tab 5 Select Automatically Detect Pictures if it is not selected then click OK 6 Click the Home icon in the top right corner then select Scan Documents and Pictures 7 Make sure that Picture is...

Страница 59: ...o select Scan then press OK 5 Press to select an option then press or to change the setting Scan Option Settings Description Scan To USB connected computer default The scanned file is sent to the USB...

Страница 60: ...an settings for scanning a photograph see Changing the scan settings for scanning from the control panel page 50 Destination File default Sends the scanned file in the format and to the location on yo...

Страница 61: ...o help prevent damage to the printhead For recycling and or disposal information contact your local authorities In the US go to the Electronics Industry Alliance at www eia org or go to www kodak com...

Страница 62: ...he scanner glass and document backing CAUTION Do not use harsh or abrasive cleaners on any part of the printer Do not spray liquid directly on the glass Do not use paper based wipes on the document ba...

Страница 63: ...loth or sponge slightly moistened with mild soap and warm water 5 Dry the document backing with a chamois or soft lint free cloth NOTE If the document backing needs further cleaning use isopropyl rubb...

Страница 64: ...e When an ink cartridge is out of ink the printer LCD displays a message stating that the black or color ink cartridge needs replacing IMPORTANT Do not use non Kodak brand or refilled ink cartridges T...

Страница 65: ...r 3 Pinch the tab on the ink cartridge and lift it out of the printhead 4 Remove the new ink cartridge from its bag IMPORTANT To prevent the printhead from drying out insert the ink cartridge into the...

Страница 66: ...Maintaining Your Printer 60 www kodak com go aiosupport 6 Insert the ink cartridge into the printhead 7 Press down on the ink cartridge tab until you hear a click 8 Close the printer access door...

Страница 67: ...the printhead is not a regular maintenance procedure Replace the printhead only if you receive a new printhead from Kodak To replace the printhead 1 Make sure your printer is on 2 Lift the printer ac...

Страница 68: ...ort 4 Unlatch the used printhead by lifting the button in the center of the carriage 5 Lift the used printhead out of the carriage 6 Remove the new printhead from its bag CAUTION Do not touch the gold...

Страница 69: ...support 63 KODAK ESP 7200 Series All in One Printer 7 Remove the two plastic protective caps 8 Place the new printhead into the carriage 9 Push firmly against the target label of the printhead until y...

Страница 70: ...g Your Printer 64 www kodak com go aiosupport 10 Insert the black ink cartridge into the printhead 11 Press down on the ink cartridge tab until you hear a click 12 Repeat steps 10 11 for the color ink...

Страница 71: ...your printer is connected to a computer with WINDOWS OS To update the software 1 Make sure that your computer is connected to the Internet 2 Open Home Center Software 3 Click Tools and Documentation 4...

Страница 72: ...ssly if not currently connected 3 Select your operating system from the drop down list 4 Click Select in the Firmware box 5 Read the instructions click Download then follow the on screen instructions...

Страница 73: ...factory default settings 1 Press Home 2 Press to select Printer Settings 3 Press to select Reset All Settings then press OK 4 When you see the message This will reset printer settings to factory defa...

Страница 74: ...Make sure your printer is plugged in and turned on If you are using a USB cable make sure you have a USB 2 0 cable that the USB cable is connected to both your printer and your computer If you are usi...

Страница 75: ...e Paper jam Check for paper behind the duplexer in the rear access cleanout area Remove the duplexer and gently remove any paper from inside the printer Make sure the paper in the tray is free of tear...

Страница 76: ...kodak com go esp7250support Download the latest firmware and software for optimal printer performance www kodak com go esp7250downloads See the recommended system requirements www kodak com go esp725...

Страница 77: ...printer to finish the task On The printer is ready Wi Fi status light What it means Off The Wi Fi radio is either turned off or is turned on but not connected to a wireless network Blinks continuously...

Страница 78: ...ality mode on photo paper Quantity 1 to 99 may vary for different models of the 7200 series printers Print sizes 2 x 3 in 5 x 8 cm 3 5 x 5 in 9 x 13 cm 4 x 6 in 10 x 15 cm 4 x 7 in 10 x 18 cm 4 x 12 i...

Страница 79: ...Best Normal Draft Brightness 3 to 3 Color Black and white or color Quantity 1 to 99 copies may vary for different models of the 7200 series printers Copy sizes 2 x 3 in 5 x 7 6 cm 3 5 x 5 in 9 x 12 7...

Страница 80: ...handling 2 cartridge 6 ink system Ink life 1 year warranty from date of purchase Protocols supported USB 2 0 high speed Devices supported Computers with WINDOWS OS and computers with MAC OS mobile pho...

Страница 81: ...nning Update support Software and firmware updates available through Web support Power WW 110 240 V AC 50 60 Hz Output 36 V DC at 1 6 A Dimensions 45 x 19 x 43 cm L x W x D 17 5 x 7 4 x 16 8 in Weight...

Страница 82: ...or XP Home SP2 or later CPU Intel Celeron Clock speed 1 2 GHz Memory 512 MB RAM Available hard disk space 500 MB available Interface USB Removable drive CD ROM Computer Minimum Operating System MACINT...

Страница 83: ...nsfers All commercially available inkjet varieties on 8 5 x 11 in and A4 size sheets Plain paper A4 8 3 x 11 7 in 21 x 30 cm A5 5 8 x 8 3 in 15 x 21 cm A6 4 1 x 5 8 in 11 x 15 cm B5 6 9 x 9 8 in 18 x...

Страница 84: ...n 11 x 16 cm DL designated long 4 3 x 8 7 in 11 x 22 cm US 10 4 1 x 9 5 in 11 x 24 cm US 7 3 9 x 7 5 in 10 x 19 cm US 9 3 9 x 8 9 in 10 x 23 cm Photos 4 x 6 in 10 x 15 cm 4 x 7 in 10 x 18 cm 4 x 12 in...

Страница 85: ...not tilt or stand it on its side Never turn this product upside down ink can leak out of the product Avoid placing this product in an environment that is subject to rapid changes in temperature or hu...

Страница 86: ...occur in a particular installation If this equipment does cause harmful interference to radio or television reception which can be determined by turning the equipment off and on the user is encouraged...

Страница 87: ...m between the radiator and your person European compliance statement Hereby Eastman Kodak Company declares that this KODAK all in one wireless printer is in compliance with the essential requirements...

Страница 88: ...n the original dated sales receipt Proof of the date of purchase will be required with any request for warranty repair Limited Warranty Coverage Warranty service is only available from within the coun...

Страница 89: ...epair replacement or refund is Kodak s only obligation Kodak will not be responsible for any special consequential or incidental damages resulting from the sale purchase or use of this product regardl...

Страница 90: ...0601R3 VP 09500084 000 Radio Module Number WLU6120 Safety IEC 60950 1 2001 EN 60950 1 2001 A11 2004 UL 60950 1 2003 R7 06 CAN CSA C22 2 No 60950 1 03 Radio EN 301 489 1 V1 8 1 2008 04 EN 301 489 17 V1...

Страница 91: ...41 43 color 40 copy sizes 73 darkening 41 43 enlarging 40 42 features 73 fit to page 40 lightening 41 43 number of copies 40 41 quality 41 quantity 40 41 reducing 40 42 photos 44 49 adjusting setting...

Страница 92: ...ck sizes 77 ink cartridges location 1 replacing 58 60 ink levels 58 66 IP address 8 IP address viewing 9 iPhoto software 38 iron on transfers sizes 77 K keyboard on LCD using 5 7 KODAK EASYSHARE Softw...

Страница 93: ...ity 74 extender for legal paper 1 main 1 45 capacity 74 output 1 photo 1 45 capacity 74 selecting 45 top 45 capacity 74 paper tray main capacity envelopes 24 legal size paper 19 plain paper 17 loading...

Страница 94: ...29 R rear access cleanout area 1 recycling printer or supplies 55 reducing copies documents 40 42 photos 46 48 regulatory compliance 80 Canadian 81 European 81 German 81 REACH Article 33 declarations...

Страница 95: ...are update 66 interactive troubleshooting 69 70 iPhone software 37 iPod Touch Device software 37 Material Safety Data Sheets MSDS 80 networking 7 8 12 68 70 Pic Flick App 37 printer support 70 REACH A...

Отзывы: