background image

EN-25

User’s Manual >>

Video Mode

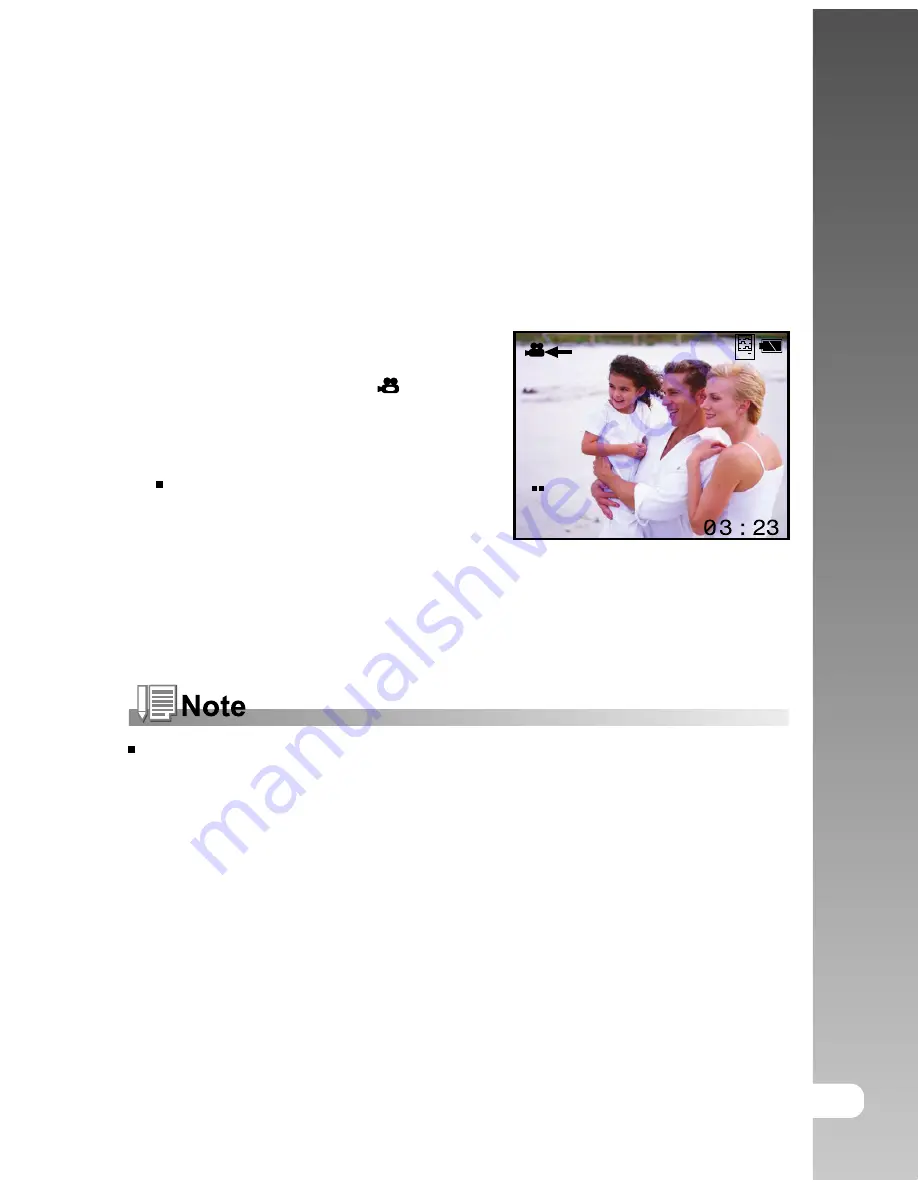
Recording Video Clips

This mode allows you to record video clips (without audio) at a resolution of VGA
/ QVGA pixels.

1. Slide the lens cover to open.
2. Press the 

POWER

 button.

3. Toggle the 

MODE

 button to 

 and press

the 

SET

 button.

4. To start recording a video clip, press

the shutter button.

The recording time depends on
the storage size and the subject of
the image to be recorded.

5. Pressing the shutter button again stops

recording.

Flash cannot be used.

Содержание CyperPix S551V

Страница 1: ... communications However there is no guarantee that interference will not occur in a particular installation If this equipment does cause harmful interference to radio or television reception which can be determined by turning the equipment off and on the user is encouraged to try to correct the interference by one or more of the following measures Reorient or relocate the receiving antenna Increas...
Страница 2: ...s that come with your camera may be different from those described in this manual This is due to the fact that different retailers often specify slightly different product inclusions and accessories to suit their market requirements customer demographics and geographical preferences Products very often vary between retailers especially with accessories such as batteries memory cards cables pouches...

Страница 3: ... electric shock For repair or internal inspection ask the store of purchase Use the specified batteries Use with any other type of batteries might cause explosion or influence the camera s performance Do not use the camera in areas near water This might cause fire or electric shock Take special care during rain snow on the beach or near the shore Do not place the camera on inclined or unstable sur...

Страница 4: ...recision instrument Do not drop it strike it or use excessive force when handling the camera This might cause damage to the camera Do not use the camera in humid steamy smoky or dusty places This might cause fire or electric shock Do not remove the batteries immediately after long period of continuous use The batteries become hot during use Touching hot batteries might cause burns Do not wrap the ...

Страница 5: ...mize their performance and lifetime we recommend that you fully charge the batteries and discharge them for at least one complete cycle before use The batteries may feel warm after long period of continuous use of the camera or the flash This is normal and not a malfunction The camera may feel warm after long period of continuous use This is normal and not a malfunction If the batteries are not to...

Страница 6: ...sory 17 Turning the Power On Off 18 Choosing the Language 18 Formatting the SD Memory Card or Internal Memory 19 Setting Image Resolution and Quality 21 CAPTUREMODE 21 Normal Mode 22 Macro Mode 22 Digital Zoom 23 Flash 24 Shooting Mode 25 Video Mode 25 Recording Video Clips 26 PLAYBACKMODE 26 Playing Back Still Images 26 Playing Back Video Clips 27 Slideshow Display 27 Protecting Images 28 Thumbna...

Страница 7: ...mputer 35 Step 3 Downloading Images and Video Files 36 USING THE DIGITAL STILL CAMERA AS A PC CAMERA 36 Step 1 Installing the PC camera driver 37 Step 2 Connecting the digital still camera to your computer 37 Step 3 Running your application software i e Windows NetMeeting 38 EDITINGSOFTWAREINSTALLATION 38 Installing Photo Explorer 39 Installing Photo Express 40 CAMERASPECIFICATIONS 41 TROUBLESHOOT...

Страница 8: ...rage External memory supports SD memory card up to 1 GB capacity Digital zoom 4X digital zoom permits zoom photography Flexible flash settings Change the flash setting according to your lighting environment and photography mode setting Focus mode Images can be captured with the distance to the subject set by normal and macro Shooting mode Capture different still images including single self timer ...

Страница 9: ...r camera and ensure that you have the following items Common Product Components Digital camera User s manual Software CD ROM USB cable Camera strap Camera pouch Common Optional Accessories SD memory card Batteries Accessories and components vary by retailer ...

Страница 10: ...e lens 3 Lens Designed to collect and focus rays of light to form a sharp image on the sensor 4 Self timer LED Blinks during Self timer mode until image is captured 5 Flash Provides flash illumination 6 POWER Power button Turns the camera power on and off 7 Shutter button Captures an image or records a video clip when the button is pressed ...

Страница 11: ...on Scrolls right MODE button Sets the camera mode 5 SET button Confirms the chosen settings Flash button Allows you to choose the appropriate flash setting 6 T button Scrolls downward MENU button Toggles OSD menu on and off 7 W button Scrolls left Zoom button Zooms in out the image 8 LCD monitor Provides menu information to operate the camera and previews the image before capturing it and review i...

Страница 12: ...ing Flash charging in progress On Camera is powered on Charging process is completed Off Flash is off Beep Beep Description 1 sound The camera is powered on Camera operation Self timer mode for the first 7 seconds After an image video clip is captured 2 sounds Cannot operate or undefined button function Low battery power 4 sounds Self timer mode for the last 3 seconds No sound Beeper is set to off...

Страница 13: ...ten Fluorescent 5 Size VGA 1 3MP 3MP 4MP 5MP 6 Quality Normal Fine Super Fine 7 Possible number of shots 8 Digital zoom indicator 9 Flash mode Flash off Auto flash Red eye reduction LCD Monitor Icons Capture mode 10 Remaining battery status Full battery power Medium battery power No battery power Blinking 11 Storage media No icon Internal memory SD memory card 1 2 3 4 5 6 7 8 9 11 10 2x ...

Страница 14: ...l files Playback mode Video preview 1 Total recorded time 2 Video mode 3 Protect icon 4 File number total files 5 Video playback stop indicator Video mode 1 Video mode 2 Storage media 3 Remaining battery status 4 Possible recording time 5 Size 6 Focus mode at preview mode only 1 2 3 4 5 6 1 2 3 1 2 3 4 5 ...

Страница 15: ...s shown in the illustration Loading the Batteries Optional Accessory You can use either 2 AAA size batteries Alkaline or Ni MH to power the camera 1 Make sure the camera is turned off 2 Open the battery cover 3 Load the batteries noting correct polarity and 4 Close the battery cover firmly ...

Страница 16: ...ory card in the correct orientation shown Removing the SD memory card Make sure the camera is turned off Press lightly on the edge of the SD memory card and it will eject To prevent valuable data from being accidentally erased from an SD memory card you can slide the write protected tab on the side of the SD memory card to LOCK To save edit or erase data on an SD memory card you must unlock the ca...

Страница 17: ...d the camera is initiated When the power is turned on the camera will start in the capture mode Turning the power off Press the POWER button to turn the power off The power is turned off automatically when the camera has not been operated for a fixed period of time To resume the operation condition turn the power on again Refer to section in this manual titled Power Off in the Setup Menu for furth...

Страница 18: ...nd press the SET button 2 Select Format with the W X buttons and press the SET button 3 Select with the W X buttons and press the SET button To cancel formatting select and press the SET button 4 To exit from the menu press the MENU button To format the internal memory do not insert an SD memory card into the camera Otherwise you will format the SD memory card Formatting the SD memory card also er...

Страница 19: ... produce large file sizes Therefore few images will take up a lot of memory space High resolution and quality settings are recommended for printed output and situations requiring the finest detail Lower resolution quality images take up less memory space and may be quite suitable for sharing images via e mail in a report or on a web page To change image resolution or image quality perform these st...

Страница 20: ...actual capacity varies according to the shooting conditions and settings Frame rate of video recording would be different depending on the SD memory card access speed If using a low access speed SD memory card it influences the frame rate and recording time Internal Memory 31 24 18 33 26 20 39 31 24 52 45 35 110 90 76 58 46 35 62 49 38 74 58 46 98 84 66 207 169 143 118 95 71 126 100 79 152 118 95 ...

Страница 21: ...that the lens cover is opened and the focus switch is set to the appropriate photography mode 1 Set the focus switch to 2 Slide the lens cover to open 3 Press the POWER button 4 Toggle the MODE button to and press the SET button 5 Compose your image in the LCD monitor Place the subject of your photo at the center and press the shutter button The LCD monitor darkens in strong sunlight or bright lig...

Страница 22: ...pen 3 Press the POWER button 4 Toggle the MODE button to and press the SET button 5 Compose the image and press the shutter button Digital Zoom Images appear closer when using the digital zoom 1 Toggle the MODE button to and press the SET button 2 Compose the image on the LCD monitor 3 Toggle the button to magnify up to 4x 4 Press the shutter button to capture a zoomed image The digital zoom funct...

Страница 23: ...flash The flash fires automatically according to the ambient lighting conditions Select this mode for general flash photography Red eye reduction Use this mode to reduce the red eye effect when you want to capture natural looking photographs of people and animals in low light conditions When capturing photographs of people the red eye effect can be reduced by increasing the room lighting if possib...

Страница 24: ...the menu screen 2 Compose the image and press the shutter button This table below will help you choose the appropriate shooting mode Shooting mode Description No icon Single Captures an image at a time Self timer The image is captured about 10 seconds after the shutter button is pressed The self timer LED blinks slowly for 7 seconds and then blinks rapidly for the last 3 seconds This allows you to...

Страница 25: ... pixels 1 Slide the lens cover to open 2 Press the POWER button 3 Toggle the MODE button to and press the SET button 4 To start recording a video clip press the shutter button The recording time depends on the storage size and the subject of the image to be recorded 5 Pressing the shutter button again stops recording Flash cannot be used ...

Страница 26: ...n the LCD monitor Playing Back Video Clips You can play back video clips on the LCD monitor 1 Press the button The last image appears on the screen 2 Select the desired video clip with the W X buttons To view the previous video clip press W button To view the next video clip press X button 3 Press the SET button Playback begins The elapsed time is displayed on the LCD monitor Press the SET button ...

Страница 27: ... 4 To stop the slideshow during playback press the SET button Slideshow SET 90 Protecting Images Set the data to read only to prevent images from being erased by mistake 1 Press the button 2 Press the MENU button 3 Select Protect with the W X buttons and press the SET button 4 Select and press the SET button Protection is applied to the image and the camera returns to the playback mode The protect...

Страница 28: ...ss the W X buttons to select the image to be displayed at regular size 5 Press the SET button The selected image is displayed at its regular size Thumbnail SET 90 Rotating the Image You can rotate still images during image playback 1 Press the button 2 Press the MENU button 3 Select Rotation with the W X buttons and press the SET button The image is in a 90 degree rotated and displayed countercloc...

Страница 29: ...ted file Delete All Deletes all of the images video clips except for the protected files 4 Select with the W X buttons and press the SET button To not delete select and press the SET button is displayed when no images are stored in the memory card or internal memory Delete SET 90 Delete All SET 90 To delete images or videos stored in internal memory do not insert a memory card into the camera Othe...

Страница 30: ...ess the MENU button Quality This sets the quality compression rate at which the image is captured Normal Fine Super Fine Size This sets the size of the image that will be captured VGA 1 3MP 3MP 4MP 5MP WB White Balance This sets the white balance capturing under a variety of lighting conditions and permits images to be captured that approach the conditions that are seen by the human eye A AUTO Day...

Страница 31: ... W X buttons 4 Press the SET button to enter its sub menu or execute its function 5 Select the desired setting with the W X buttons and press the SET button 6 To exit from playback mode press the button Delete Refer to section in this manual titled Deleting Images for further details Delete All Refer to section in this manual titled Deleting Images for further details Slideshow Refer to section in...

Страница 32: ...rescent lighting select the correct frequency setting depending in your local area s voltage This function is only effective if you set the White Balance to Fluorescent setting 50Hz 60Hz Power Off If no operation is performed for a specific period of time the power to the camera is automatically turned off This feature is useful to reduce battery wear 1 Min 3 Min Off Beeper This sets whether or no...

Страница 33: ...sk space CD ROM drive Available USB port Step 1 Installing the USB Driver Windows 98 computers The USB driver on the CD ROM is exclusively for Windows 98 computers Installing the USB driver on computers running Windows 2000 ME XP is not necessary 1 Insert the CD ROM that came with the camera into your CD ROM drive The welcome screen appears 2 Click INSTALL USB PC CAM DRIVER Follow the on screen in...

Страница 34: ...n 4 From the Windows desktop double click on My Computer 5 Look for a new Removable disk icon This Removable disk is actually the memory card in your camera Typically the camera will be assigned drive letter e or higher 6 Double click on the removable disk and locate the DCIM folder 7 Double click on the DCIM folder to open it to find more folders Your recorded images and video clips will be insid...

Страница 35: ...Your images are inside these folder s Select the images that you want and then choose Copy from the Edit menu Open the destination location folder and choose Paste from the Edit menu You may also drag and drop image files from the camera to a desired location Macintosh Open the untitled disk icon and the destination location on your hard disk Drag and drop from the camera to the desired destinatio...

Страница 36: ...mera This mode is not supported on the Mac Step 1 Installing the PC camera driver The PC camera driver included in the CD ROM is exclusively for Windows The PC camera function is not supported for Mac platforms 1 Insert the CD ROM that came with the camera into your CD ROM drive 2 When the welcome screen appears click INSTALL USB PC CAM DRIVER Follow the on screen instructions to complete the inst...

Страница 37: ...ferencing 1 Go to Start J J J J J Programs J J J J J Accessories J J J J J Communications J J J J J NetMeeting to launch the NetMeeting program 2 Click the Start Video button to view live video 3 Click the Place Call button 4 Type the e mail address or the network address of the computer that you are calling 5 Click Call The person that you are calling must also have Windows NetMeeting running and...

Страница 38: ...l for owners of digital cameras WebCams DV camcorders scanners or anyone who strives to effectively organize a large collection of digital media To install Photo Explorer 1 Insert the CD ROM that came with the camera into your CD ROM drive The welcome screen appears 2 Click INSTALL PHOTO EXPLORER 8 0 Follow the on screen instructions to complete the installation For more information about the oper...

Страница 39: ...ols photographic filters and special effects Embellish projects by adding creative design elements such as frames callouts and stamp objects Share results with family and friends via e mail and multiple print options To install Photo Express 1 Insert the CD ROM that came with the camera into your CD ROM drive The welcome screen appears 2 Click INSTALL PHOTO EXPRESS 5 0 Follow the on screen instruc...

Страница 40: ...edia 16 MB internal memory 16 MB available for image storage SD memory card up to 1 GB capacity optional File format JPEG AVI for video clip Lens Focal length f 8 5mm F number 2 8 Focus range Normal 1 5m infinity Macro 0 4m 0 6m Frame rate VGA 10fps QVGA 15fps Digital zoom 4x digital zoom Capture mode Terminal USB connector Power supply 2 AAA Alkaline 1 5V or Ni MH 1 2 V batteries Dimension W x H ...

Страница 41: ...tteries or camera feels warm Cause The batteries are not loaded The batteries are exhausted T h e c a m e r a w a s l e f t unattended and unused so the auto power off cuts it off The batteries are exhausted It is being used in extreme low temperature Many shots are being captured in dark places inside requiring flash Long period of continuous use of the camera or the flash Solution Load the batte...

Страница 42: ...nction is activated The memory card is write protected The power is not on The lens cover is not open The flash is set to off The image is captured in a dark place while set to flash off Solution Replace with a new set of batteries Turn the power on Toggle the MODE button to shooting mode Insert a new memory card or delete unwanted files Insert a new memory card Wait until the status LED lights gr...

Страница 43: ...a memory card that was formatted and stored on by this device Remove the write protection Remove the write protection Insert a new memory card Other problems Symptom Cannot insert the memory card E v e n w h e n t h e camera s buttons are pressed it does not operate Cause The card is facing the wrong way The batteries are running low Solution Insert correctly Replace with a new set of batteries Ab...

Отзывы: