19
2
2
1
2
1
8
1
1
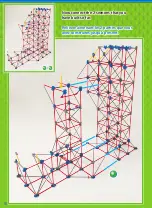
Push the connector onto the plastic pins
(1)
. To attach the metal
adapter align the first set screw
(2)
with the flat side
(3)
of the
motor shaft and push together. Then tighten the set screw.
Poussez le connecteur sur les broches en plastique
(1)
. Pour
attacher l’adaptateur métallique alignez la première vis de
réglage
(2)
avec le côté plat
(3)
de l’arbre du moteur et pousser
ensemble. Puis serrer la vis de réglage.
(2)
(2)
(1)
(3)
(3)
(1)
(Designer note: The gray motor in
this shot was a proto-type that we
used, while the new blue motor
was still being engineered.)
(Remarque du concepteur :
Le moteur gris utilisé est un
prototype, tandis que le nouveau
moteur bleu est à étape de
conception.)
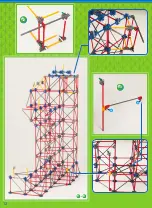
Be sure to push the 2 tan
connectors into the holes of
the red gears
(3)
.
Assurez-vous de pousser les 2
connecteurs tan dans les trous
du pignons rouge
(3)
.
Push black rod
(1)
fully into coupler
(2)
.
Tighten set screw with a screwdriver.
Poussez la tige noire
(1)
pleinement dans le
coupleur
(2)
. Serrer la vis de réglage avec un
tournevis.
26
27
28
1
28
Содержание Son of serpent
Страница 4: ...4 3 1 3 2 2 1 12 1...
Страница 6: ...6 5 x34...
Страница 7: ...7 6 6 10 1 11 1 1 1 1 7 9 4 2...
Страница 8: ...8 7 x14 2 6 2 2...
Страница 9: ...9 8 x14...
Страница 11: ...11 10 11 1 1 1 1 1 1 2 2...
Страница 12: ...12 12 13 1 13 1 1...
Страница 13: ...13 14 15 14 15 1 1 7 1 1 1 1...
Страница 14: ...14 16 14 16 x14...
Страница 15: ...15 17 14 17 x12...
Страница 16: ...16 22 A B C D 18 A 19 B 18 22 21 D 20 C 4...
Страница 17: ...17 23 24 14 24...
Страница 18: ...18 25 1 25...
Страница 20: ...20 1 1 2 2 1 1 1 30 30 29...
Страница 22: ...22 36 1 36...
Страница 23: ...23 37 38 39 1 39 1 1 2 1 1 2...
Страница 24: ...24 40 41 1 41 6...
Страница 25: ...25 42 43 44 1 44 2 2 2 3 6 6 1 2...
Страница 26: ...26 A B C B D B E 50 45 46 47 48 49 45 50 Bx3 A C D E...

