background image

1.  

LCD display

: It exhibits the different icons previously described.

2.  

Laser beam button

: Press it to activate the beam and direct the 

audience’s attention to the portion you want it to focus on.

3.  

Scroll forward button

: Press this button to go to the next slide.

4.  

Scroll backward button

: Press this button to go to the previous 

slide.

5.  

Main screen button

 (presentation): Press this button to enter 

the main screen mode. Once in main screen mode, press and 

hold this button to enter the black screen mode, press and hold 

it again to exit this mode.  

6.  

On/Off button

: Press this button to turn the device on or off.

7.  

Countdown set up

: Press and hold this button briefly to set the 

countdown function. The minute portion in the LCD display 

will start blinking first. Press this button again to switch to the 

hour portion, which will also start blinking.

    a. Set the countdown by pressing the 

Scroll forward/ 

backward button

. Press these buttons briefly to increase or 

decrease the time in steps of one minute/one hour (pressing 

these buttons longer will decrease or increase the time rapidly). 

    b. Press the 

Pointer button

 briefly to confirm the action and 

start the countdown.


Note:

 The presenter will silently vibrate with a 2 and 0 minute 

warning, giving you and indication that your time limit is 

approaching. During the countdown, press the 

Countdown 

button

 briefly to pause this action. Press and hold this button 

when you need to reset this function.

8.  

Clock setting button

: Press this button to set the time (the 

default mode is the minute set up). The minutes in the LCD 

display will start to blink. Then, press the 

Clock setting button


to switch and adjust the right time setting.

    a. Set the clock by pressing the 

Scroll forward/backward 

button

. Press these buttons briefly to increase or decrease the 

time in steps of one minute/one hour (pressing these buttons 

longer will decrease or increase the time rapidly).

    b. After setting the clock, press the 

Pointer button

 briefly to 

confirm this action.

9.  

Micro-USB charging port

: Use this port to charge your device.

10.  

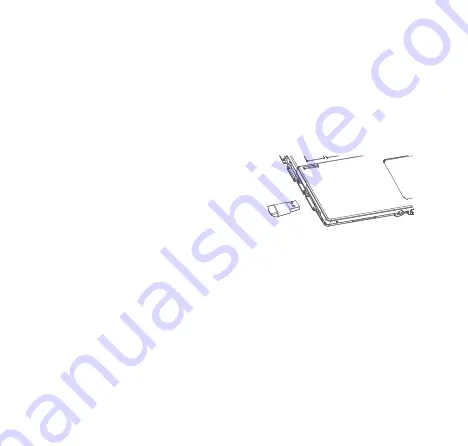
USB receiver

: Use this device to synchronize your computer 

with the presenter.

5. Description of functions

1. Remove the USB receiver from the wireless presenter. 

Power on the presenter by sliding the on/off switch to its 

ON

 position. The presenter will vibrate briefly and the 

LED light on the LCD display will light up.

2. Connect the USB receiver into the USB port of the PC or 

laptop.

3.  Turn on your computer, if you have not done so already. 

 Note:

 The radio frequency (RF) codes are factory preset 

for your convenience; the presenter should be functional 

at this point.  

4. No further configuration is necessary. Now you can start 

enjoying instant and trouble-free wireless connectivity to 

launch and manage your presentations seamlessly, from 

any spot in the room. Remember to put the USB receiver 

back into the wireless presenter, and turn off the device 

when you are not using it.

6. Connecting the presenter to

  the computer

Содержание Savant KPP-015

Страница 1: ...KPP 015 Savant...

Страница 2: ...bility Keep track of time and set intervals with a handy timer and vibrating alarm This outstanding device will make you feel in control and never miss a point in your presentation We invite you to vi...

Страница 3: ...and wireless freedom of up to 300 feet It automatically enters into a standby mode when not in use to save battery life Embedded USB 3 0 receiver Plug and Play configuration software driver not requi...

Страница 4: ...hold this button when you need to reset this function 8 Clock setting button Press this button to set the time the default mode is the minute set up The minutes in the LCD display will start to blink...

Страница 5: ...ackward button on the presenter Turn OFF ON the presenter while holding the backward button until the PowerPoint presentation starts responding to the back forward function When this process finishes...

Страница 6: ...llowing measures Reorient or relocate the receiving antenna Increase the separation between the equipment and receiver Connect the equipment into an outlet on a circuit different from that to which th...

Страница 7: ...compatible y funcional Lleva registro del tiempo y programa intervalos con el pr ctico temporizador y la alarma vibratoria Este magn fico dispositivo te har sentir en control y nunca olvidar s ning n...

Страница 8: ...tom ticamente al modo de pausa cuando no est en uso para ahorrar energ a de la bater a Receptor USB 3 0 empotrado Configuraci n autom tica plug and play no requiere software de instalaci n Cumple con...

Страница 9: ...e para programar la funci n de cuenta regresiva La secci n de los minutos en la pantalla de LCD parpadear en primer lugar Oprima nuevamente este bot n para pasar a la porci n de la hora que tambi n co...

Страница 10: ...sentador mientras oprime el bot n de retroceder hasta que la presentaci n en PowerPoint comience a responder a la funci n de avanzar retroceder Cuando este proceso finaliza exitosamente significa que...

Страница 11: ...guientes medidas con el objeto de corregir la situaci n Vuelva a orientar o cambie la ubicaci n de la antena receptora Aumente la distancia que separa al equipo del aparato receptor Conecte el equipo...

Страница 12: ...r da dura o da apresenta o e defina os intervalos com o cron metro til e alarme vibrat rio Sinta se em controle da situa o e nunca se perca durante sua apresenta o com este excelente dispositivo Convi...

Страница 13: ...a dist ncia de at 100 metros Entra automaticamente em modo de espera quando n o estiver em uso para economizar bateria Receptor USB 3 0 embutido Configura o plug and play n o necess rio um driver de s...

Страница 14: ...incipal Uma vez no modo de tela principal pressione e segure este bot o para entrar no modo de tela preta pressione e segure o novamente para sair deste modo 6 Bot o LIGA DESLIGA Pressione este bot o...

Страница 15: ...r DESLIGUE LIGUE o apresentador mantendo o bot o Regressar pressionado at que a apresenta o do PowerPoint comece a responder fun o regressar avan ar A comunica o ser reestabelecida quando esse process...

Страница 16: ...entre o equipamento e o receptor Conectar o equipamento em uma sa da de um circuito diferente do que o receptor est conectado Consultar o revendedor ou um t cnico em r dio TV para ajuda Os produtos el...

Страница 17: ...as las dem s marcas y nombres comerciales son propiedad de sus respectivos due os Cualquier menci n de los mismos es por motivo de identificaci n solamente y por ende no constituye reclamo alguno a un...

Отзывы: