Klein + Hummel
Installation and Operating Manual CLS FX Series
English
3
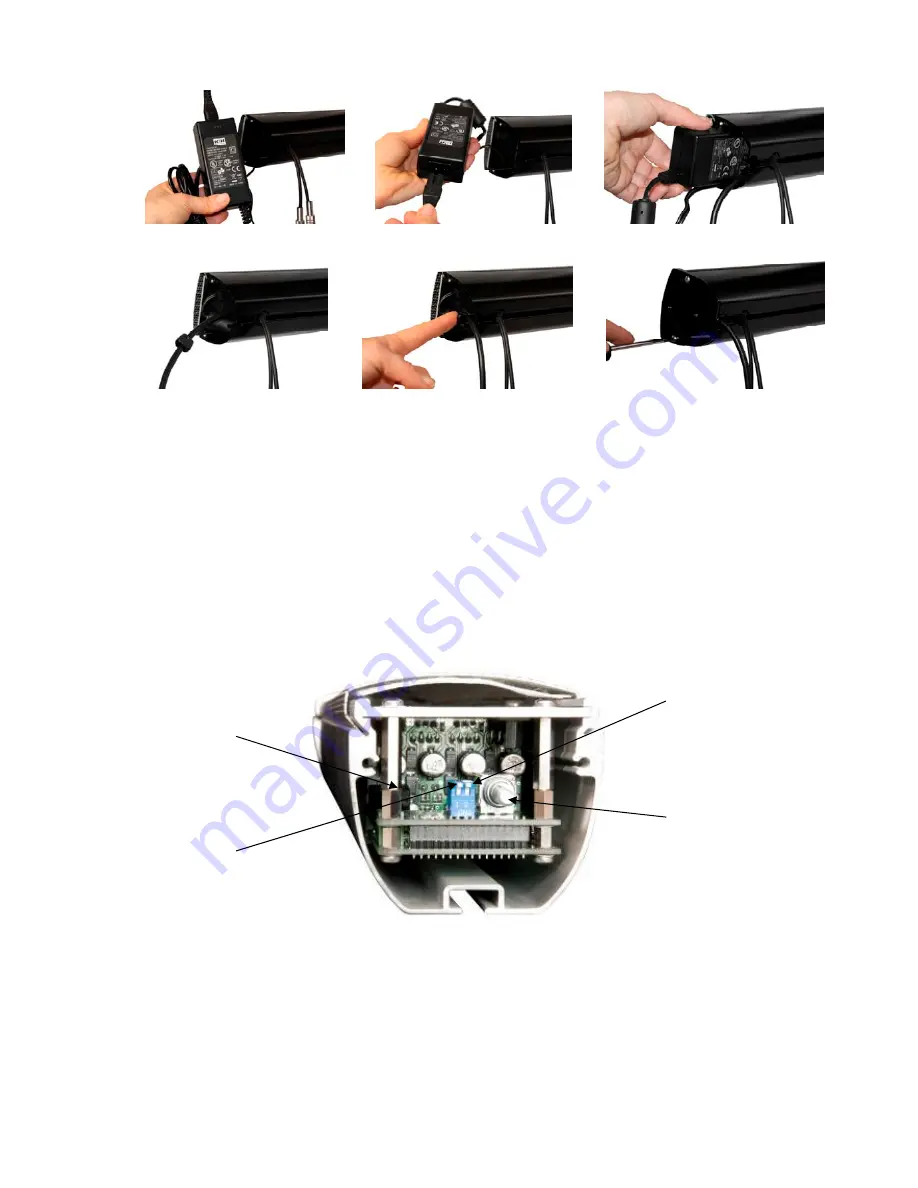
figure 4
figure 5
figure 6
figure 7
figure 8
figure 9
■
Audio Adjustment
The line level input of the loudspeaker expects to see -10 dBV nominal, the level provided by many consumer audio
devices. Higher input levels may be used or the volume of the loudspeaker may be turned down by adjusting the
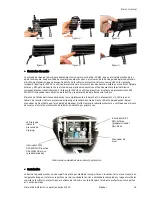
attenuator behind the end cap as shown below. The DIP switch #1 is used to select between stereo or mono
operation where switch ON=Stereo and switch OFF=Mono. For mono operation connect only the left channel or
white connector. DIP switch #2 is used to activate the SRS WOW HD processing including TruBass and loudspeaker
equalization.
The Level Attenuator is set full clockwise (no attenuation) by default when shipped from the factory. A flashing red
LED on this circuit board indicates input clipping. If this LED flashes turn the level attenuator down until the
flashing stops. Always remove the end cap and verify the level trim is set properly when setting up a system for
the first time.
Audio adjustments behind end cap
■
Mounting
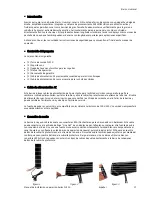
Mounting the loudspeaker onto a flat surface may be accomplished by using the included L-brackets as shown
below. Attach the L-brackets to the wall using appropriate fasteners or anchors and then screw the L-brackets into
the end cap of the loudspeaker. L-brackets and end cap screws are included.
DIP Switch 1
OFF=WOW HD Off
ON=WOW HD On (default)
Level Attenuator
DIP Switch 2
OFF=Stereo (Default)
ON=Mono
Red clip LED
Содержание CLS-2FX100-B
Страница 2: ......


