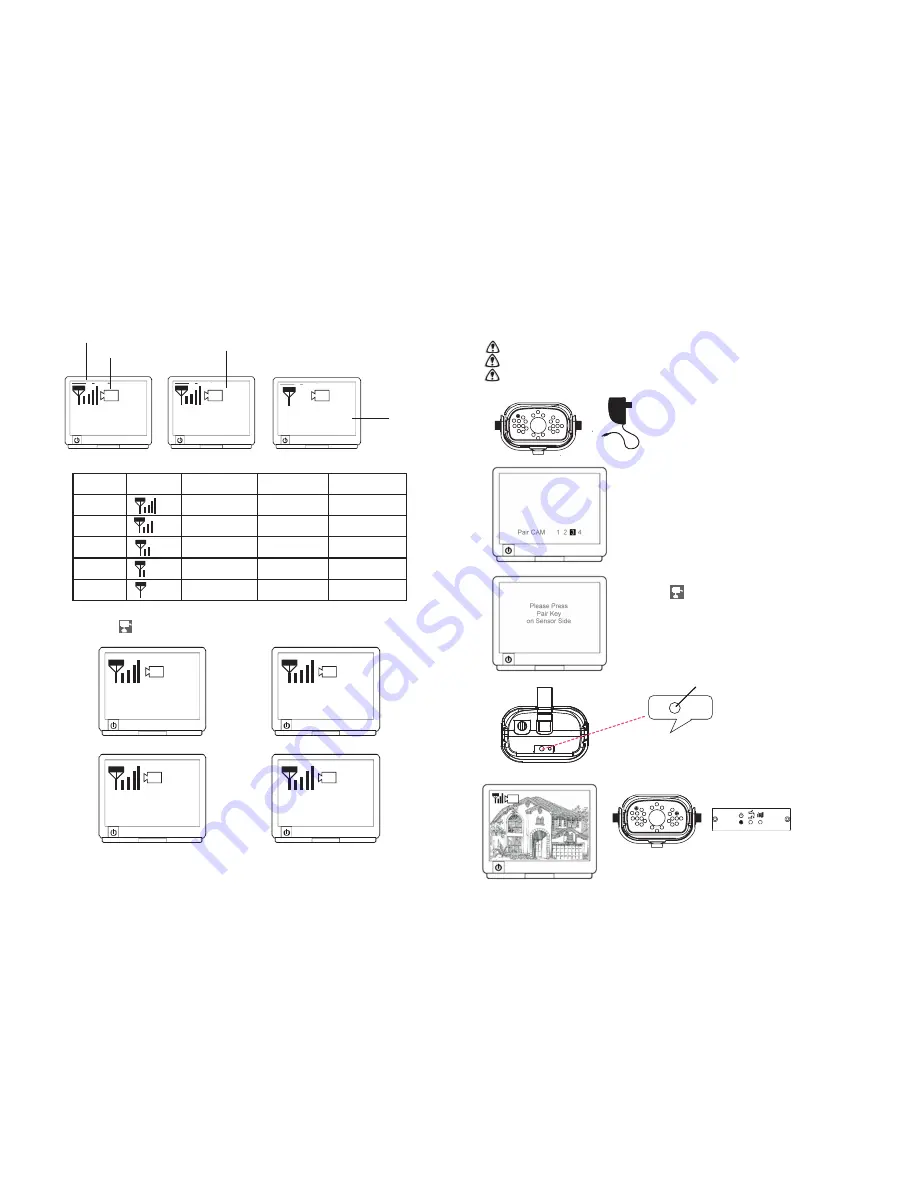
In the View Mode
NO SIGNAL
A. Signal Indicator shows signal strength, more dots means stronger signal.
Signal Level
Indicator Data Rate VGA Frame Rate QVGA Frame Rate
Perfect
1062~1280Kbps
5~10Fps 15~30Fps
Good
725~1062Kbps
3~5Fps 12~20Fps
Fair
543~725Kbps 2~4Fps 8~15Fps
Low
250~543Kbps 0~1Fps 0~4Fps
Zero
0~250Kbps 0Fps 0Fps
B. Channel indicator shows the current camera being picked up by the receiver
By pressing (Cam), you can manually switch among multi cameras.
Or you can set up auto scan in the Menu Mode.
Signal Indicator
Channel Indicator
Zoom Indicator
Status Indicator
ZOOM
Camera 1
Camera 2
Camera 3
Camera 4
C. When System Message shows “NO SIGNAL”, it means Service out of Range.
Please refer to Trouble Shooting page.
7
1
1
1
1
2
3
4
12
Pairing key
Pairing Camera(s)
This function is available for multi cameras users.
It is highly recommended to pair the camera before hardware installation.
Before pairing the camera, make sure camera is power ON, camera status indicator
as shown:
A. Simply pair the camera by selecting the
desired channel in Menu Mode.
B. Only assign one camera to one channel.
Channel memory will be overwritten if
next camera is assigned to same channel.
C. Pairing new camera to channel 3, settings
as shown:
D. Press (Pair).
E. System will count down within 60
seconds, system message as shown:
F. W
ithin 60-seconds count
down, press the Pair Key
on the back of camera.
G. Once pairing
completed,
camera and
receiver status
indicators as
shown.
60
3


