background image

4

EN

CLEANING AND MAINTENANCE

• Do not immerse the main body in water.

• Always unplug the window vac from the charger before cleaning or maintenance.

• Wash the microfibre cloth in warm soapy water and let it dry properly.

• To clean the exterior of the window vac, wipe it with a soft damp cloth and then let it dry 

properly.

• Clean the squeegee vacuum head and spray head in warm soapy water and let it dry.

USE

CHARGING

Before first use, charge the product for 4 hours.

The window vacuum needs to be charged for 4 hours for 30 minutes of continuous use.

How to charge:

1. Connect the lead from the charger to the charging port (11) on the window vac.

2. Plug the charger into the mains. During charging the indicator (10) will light red. When the 

window vac is fully charged, the indicator will light green.

3. Remove the charger from the mains and the connector from the window vac.

Note: If the indicator is flashing, the window vac is not charging, press the power button (8) to 

reset the window vac.

1. Wipe the front edge of the squeegee (1) to remove any impurities.

2. Remove the clean water tank cap (3) and fill the tank with water using the water jug. Make 

sure not to overfill. You can add a small amount of window cleaning solution.

3. Pull trigger (9) to spray the solution on a window and wipe any excess dirt with the cloth.

4. Turn the window vac on by pressing the power button (8).

5. Move the window vac vertically from the top to the bottom of the window, until the window is

clean.

6. Hold the window vac at the bottom of the window to suck any excess dirty water.

7. Turn the window vac off when the dirty water tank (12) is full.

8. Open the dirty water tank cap (6) and pour the content away.

Note: Always unplug the window vac from the charger before assembly, cleaning or 

maintenance.

Содержание KWC 7105

Страница 1: ...kullanım kılavuzu mode d emploi instruction manual FR TR EN şarjlı cam temizleyici rechargeable window cleaner nettoyeur rechargeable de fenêtre KWC 7105 ...

Страница 2: ...tion Turn the product off and disconnect the charging adapter from the mains outlet before installing accessories performing maintenance or in the case of any failure The unit is suitable for domestic use only It is not designed for commercial operation Do not vacuum any burning objects such as cigarettes matches or hot ash Do not use the unit in wet rooms Do not vacuum wet objects liquids or flam...

Страница 3: ...m head 1 on the main body An audible click will be heard when it is in place 2 Use the velcro to attach the microfibre cloth 7 on the squeegee vacuum head 1 Squeegee vacuum head 2 Spray nozzle 3 Clean water tank cap 4 Clean water tank 5 Charger 6 Dirty water tank cap 7 Microfibre cloth 8 Power button 9 Trigger 10 Charge indicator 11 Charging port 12 Dirty water tank Accumulator voltage DC 3 7 V Ch...

Страница 4: ...light green 3 Remove the charger from the mains and the connector from the window vac Note If the indicator is flashing the window vac is not charging press the power button 8 to reset the window vac 1 Wipe the front edge of the squeegee 1 to remove any impurities 2 Remove the clean water tank cap 3 and fill the tank with water using the water jug Make sure not to overfill You can add a small amou...

Страница 5: ...omestic appliances you contribute an important push to the protection of our environment Ask your local authorities for information regarding the point of recollection TROUBLESHOOTING Questions Answers It does not spray Fill the water tank with water Spray nozzle is blocked Fill the tank with warm water and gently pull the trigger to unblock the nozzle If this fails contact the customer service Wa...

Страница 6: ...vant de monter les accessoires pour le nettoyer ou en cas de panne L appareil est exclusivement destiné à un usage domestique il n est pas prévu à des fins commerciales N aspirez aucun objet brulant ou fumant tel que les cigarettes les allumettes ou de la cendre chaude Ne pas utiliser l appareil dans des locaux humides ne pas aspirer d objets humides de liquides de liquides inflammables tels que l...

Страница 7: ...ur sur le corps de l aspirateur jusqu à ce qu il s enclenche 2 Fixez la housse en microfibre sur le suceur à l aide des bandes velcro 1 Embout d aspiration avec spatule 2 Buse de pulvérisateur 3 Couvercle du réservoir d eau propre 4 Réservoir d eau propre 5 Chargeur 6 Couvercle du réservoir d eau sale 7 Housse en microfibre 8 Bouton marche arrêt 9 Levier du pulvérisateur 10 Indicateur de charge 11...

Страница 8: ... rouge en vert 3 Débranchez le chargeur de la prise et enlevez le connecteur de l appareil Note Si l indicateur de charge clignote cela signifie que l appareil ne se charge pas Appuyez sur le bouton marche arrêt 8 pour relancer le chargement 1 Essuyez le bord avant de la spatule 1 et éliminez toutes les impuretés 2 Enlevez le couvercle du réservoir d eau propre 3 et à l aide du gobelet remplissez ...

Страница 9: ...urnisseur afin qu il vous commande un neuf Perte d aspiration L aspirateur n est pas suffisamment chargé DIRECTIVES POUR LA PROTECTION DE L ENVIRONNEMENT Cet appareil ne doit pas être jeté aux ordures ménagères à la fin de sa durée de vie mais doit être rendu à un centre de recyclage d appareils ménagers électriques et électroniques Ce symbole sur l appareil La notice d emploi et l emballage attir...

Страница 10: ...alışmaya devam etmeden önce blokajı kaldırın Aksesuarları kurmadan önce ürünü kapatın ve şarj adaptörünü elektrik prizinden çekin bakım yapmak veya herhangi bir arıza durumunda Ünite sadece ev içi kullanıma uygundur Ticari kullanım için tasarlanmamıştır Sigara kibrit veya sıcak külü gibi yanmış nesneleri vakumlamayın Üniteyi ıslak odalarda kullanmayın Islak nesneleri sıvıları veya benzin gibi yanı...

Страница 11: ...deye yerleştirin Yerinde olduğunda sesli bir tıklama duyulur 2 Mikrofiber bezin 7 silecek vakum kafasına takılması için cırt cırt kullanın 1 Çekçek vakum başlığı 2 Püskürtme başlığı 3 Temiz su deposu kapağı 4 Temiz su deposu 5 Şarj Cihazı 6 Kirli su deposu kapağı 7 Mikrofiber Bez 8 Güç düğmesi 9 Tetikleyici 10 Şarj göstergesi 11 Şarj noktası 12 Kirli su deposu Akü voltajı DC 3 7 V Şarj adaptörü vo...

Страница 12: ...u tamamen şarj olduğunda gösterge yeşil yanar 3 Şarj cihazını elektrik şebekesinden ve konektör pencereden boşaltın Not Gösterge yanıp sönüyorsa vakum lambası şarj edilmiyorsa cam boşluğunu sıfırlamak için güç düğmesine 8 basın 1 Kirleri temizlemek için sileceğin 1 ön kenarını silin 2 Temiz su deposu kapağını 3 çıkarın ve su sürahisini kullanarak depoyu suyla doldurun Aşırı doldurmamaya dikkat edi...

Страница 13: ...satın almış olduğunuz mağazaya başvurun Bu kişiler ürünün çevreye dost bir şekilde geri dönüştürülmesi için teslim alabilir UYARI Akümülatör veya pil hücresi Asla ateşe atmayın Asla sökmeyin Terminallerine asla kısa devre yaptırmayın SORUN GİDERME SORULAR CEVAPLAR Sprey yapmıyor Su haznesini suyla doldurun Püskürtme başlığı tıkalı Tankı ılık suyla doldurun ve nozulu çıkarmak için tetiği yavaşça çe...

Страница 14: ...ı müteselsilen sorumludur Satıcı tarafından Garanti Belgesinin verilmemesi durumunda tüketici Gümrük ve Ticaret Bakanlığı Tüketicinin Korunması ve Piyasa Gözetimi Genel Müdürlüğüne başvurabilir Tüketici çıkabilecek uyuşmazlıklarda şikayet ve itirazları konusundaki başvuruları yerleşim yerinin bulunduğu veya tüketici işleminin yapıldığı yerdeki Tüketici Hakem Heyetine veya Tüketici Mahkemesine başv...

Страница 15: ...ksel algılama veya zihinsel becerileri yeterli olmayan veya deneyimli ve bilgili olmayan kişiler tarafından gözetim altında veya cihazın güvenli kullanımıyla ilgili talimatlar verildiği ve tehlikelerin anlaşılmasının sağlandığı koşullarda kullanılabilir 9 Çocuklar cihazla oynamamalıdırlar Temizlik ve kullanıcı bakımı gözetim olmadan çocuklar tarafından yapılmamalıdır 10 Cihazı temizlemeden ya da b...

Страница 16: ...ki senedir T C Gümrük ve Ticaret Bakanlığı nca tespit edilen kullanım ömrü 10 senedir Tüketicinin Dikkatine Ürünlerimizle ilgili hizmetleri tam olarak alabilmek için aşağıdaki önerilere uymanızı rica ederiz 1 Ürünü aldığınızda Garanti Belgesini mutlaka yetkili satıcınıza onaylattırınız 2 Ürünü kullanma kılavuzunda belirtilen hususlara göre kullanınız 3 Ürününüzle ilgili hizmet talebiniz olduğunda ...

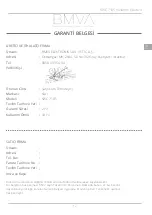
Страница 17: ...Esenyurt Istanbul 0850 433 54 94 Şarjlı Cam Temizleyici Kiwi KWC 7105 2 Yıl 10 Yıl SATICI FİRMA Ünvanı Adresi Tel Fax Fatura Tarihi ve No Teslim Tarihi ve Yeri İmza ve Kaşe Bu bölüm ürünü satın aldığınız Yetkili satıcı tarafından imzalanacak ve kaşelenecektir Bu belgenin hazırlanması 6502 sayılı Tüketicinin Korunması Hakkında Kanun ve bu Kanun a dayanılarak yürürlüğe konulan Garanti Belgesi Uygula...

Страница 18: ...ımını yapmak veya yaptırmakla yükümlüdür Tüketici ücretsiz onarım hakkını üretici veya ithalatçıya karşı da kullanabilir Satıcı üretici ve ithalatçı tüketicinin bu hakkını kullanmasından müteselsilen sorumludur 6 Garanti uygulaması sırasında değiştirilen malın garanti süresi satın alınan malın kalan garanti süresi ile sınırlıdır 7 Malın kullanma kılavuzunda yer alan hususlara aykırı kullanılmasınd...

Страница 19: ...t pas être jeté avec les ordures ménagères à travers l Europe Pour préserver l environnement et la santé des personnes face à l élimination incontrôlée des déchets recyclez votre appareil de manière responsable afin d encourager la réutilisation durable des ressources matérielles Pour retourner votre ancien appareil utilisez les systèmes de retour et de collecte ou veuillez contacter le revendeur ...

Страница 20: ... Kiwi logosu BMVA ya aittir Diğer tüm logo ve markalar sahiplerine aittir Yazım ve baskı hatalarından BMVA sorumlu değildir 2018 BMVA All rights reserved Kiwi logo is owned by BMVA and registered All other trademarks and signs are property of their owners BMVA is not responsible for printing and composing mistakes Bu ürün doğa dostu bir fabrikada üretilmiştir This product is produced in nature fri...

Отзывы: