background image

5

5

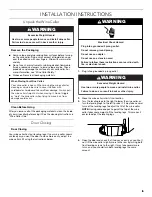
INSTALLATION INSTRUCTIONS

Unpack the Wine Cellar

Remove the Packaging

Remove tape and glue residue from surfaces before turning 
on the wine cellar. Rub a small amount of liquid dish soap 
over the adhesive with your fingers. Wipe with warm water 
and dry.

Do not use sharp instruments, rubbing alcohol, flammable 
fluids, or abrasive cleaners to remove tape or glue. These 
products can damage the surface of your wine cellar. For 
more information, see “Wine Cellar Safety.”

Dispose of/recycle all packaging materials.

Clean Before Using

After you remove all of the packaging materials, clean the inside 
of your wine cellar before using it. See the cleaning instructions in 
“Wine Cellar Care.”

Door Closing

Door Closing

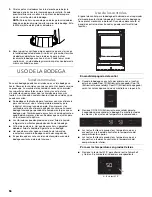
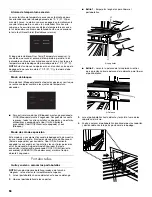
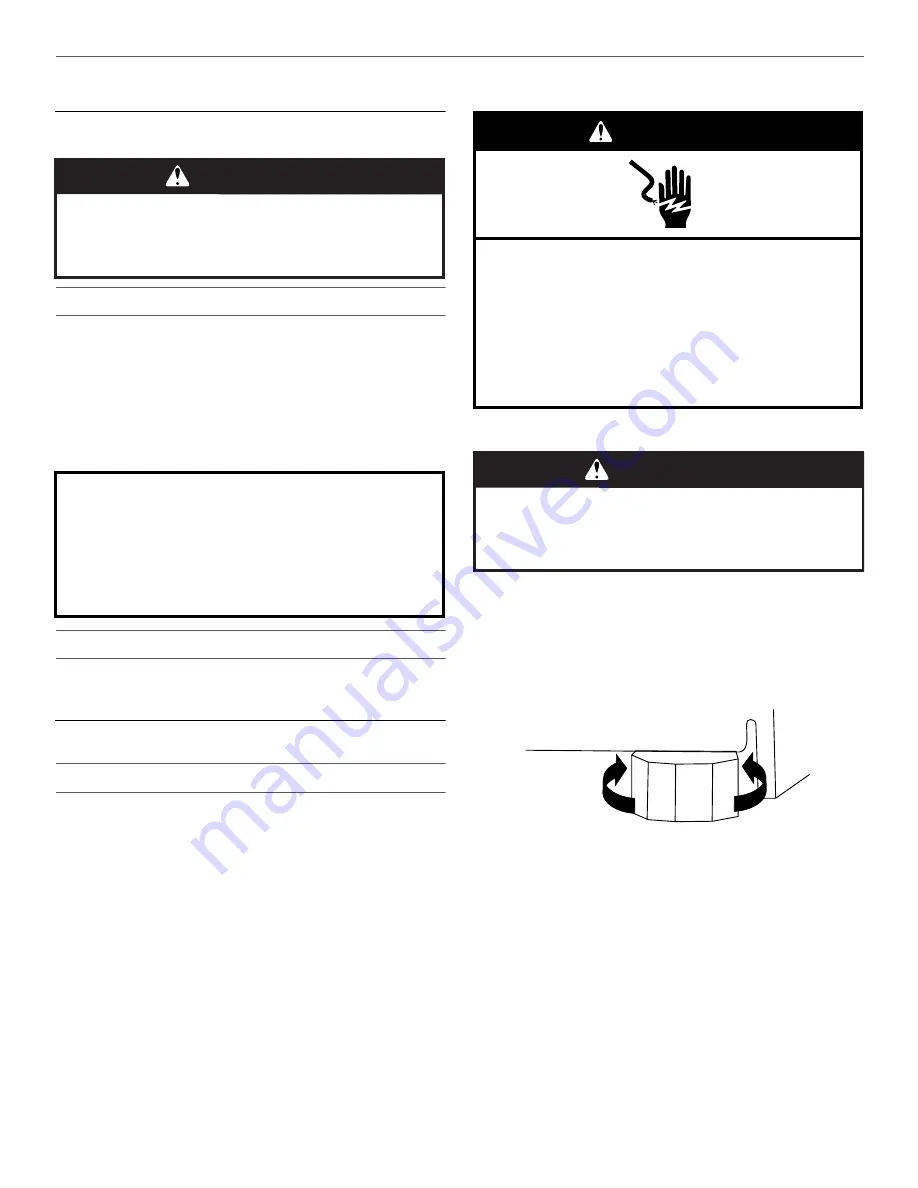
Your wine cellar has four leveling legs. If your wine cellar seems 
unsteady or you want the door to close more easily, adjust the 
wine cellar’s tilt using the instructions below.

1. Plug into a grounded 3 prong outlet.

2. Move the wine cellar into its final location. 

3. Turn the leveling legs to the right to lower the wine cellar, or 

turn the leveling legs to the left to raise it. It may take several 
turns of the leveling legs to adjust the tilt of the wine cellar. 

NOTE: Having someone push against the top of the wine 
cellar takes some weight off the leveling legs. This makes it 
easier to adjust the leveling legs.

4. Open the door and check that it closes as easily as you like. If 

not, tilt the wine cellar slightly more to the rear by turning both 
front leveling screws to the right. It may take several more 
turns, and you should turn both leveling legs the same 
amount.

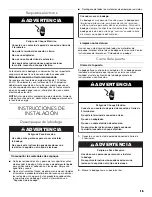
WARNING

Excessive Weight Hazard

Use two or more people to move and install wine cellar.

Failure to do so can result in back or other injury.

When Moving Your Wine Cellar:

Your wine cellar is heavy. When moving the wine cellar for 
cleaning or service, be sure to cover the floor with 
cardboard or hardboard to avoid floor damage. Always pull 
the wine cellar straight out when moving it. Do not wiggle 
or “walk” the wine cellar when trying to move it, as floor 
damage could occur.

Electrical Shock Hazard

Plug into a grounded 3 prong outlet.

Do not remove ground prong.

Do not use an adapter.

Do not use an extension cord.

Failure to follow these instructions can result in death, 
fire, or electrical shock.

WARNING

WARNING

Excessive Weight Hazard

Use two or more people to move and install wine cellar.

Failure to do so can result in back or other injury.
Содержание KUWL304EBS

Страница 1: ...o a las características funcionamiento rendimiento partes accesorios o servicio técnico llame al 1 800 422 1230 o visite nuestro sitio de internet en www kitchenaid com En Canadá llame al 1 800 807 6777 o visite nuestro sitio de internet en www KitchenAid ca CAVE À VIN Guided utilisationetd entretien Au Canada pour assistance installation ou service composez le 1 800 807 6777 ou visitez notre site...

Страница 2: ...A 16 Sonidos normales 16 Uso de los controles 16 Portabotellas 18 Cómo almacenar en la bodega 19 CUIDADO DE LA BODEGA 19 Rejilla de la base 19 Limpieza 19 Cuidado durante las vacaciones y mudanzas 20 SOLUCIÓN DE PROBLEMAS 20 AYUDA O SERVICIO TÉCNICO 22 En los EE UU 22 En Canadá 22 Accesorios 22 GARANTÍA 23 TABLE DES MATIÈRES SÉCURITÉ DE LA CAVE À VIN 25 EXIGENCES D INSTALLATION 26 Outillage 26 Exi...

Страница 3: ...mbol and either the word DANGER or WARNING These words mean follow instructions instructions DANGER WARNING IMPORTANT SAFETY INSTRUCTIONS WARNING To reduce the risk of fire electric shock or injury when using your wine cellar follow these basic precautions SAVE THESE INSTRUCTIONS Plug into a grounded 3 prong outlet Do not remove ground prong Do not use an adapter Do not use an extension cord Disco...

Страница 4: ...cal Requirements Before you move your wine cellar into its final location it is important to make sure you have the proper electrical connection Recommended Grounding Method A 115 volt 60 Hz AC only 15 or 20 amp fused grounded electrical supply is required It is recommended that a separate circuit serving only your wine cellar be provided Use an outlet that cannot be turned off by a switch Do not ...

Страница 5: ...rns of the leveling legs to adjust the tilt of the wine cellar NOTE Having someone push against the top of the wine cellar takes some weight off the leveling legs This makes it easier to adjust the leveling legs 4 Open the door and check that it closes as easily as you like If not tilt the wine cellar slightly more to the rear by turning both front leveling screws to the right It may take several ...

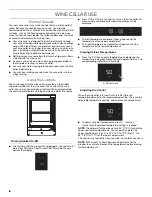
Страница 6: ...ntrol panel displays nothing and may be difficult to locate Turning Control On Off The first time that the wine cellar is plugged in the control will be in Cool Off mode Cool On and Cool Off will be the only options that display Press COOL ON for 3 seconds to turn on the wine cellar All menus and recommended temperature settings will be displayed The left temperature and preset touch pads control ...

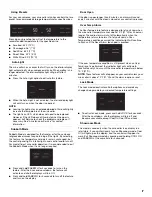
Страница 7: ...SABBATH for 3 seconds to turn on the feature After the 3 second countdown the feature will activate and all other displays will turn Off Press and hold SABBATH for 3 seconds to turn off the feature and turn on the display Door Open If the door is open longer than 5 minutes an alarm will sound every 2 minutes until the door is closed or any control is pressed Over Temp Alarm The Over Temperature fe...

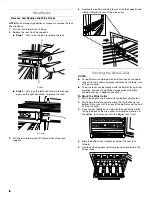
Страница 8: ...r rack of the wine cellar and place red wines on the lower rack of the wine cellar The wine racks can be stocked with the bottles facing either direction however to optimize storage adjacent bottles should be facing in opposite directions To Stock the Wine Cellar 1 Start stocking the wine cellar with the bottom display rack 2 Starting on the left hand side place the first bottle on the bottom of t...

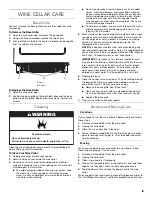
Страница 9: ...a soft cloth NOTE To keep your stainless steel wine cellar looking like new and to remove minor scuffs or marks it is suggested that you use the manufacturer s approved Stainless Steel Cleaner and Polish To order the cleaner see Accessories IMPORTANT This cleaner is for stainless steel parts only Do not allow the Stainless Steel Cleaner and Polish to come into contact with any plastic parts such a...

Страница 10: ...close the door as soon as the wine is removed Is the control set correctly for the surrounding conditions See Using the Control Is the base grille blocked For best performance do not install the wine cellar behind a cabinet door or block the base grille There is interior moisture buildup Is the door opened often To avoid humidity buildup try to get everything you need out of the wine cellar at onc...

Страница 11: ... in the United States To locate the KitchenAid designated service company in your area you can also look in your telephone directory Yellow Pages For Further Assistance If you need further assistance you can write to KitchenAid with any questions or concerns at KitchenAid Brand Home Appliances Customer eXperience Center 553 Benson Road Benton Harbor MI 49022 2692 Please include a daytime phone num...

Страница 12: ... or multiple family use or use inconsistent with published user operator or installation instructions 2 In home Instruction on how to use your product 3 Service to correct improper product maintenance or installation installation not in accordance with electrical or plumbing codes or correction of household electrical or plumbing i e house wiring fuses or water inlet hoses 4 Consumable parts i e l...

Страница 13: ...ón a usted y a los demás Todos los mensajes de seguridad irán a continuación del símbolo de advertencia de seguridad y de la palabra PELIGRO o ADVERTENCIA Estas palabras significan INSTRUCCIONES IMPORTANTES DE SEGURIDAD ADVERTENCIA Para reducir el riesgo de incendio choque eléctrico o lesiones personales al usar su bodega siga estas GUARDE ESTAS INSTRUCCIONES Conecte a un contacto de pared de cone...

Страница 14: ...altura mínima NOTA Si las patas niveladoras están totalmente extendidas agregue 15 mm a las medidas de altura Si el piso de la abertura no está nivelado con el piso de la cocina ponga calzas en la abertura para que quede nivelado con el piso de la cocina Información importante para saber acerca del desecho de refrigerantes Deshágase del refrigerador siguiendo los reglamentos federales y locales Lo...

Страница 15: ...erta Cierre de la puerta Su bodega tiene cuatro patas niveladoras Si su bodega parece inestable o usted quiere que la puerta se cierre con mayor facilidad ajuste la inclinación de la bodega usando las instrucciones a continuación 1 Conecte a un contacto de pared de conexión a tierra de 3 terminales 2 Mueva la bodega hacia su posición final ADVERTENCIA Peligro de Choque Eléctrico Conecte a un conta...

Страница 16: ...ido pulsante o agudo del compresor o los ventiladores que se ajustan para un funcionamiento óptimo Las vibraciones pueden producirse por el flujo de líquido refrigerante o artículos guardados dentro de la bodega Al final de cada ciclo Ud puede escuchar un gorgoteo debido al flujo de líquido refrigerante en su bodega Ud puede escuchar agua corriendo hacia la bandeja recolectora cuando la bodega se ...

Страница 17: ... más movimiento la luz de la pantalla interior se apagará después de 2 minutos Presione la opción de Auto Light Luz automática para activar esta función Cuando Auto Light Luz automática no se activa la luz de la pantalla interior se encenderá solamente cuando la puerta esté abierta NOTAS Si se deja la luz encendida por mucho tiempo aumentará ligeramente la temperatura de la bodega La luz es LED y ...

Страница 18: ...iva todas las otras pantallas se apagarán y no estarán disponibles a excepción de Cool On Enfriamiento encendido Cool Off Enfriamiento apagado y Lock Bloqueo Modo de sala de exposición Este modo se usa solamente cuando la bodega está de muestra en una tienda minorista Si usted enciende el modo Showroom Sala de exposición por accidente Cool Off Enfriamiento apagado se encenderá en la pantalla y los...

Страница 19: ...illa de la base 1 Abra la puerta de la bodega 2 Coloque la rejilla de la base de manera que ambas lengüetas estén alineadas y la rejilla de la base encaje en su lugar Vuelva a colocar los dos tornillos Apriete los tornillos Limpieza Limpie la bodega más o menos una vez al mes para evitar la acumulación de olores Limpie los derrames de inmediato Cómo limpiar la bodega 1 Desenchufe la bodega o desco...

Страница 20: ...sele un paño y séquela detalladamente 4 Saque todas las partes desmontables envuélvalas bien y asegúrelas con cinta adhesiva para que no se sacudan durante la mudanza 5 Sostenga las puertas cerradas y el cable pegado a la bodega con cinta adhesiva Cuando llegue a la casa nueva ponga todo de nuevo y lea la sección Instrucciones de instalación para obtener instrucciones de preparación SOLUCIÓN DE PR...

Страница 21: ...stá abierta la humedad de la habitación entra a la bodega La humedad se acumula más rápido cuanto más seguido se abre la puerta especialmente cuando la habitación está muy húmeda Hay humedad Es normal que se acumule humedad dentro de la bodega cuando el aire está húmedo Se ha ajustado el control correctamente de acuerdo con las condiciones circundantes Vea Uso de los controles Es difícil abrir la ...

Страница 22: ...lquier lugar de los Estados Unidos Para localizar a una compañía de servicio designada por KitchenAid en su área también puede consultar la sección amarilla de su guía telefónica Para obtener asistencia adicional Si necesita asistencia adicional puede escribir a KitchenAid con sus preguntas o dudas a KitchenAid Brand Home Appliances Customer eXperience Center 553 Benson Road Benton Harbor MI 49022...

Страница 23: ...iento de la cavidad del refrigerador congelador si la pieza se rompiera debido a defectos de material o de mano de obra Sistema de refrigeración sellado incluye compresor evaporador condensador secador y tubos conectores SU ÚNICO Y EXCLUSIVO RECURSO SEGÚN LOS TÉRMINOS DE ESTA GARANTÍA LIMITADA SERÁ EL DE REPARAR EL PRODUCTO SEGÚN SE ESTIPULA EN LA PRESENTE El servicio deberá ser suministrado por u...

Страница 24: ...eparación de este electrodoméstico principal aparte de las declaraciones incluidas en esta garantía Si usted desea una garantía con una duración más prolongada o más completa que la garantía limitada que se incluye con este electrodoméstico principal deberá dirigirse a KitchenAid o a su distribuidor acerca de la compra de una garantía extendida LIMITACIÓN DE RECURSOS EXCLUSIÓN DE DAÑOS INCIDENTALE...

Страница 25: ...els de décès et de blessures graves à vous et à d autres Tous les messages de sécurité suivront le symbole d alerte de sécurité et le mot DANGER ou AVERTISSEMENT Ces mots signifient AVERTISSEMENT cave à vin prendre quelques précautions fondamentales y compris les suivantes Pour réduire les risques d incendie de choc électrique ou des blessures lors de l utilisation de la IMPORTANTES INSTRUCTIONS D...

Страница 26: ...ellement déployés à la hauteur minimum REMARQUE Lorsque les pieds de nivellement sont totalement déployés ajouter 15 mm à la hauteur totale Si le plancher de l ouverture n est pas au même niveau que le plancher de la cuisine placer une cale dans l ouverture pour qu elle soit au même niveau que le plancher de la cuisine Renseignements importants à propos de la mise au rebut des fluides réfrigérants...

Страница 27: ...rte Fermeture de la porte La cave à vin dispose de quatre pieds de réglage de l aplomb Si la cave à vin semble instable ou si vous désirez que la porte se ferme plus facilement ajuster l inclinaison de la cave à vin en observant les instructions ci dessous 1 Brancher sur une prise à 3 alvéoles reliée à la terre 2 Déplacer la cave à vin à sa position finale AVERTISSEMENT Risque de choc électrique B...

Страница 28: ...se peut également que vous entendiez un bruit saccadé ou aigu provenant du compresseur ou des ventilateurs qui s ajustent pour optimiser la performance Des vibrations sonores peuvent provenir de l écoulement du réfrigérant ou d articles placés dans la cave à vin À la fin de chaque programme vous pouvez entendre un gargouillement attribuable au réfrigérant qui se trouve dans votre cave à vin Vous p...

Страница 29: ...eur Toutefois si la DEL ne s allume pas quand on ouvre la porte appeler le service de dépannage pour vérifier le problème et remplacer la lampe si nécessaire Voir Assistance ou service pour savoir qui contacter Mode Sabbat Le mode Sabbat est conçu pour les personnes qui partent en voyage ou pour celles dont les pratiques religieuses requièrent l extinction des lumières En sélectionnant cette carac...

Страница 30: ... le casier vers l avant jusqu à la butée 2 Dégager le casier de ses supports Style 1 Enfoncer les onglets pour dégager le casier Style 2 Relever la manette de gauche tout en appuyant sur la manette de droite pour dégager le casier 3 Continuer à tirer le casier à vin vers l avant et le soulever pour le sortir de ses supports 4 Réinstaller le casier en l insérant dans les supports et en le faisant g...

Страница 31: ...er de nettoyants forts ou abrasifs tels que les nettoyants à vitre en atomiseurs nettoyants à récurer liquides inflammables cires nettoyantes détergents concentrés produits de blanchiment ou nettoyants contenant du pétrole sur les pièces en plastique les garnitures intérieures et de portes ou les joints de portes Ne pas utiliser d essuie tout tampons à récurer ou autres outils de nettoyage puissan...

Страница 32: ...E Essayer les solutions suggérées ici d abord afin d éviter le coût d une visite de service non nécessaire Votre cave à vin ne fonctionne pas Le cordon d alimentation électrique est il débranché Brancher sur une prise à 3 alvéoles reliée à la terre Un fusible est il grillé ou le disjoncteur s est il déclenché Remplacer le fusible ou réenclencher le disjoncteur La commande de la cave à vin est elle...

Страница 33: ...ieur pénètre dans la cave à vin Plus la porte est ouverte plus l humidité s accumule rapidement surtout lorsque la pièce est elle même déjà très humide La pièce est elle humide Il est normal que de l humidité s accumule à l intérieur de la cave à vin lorsque l air est humide Le réglage de la commande est il correct pour les conditions existantes Voir Utilisation des commandes La porte est difficil...

Страница 34: ... partout aux États Unis Pour localiser la compagnie de service désignée par KitchenAid dans votre région vous pouvez également consulter les Pages jaunes Pour plus d assistance Si vous avez besoin de plus d assistance vous pouvez écrire à KitchenAid en soumettant toute question ou problème à KitchenAid Brand Home Appliances Customer eXperience Center 553 Benson Road Benton Harbor MI 49022 2692 Dan...

Страница 35: ... fissure en raison d un vice de matériau ou de fabrication Système de réfrigération scellé y compris le compresseur l évaporateur le condenseur le séchoir et les conduits de connexion LE SEUL ET EXCLUSIF RECOURS DU CLIENT DANS LE CADRE DE LA PRÉSENTE GARANTIE LIMITÉE CONSISTE EN LA RÉPARATION PRÉVUE PAR LA PRÉSENTE Le service doit être fourni par une compagnie de service désignée par KitchenAid Ce...

Страница 36: ...tés énoncées dans la présente garantie Si vous souhaitez une garantie plus étendue ou plus complète que la garantie limitée fournie avec ce gros appareil ménager adressez vous à KitchenAid ou à votre détaillant pour obtenir les modalités d achat d une garantie étendue LIMITATION DES RECOURS EXCLUSION DES DOMMAGES FORTUITS OU INDIRECTS LE SEUL ET EXCLUSIF RECOURS DU CLIENT DANS LE CADRE DE LA PRÉSE...

Отзывы: