background image

Содержание KEBS177W

Страница 1: ...K tche _kud _ T te__ ic 27 Buit In e _nal_Convec_ion Single and Double Self Cleaning Ovens Models KEBS277W and KEBS177W USE and CARE GUIDE ...

Страница 2: ...ven Cycle 23 Adjusting The Temperature Control 27 Oven Ughts Operation Replacement 28 Removing And Replacing An Oven Door 29 Optional Oven Door Fronts 29 For Service Or Assistance 30 KitchenAid Warranty Back Cover Your purchase of a KitchenAid ThermaI ConvectionTM Oven allows you to expand your present methods of cooking and at the same time experience a new and exciting way of increasing the qual...

Страница 3: ...laming pan Smother flaming pan by covering with a well fitted lid cookie sheet or flat tray Flaming grease outside of pan can be extinguished with baking soda or if available a multipurpose dry chemical or foam type extinguisher 9 Use only dry potholders Moist or damp potholders on hot surfaces may result in burns from steam Do not let potholder touch hot heating elements Do not use a towel or bul...

Страница 4: ...r surfaces of oven until they have had sufficient time to cool Other surfaces of the oven may become hot enough to cause burns such as the oven vent opening the surface near the vent opening the oven door and the oven door window FOR YOUR SAFETY DO NOT STORE OR USE GASOLINE OR OTHER FLAMMABLE VAPORS AND LIQUIDS IN THE VICINITY OF THIS OR ANY OTHER APPLIANCE THE FUMES CAN CREATE A FIRE HAZARD OR EX...

Страница 5: ...sumer Product Safety Act Return of this card is not necessary to validate your warranty You must provide proof of purchase or installation date for in warranty service Write down the following information You will need it if your oven ever requires service Model Number Serial Number Date Purchased Date Installed Builder s or Dealer s Name Address Phone Model and serial numbers are located on the l...

Страница 6: ... Temperature probejack Oven rack guides Serial number plate Bake element Window Door Door handle I Lock lever cover panel III I Broiler element Convection element Gasket Self clean oven _ _ lo 1 lllllllllllllllllllll IIIIIlllllllllllll ill Self clean lower oven double oven only I 6 ...

Страница 7: ... switch Time knob Econo maxi broil knob Upper oven lock Indicator light Upper oven clean indicator light Upper oven Lower oven temperature lock indicator control light Lower oven clean indicator light Single Oven Control Panel Electronic clock Start Stop button button Auto time manual switch Oven cycle light Selector Temperature control Meat thermometer control Time knob Econo maxi broil knob Lock...

Страница 8: ...e to show TIMER and the selected time will begin counting down At the end of the timed period TIMER will appear in the Display Window and flash rapidly and a tone will sound for 3 seconds after which an intermittent tone will sound until the Minute Timer is cancelled or until a total of 15 minutes have elapsed IMPORTANT The current time of day may be checked while the Minute Timer is in use by tou...

Страница 9: ...ot in use The selector has seven settings Each of the following diagrams shows only those heating elements involved in that setting CONVECTION BROIL The top element s as set by the Econo Maxi Broil Knob operate at full power whenever heating Air in the oven cavity is circulated by the fan for even heating with the same results as a rotisserie Use this setting for broiling thick cuts of meat CONVEC...

Страница 10: ... The lower oven isa thermal oven which can be used for broiling baking and roasting It has two controls a Selectorand a Temperature Control Both must be set for the oven to work Temperature control The Temperature Control can be set at any temperature from WARM 150 F to BROIL 550 F or on CLEAN SettingsWARM to 225 F are suggested for warming and holding foods Be sure the Temperature Control is turn...

Страница 11: ...wise when the oven is not in use Baking Single Upper or Lower Oven Convection Baking Single Upper Oven Or Convection Cooking Single Upper Oven 1 Arrange the oven racks in the desired positions 2 Turn the Selector to BAKE CONVECTION BAKE or CONVECTION COOK 3 Set the Temperature Control to the recommended temperature See Baking chart on page 13 4 Placethe food in the oven after the Oven Cycle Light ...

Страница 12: ...y 5 to 10 minutes from the time stated in conventional recipes When baking three sheets of cookies at one time each sheet should be removed when the desired degree of doneness is reached Stagger cake pans in opposite directions on each rack when three racks are used Pan placement If possible use only one rack during baking if the pan coversmost of the rack such as a large cookie sheet Stagger pans...

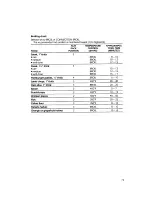
Страница 13: ...ONVECTION COOK CONVECTION TIME THERMAL TIME FOOD TEMP MINUTES TEMPERATURE MINUTES Breads yeast loaf 350 F 25 30 375 F 30 35 rolls pan 400 F 12 15 Breads quick biscuits 425 F 8 450 F I 0 15 muffins 375 F 18 400 F 15 20 corn bread 375 F 15 400 F 25 30 Cakes angel food 350 F 30 375 F 25 layer cake 350 F 25 375 F 20 pound loaf 300 F 50 325 F 60 sheet cake 300 F 15 325 F 20 Cookies drop 350 F 8 375 F 1...

Страница 14: ...Upper or Lower Oven Convection Roasting Single Upper Oven 1 Arrange the oven racks in the desired positions and place the food in the oven 2 Turn the Selector to BAKE or CONVECTION BAKE 3 Set the Temperature Control to the recommended temperature See Roasting chart on page 15 and Convection roasting chart on page 16 Be sure the Selector is turned to OFF and the Temperature Control is turned fully ...

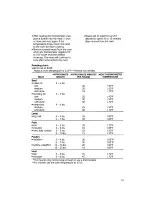
Страница 15: ...t not needed APPROXIMATE APPROXIMATE MINUTES MEAT WEIGHT PER POUND MEAT THERMOMETER TEMPERATURE Beef rolled rib 5 6 Ibs rare medium well done standing rib 6 7 Ibs rare medium well done rump roast 4 6 Ibs medium well done 30 35 45 25 30 40 25 30 140 F 150 F 170 F 140 F 150 F 170 F 150 F 170 F Lamb leg half 3 4 Ibs 6 7 Ibs 35 30 180 F 180 F Pork loin 4 5 Ibs shoulder 4 5 Ibs ham fully cooked 3 5 Ibs...

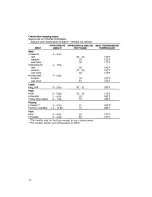
Страница 16: ...well done rump roast 4 6 Ibs medium well done 23 25 140 F 25 150 F 30 170 F 20 140 F 23 25 150 F 30 170 F 30 150 F 37 170 F Lamb leg half 4 5 Ibs Pork loin 4 5 Ibs shoulder 5 6 Ibs ham fully cooked 6 7 Ibs Poultry chicken 3 4 Ibs turkey unstuffed 12 14 Ibs Veal 30 32 180 F 33 35 170 F 30 180 F 15 130 F 25 185 F 15 180 F loin 3 4 Ibs 20 shoulder 5 6 Ibs 30 The muscles may not be large enough to use...

Страница 17: ...ternal meat temperature When the red hand reaches the white hand a continuous beep will sound indicating that the selected internal meat temperature has been reached The oven will continue to heat and the beep will continue to sound until the oven is turned off To turn off oven and warning signal 1 Turn the Selector to OFF and the Temperature Control fully counterclockwise 2 Unplug the Temperature...

Страница 18: ...d Broiling tips Always start broiling with a cold broiler pan for even results To retain more natural juice do not pierce meat with fork Trim the outer layer of fat from steaks and chops Slit fatty edges to prevent meat from curling during broiling Brush food with butter sauce or seasoning if desired several times during broiling Grease the broiler pan grid when broiling fish to prevent sticking I...

Страница 19: ...BROIL 8 10 medium BROIL I 0 12 well done BROIL 12 15 Steak 1 2 thick 3 rare BROIL 10 12 medium BROIL 12 15 well done BROIL 15 17 Hamburger patties 1 2 thick 4 BROIL 6 10 Lamb chops 1 thick 3 400 F 20 30 Ham slice 1 thick 3 BROIL 20 25 Bacon 3 400 F 5 7 Frankfurters 3 400 F I 0 12 Chicken pieces 2 400 F 40 50 Fish 2 350 F 20 25 Calves liver 3 350 F 8 10 Tomato halves 3 BROIL 8 I 0 Orange or grapefr...

Страница 20: ...he start time Touch the START button and hold down for 2 seconds START TIME will appear in the Display Window and a short tone will sound To start cooking now touch the START button again to lock in the start time and go to the next step To start cooking later turn the TIME knob until the desired start time appears in the Display Window then touch the START button again to lock in the start time M...

Страница 21: ...appear in the Display Window and flash rapidly A tone will sound for three seconds followed by an intermittent tone until the STOP CANCEL button istouched or a total of 15 minutes have elapsed Foods should be removed from the oven when the cooking time has ended or they will tend to overtook To review a program Pressand hold the STARTbutton for the start time or the STOP CANCEL button for the stop...

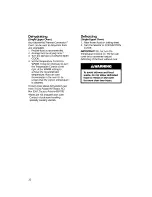
Страница 22: ...ometer in the oven to be certain that the correct temperature is obtained To learn more about dehydration see How ToDry Foods H P Books P O Box 5367 Tucson Arizona 85703 Racks are not included with oven Contact a local store handling specialty cooking utensils Defrosting Single Upper Oven 1 Place frozen food on baking sheet 2 Turn the Selector to CONVECTION COOK IMPORTANT Do not turn the Temperatu...

Страница 23: ...n spots use a soap filled steel wool pad with plenty of water Rinsewell Oven Racks Clean with detergent and hot water For stubborn spots soak in ammonia solution of I cup ammonia to 2 gallons of water Temperature Probe Clean with detergent and wet cloth Do not immerse probe in water Self Clean Oven Cycle Single Upper or Lower Oven The Self Clean cycle is designed to eliminate the need for scrubbin...

Страница 24: ...nside the oven door Wash with detergent and hot water The center area of the door does not need to be hand cleaned Do not clean move or bend gasket Poor cleaning and baking may result Rinse well with mixture of vinegar and water and wipe dry A non scratch scouring pad may be used on heavily soiled areas Wash surfaces frequently to minimize overall cleaning as these areas are not cleaned during the...

Страница 25: ... stop time 27 2hours from the present time of day will appear in the Display Window 6 Touch the STARTbutton to lock in the automatically selected stop time and return the clock to the present time of day AUTO will appear in the Display Window The Clean Indicator Light will glow and the cleaning cycle will begin No end of cycle tone will be given 7 At the end of the Self Clean cycle the Clean Indic...

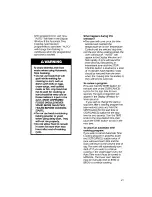
Страница 26: ...utton again to lock in the new stop time and return the clock to the present time of day 26 AUTO will flash in the Display Window until the Self Clean cycle begins Once the cycle is in progress AUTO will appear continuously No end of cycle tone will be given What happens during the self clean cycle The oven not being cleaned will not heat even though the controlsare set After the controls have bee...

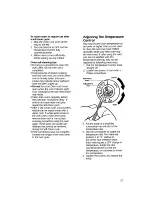
Страница 27: ...them with a non scratch scouring pad before usingthe oven again Thesespots are usuallysalt residuesthat cannot be removed during the Self Cleancycle If the soil removal was not complete increasethe length of the clean time in the next cycle Adjusting The Temperature Control You may find the oven temperature to be lower or higher than you are used to Your old oven may have shifted gradually while y...

Страница 28: ...d cause injury To replace single upper oven light bulb To replace lower oven light bulb 1 Turn the power off at the main power supply 2 Remove the three screws in the lens holder with a Phillips screwdriver Care should be taken to prevent the holder and the lens from falling into the oven cavity 3 Lift holder and glass lens out 4 Remove and replace the light bulb with a 40 watt appliance bulb 5 Re...

Страница 29: ...rmly on both sides and lift the door up and out of the hinge slots to remove Set the door aside To replace 1 Grasp door firmly on both sides Slide the hinge slot in the bottom of the door over the hinges Push the door down and in to replace 2 Open the door slightly past the broil stop position and push it down to make sure the door is completely installed 3 Open the door completely Replace the two...

Страница 30: ...ame of a local authorized KitchenAid servicer call KitchenAid Customer Relations TOLL FREE 800 422 1230 A Customer Relations representative can recommend a qualified service company in your area If you must call or write please provide Model Number Serial Number Date of Purchase and complete description of the problem Write to Customer Relations Department KitchenAld Inc RO Box 558 St Joseph MI 49...

Страница 31: ...2 Instruct you how to use the oven 3 Replace house fuses or correct house wiring Repairs when oven is used in other than normal home use Damage resulting from accident alteration misuse abuse improper installation or installation not in accordance with local electrical codes D Any labor cost during the limited warranty E Replacement parts or repair labor costs for units operated outside the United...

Отзывы: