PAGE 4 OF 4
ASSEMBLY INSTRUCTIONS
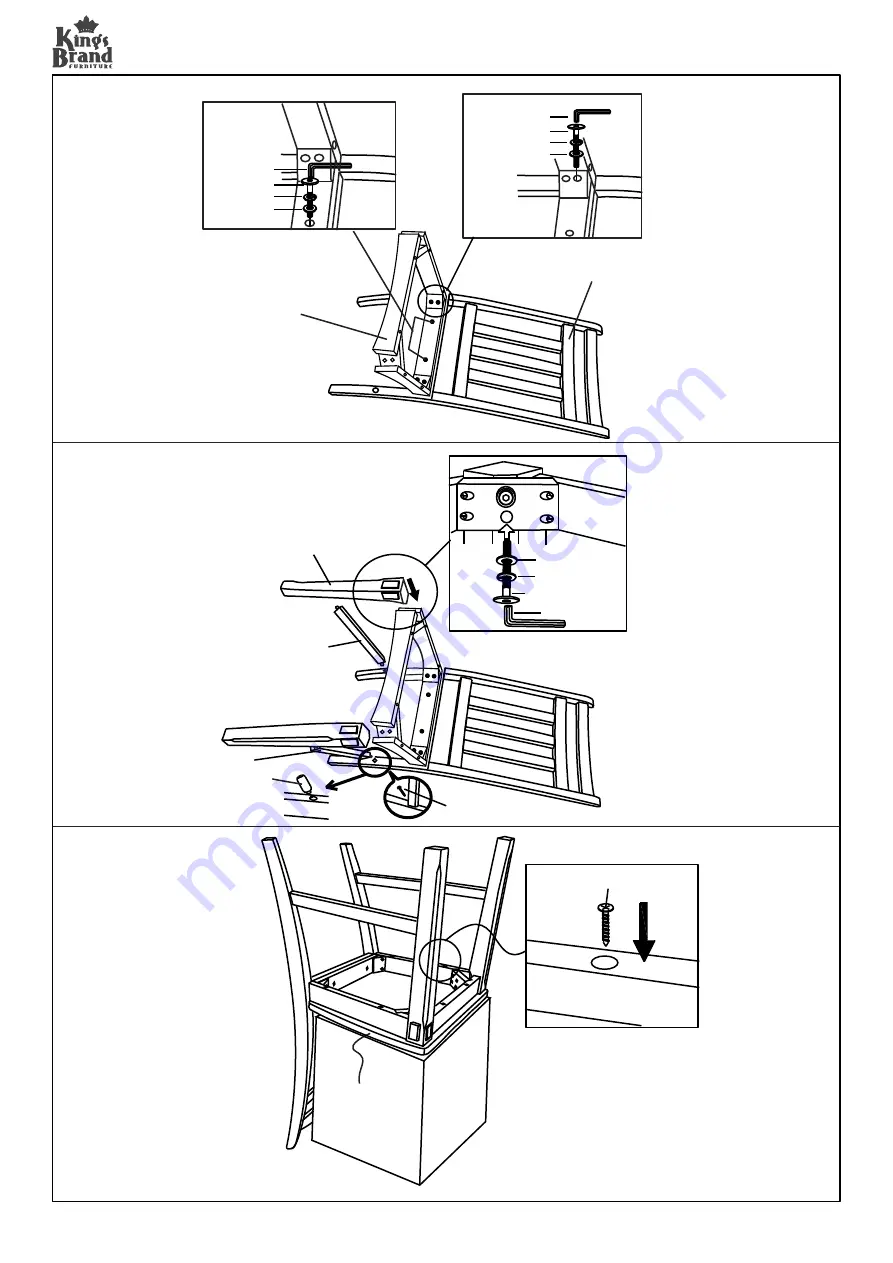
STEP 1
STEP 2
STEP 3
ITEM # D6484-2 DINING CHAIR
(Fig.1.2)
(Fig.1.1)
A
B
3
4
5
6
7
(Fig.2)
Apply Glue
(FIG.2.2)
D
F
E
2
8
C
1
Страница 1: ...product is placed on protected surfaces during assembly to prevent any damage During assembly do not over tighten the screws or bolts as this may damage the product Please ensure you retain all the p...
Страница 2: ...ks and back apron until they are adjustable by hand Place the chair upright on the floor Press firmly and evenly on the seat edges until the product sits level but do not lean against the chair back O...
Страница 3: ...pc F Right Side Stretcher 1 pc HARDWARE IDENTIFICATION 1 Drywall Screw 6 pcs 2 Pan Head Screw 4 pcs 3 JCBC Bolt M6 x 40mm 2 pc 4 JCBC Bolt M6 x 70mm 8 pc 5 Spring Washer M6 x 13mm 10 pcs 6 Flat Washer...
Страница 4: ...PAGE 4 OF 4 ASSEMBLY INSTRUCTIONS STEP 1 STEP 2 STEP 3 ITEM D6484 2 DINING CHAIR Fig 1 2 Fig 1 1 A B 3 4 5 5 6 6 7 7 Fig 2 Apply Glue FIG 2 2 D F E 2 4 5 6 7 8 C 1...