background image


Instructions for Use 


If you remove the oven trays and position the potatoes on the tray ready for loading 
you will gain more capacity out of the oven.  


Load the full tray with the anti-tilt hooks at the back of the oven to ensure the tray 
does not tip when 50% extended. 


1.


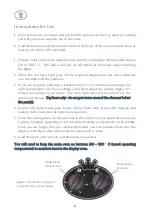
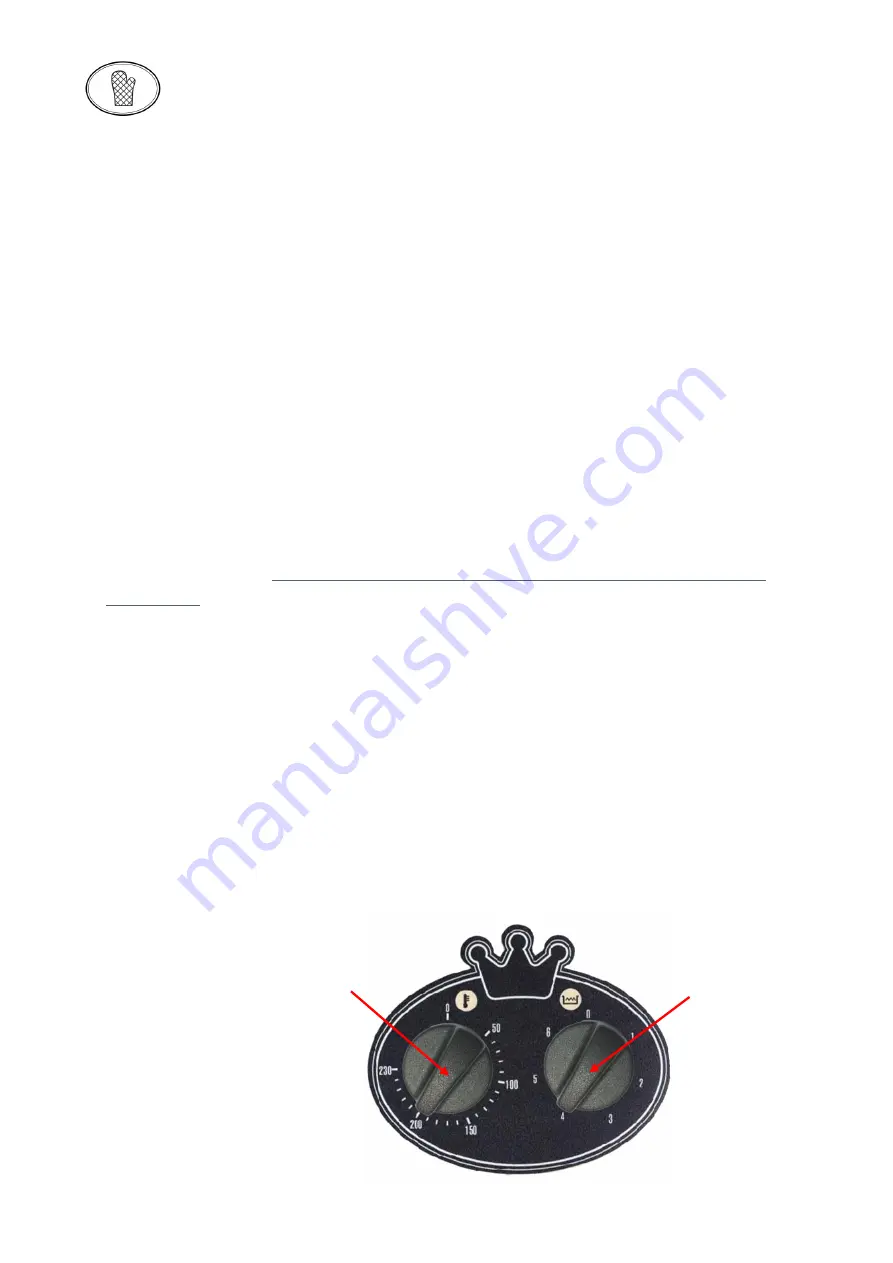
Plug the baker in and pre-heat the main oven by turning the left hand dial (figure 
1.0) to 200 

C.   This dial is also the on off switch for the whole baker including 

the lights. 

2.


When  the red  neon  light goes  off  the required temperature  has been  achieved.  
You can then load the potatoes. 

3.


If you are using the bain marie, preheat this for 5 to 10 minutes by turning the 
right hand (figure 1.0) dial to setting 4 and then adjust the setting (higher for 
hotter) according to your needs.  The neon light will cycle on and off for the 
duration of its use.  Dry heat only - do not put water around the element below 
the pan(s). 

4.


Remove  the  bain  marie  pans  before  filling  them  with  pre-heated  topping  and 
loading them back into the bain marie aperture. 

5.


Once the cooking time for the potatoes in the main oven has expired you can test 
a potato by gently squeezing it and carefully inserting a sharp knife to the middle.   
Once you are happy they are sufficiently baked, you can transfer them into the 
display oven where they will remain hot and ready to serve. 

6.


Load the main oven to cook another batch if required. 

You will need to keep the main oven on  between 180 – 200 

C (usual operating 

temperature) to maintain heat in the display oven. 


Figure 1.0: Classic Compact / 
Compact Lite control panel 

Main Oven 
Thermostat 

Bain Marie 
Control 

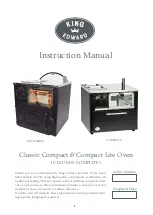
Содержание Classic Compact

Страница 1: ... quality components combined with traditional styling This instruction manual will help you get the best out of your purchase We recommend you make a note of your serial number in case you need it for future reference If sold to non UK markets these instructions can be provided in the appropriate language if required Serial Number Despatch Date COMPLITE CLCOMBLK ...

Страница 2: ...2 ...

Страница 3: ...intenance 8 Changing the Display Area Bulb 8 Changing Main Oven Door Seal 9 Wiring Instructions for UK Plug 9 Classic Compact Oven Parts Diagram 10 Classic Compact Oven Wiring Diagram 11 Compact Lite Oven Parts Diagram 12 Compact Lite Oven Wiring Diagram 13 Trouble Shooting 14 Warranty 14 EU Declaration of Conformity 15 ...

Страница 4: ...combustible material The exterior of this appliance will get hot during operation we recommend the installation of a glass or perspex sneeze screen if the baker is to be situated within customer reach The oven door will be the hottest surface do not site the baker where customers or untrained staff can access the oven door You will require a suitable 220 240 volt 13amp socket to plug your applianc...

Страница 5: ... opening the oven door unnecessarily as this will lengthen the cooking time you should not need to swap trays or turn the potatoes during the cooking period Do not turn the oven thermostat up to its full setting this could burn the outside of the potatoes before the inside is cooked moderate heat for longer is preferable The bain marie is a holding unit only it is not suitable for cooking raw food...

Страница 6: ...ust the setting higher for hotter according to your needs The neon light will cycle on and off for the duration of its use Dry heat only do not put water around the element below the pan s 4 Remove the bain marie pans before filling them with pre heated topping and loading them back into the bain marie aperture 5 Once the cooking time for the potatoes in the main oven has expired you can test a po...

Страница 7: ... the cooking temperature and increase the cooking time Be aware that the above cooking times and capacities are estimated and may vary depending on potato variety Ensure you trial your selected potatoes before service begins Hot Display It is recommended that cooked potatoes are kept in the display area for a maximum of 120 minutes After this point the core temperature and quality of the potato wi...

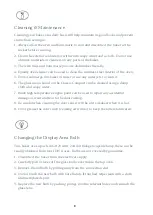
Страница 8: ...oth and soapy water 7 Black high temperature engine paint can be used to repair any accidental damage or wear and tear to the door casting 8 Be careful when cleaning the door seal it will be at its weakest when it is hot 9 Oil or grease the door catch cooking oil will do to keep the rollers lubricated Changing the Display Area Bulb This baker uses a push in G9 25 watt 240volt halogen capsule lamp ...

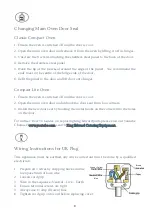
Страница 9: ...ed off and the door is cool 2 Open the main oven door and unhook the door seal from four corners 3 Install the new door seal by hooking the metal hooks on the corners into the holes on the door For further How To Guides on replacing King Edward parts please visit our Youtube Channel www youtube com search King Edward Catering Equipment Wiring Instructions for UK Plug This appliance must be earthed...

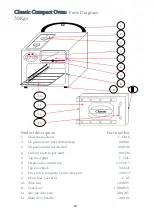
Страница 10: ... 6 gastronorm notched lid 800109 4 Control knob 2 per unit 190304 5 Top door glass C TDG 6 Display area crumb tray C TO CT 7 Top door knob 500221 8 Door catch complete roller and pin 500115 9 Oven feet set of 4 C RF 10 Wire tray 700118V 11 Cast door C700102V 12 Silicone door seal 700129V 13 Main door handle 700104 1 2 3 4 5 6 7 8 9 10 11 12 13 ...

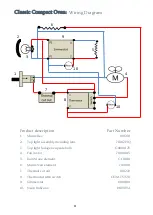
Страница 11: ...2 Top light assembly including lens 7001215Q 3 Top light halogen capsule bulb G9400125 4 Fan motor 700000V 5 Bain Marie element CC9010 6 Main Oven element 700001 7 Thermal cut out 190222 8 Thermostat with switch COM TS SW 9 Simmerstat 6000110 10 Neon Indicator 190305A 1 2 3 4 10 9 5 6 7 8 10 ...

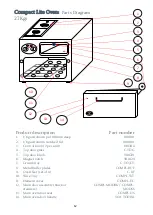
Страница 12: ...190304 4 Top door glass C TDG 5 Top door knob 500221 6 Magnet catch 500128 7 Crumb tray C TO CT 8 Metal Buffer plates COMPL BUF 9 Oven feet set of 4 C RF 10 Wire Tray COMPL WT 11 Element cover COMPL EC 12 Main door assembly black or stainless COMPL MODBK COMPL MODSS 13 Main oven door seal COMPL DS 14 Main oven door handle V60 TODHA 3 4 6 7 8 9 10 1 5 2 1 11 1 12 1 14 1 13 1 ...

Страница 13: ...lex 190201 2 Top light assembly including lens 7001215Q 3 Top light halogen capsule bulb G9400125 4 Bain Marie element CC9010 5 Main Oven element 700001 6 Thermal cut out 190222 7 Thermostat with switch COM TS SW 8 Neon Indicator 190305A 9 Simmerstat 6000110 1 2 3 4 5 6 7 8 8 9 ...

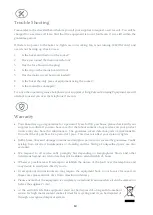
Страница 14: ...y service call your product invoice may also have this information The guarantee covers defective parts or workmanship from the time of purchase for a period of 1 year This does not affect your statutory rights Bulbs fuses door seal damage to mains lead and glass parts are not covered by guarantee Faults arising from incorrect maintenance or cleaning and the fitting of unspecified parts are also e...

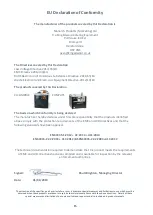
Страница 15: ...ducts identified above comply with the protection requirements of the EMC and LVD directives and that the following standards have been applied EN 60335 1 2012 AC 2014 A11 2014 EN 60335 2 42 2003 A11 2012 BS EN60335 2 42 2003 A11 2012 The technical documentation required to demonstrate that the product meets the requirements of EMC and LVD directives has been compiled and is available for inspecti...

Страница 16: ...igns and finished to suit specific requirements please contact us if you would like to find out more about what we can do King Edward Catering Equipment Porthouse Industrial Estate Bromyard Herefordshire HR7 4NS 01885 489200 oven kingedward co uk www kingedward co uk ...

Отзывы: