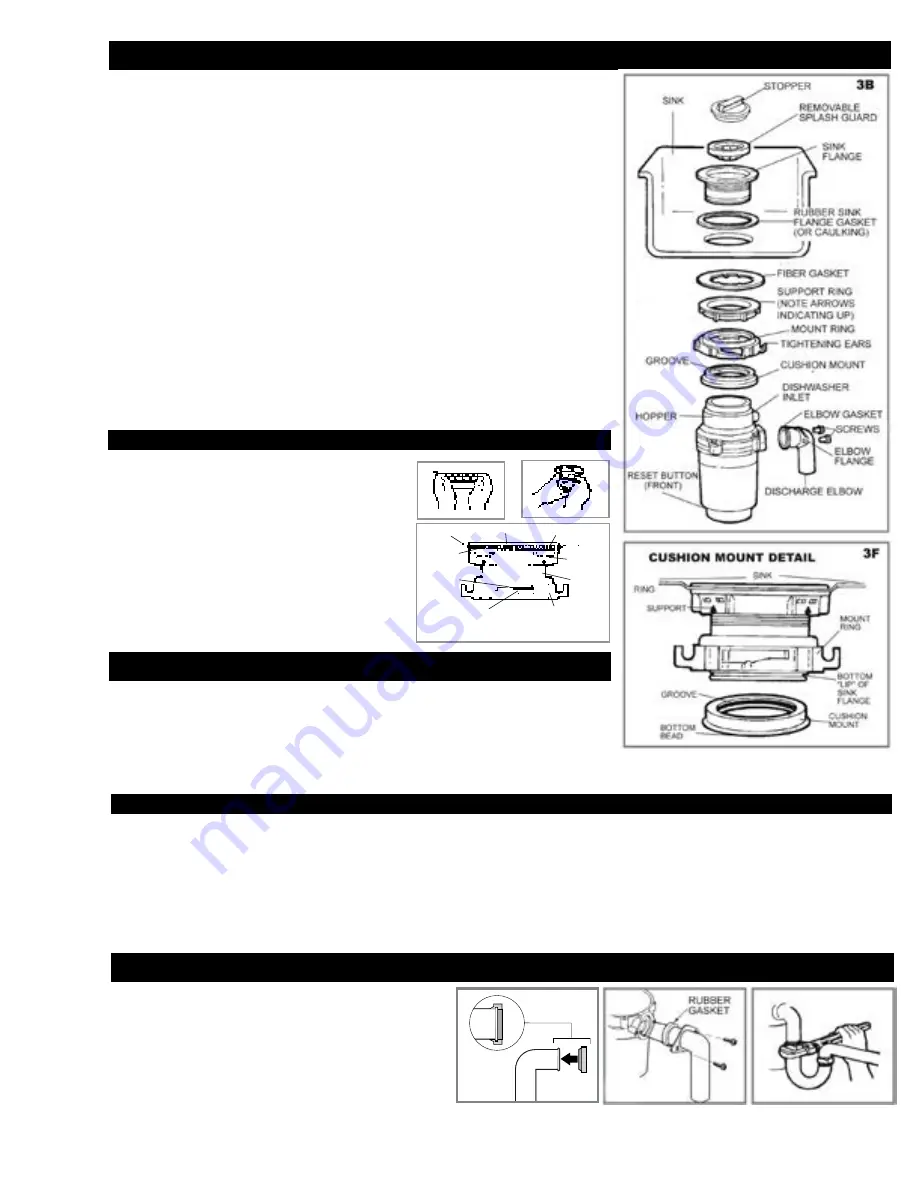
1. Raise mount ring toward top of sink flange. Remove cushion mount. Remove mount
ring. You may want to practice installing the cushion mount at this point before you are
under the sink. See paragraph G. Also see the “Important Notice: Cushion Mount Detail.”
2. Unscrew support ring from sink flange and remove fiber gasket. You are now left with
sink flange and rubber gasket.
3. The rubber gasket is used instead of plumbers putty with stainless steel sinks. Other
sinks will require silicone seal or plumber’s putty.
4. If no caulking is used, insert sink flange through rubber gasket into sink opening. Do
not rotate sink flange once it is seated.
5. If you use silicone instead of the gasket, form a ring around underside of sink flange
(see 3C). Insert flange into sink opening, press down hard to squeeze out excess (see
3B). From under sink, clean up excess flush with bottom edge of the sink opening.
6. From underneath sink, slip fiber gasket onto exposed sink flange. With arrows pointing
up, screw support ring onto the sink flange, hand tighten until the sink flange will not
move. At this point you may want to insert stopper in sink and fill with water to check
sink flange seal and ensure there are no leaks.
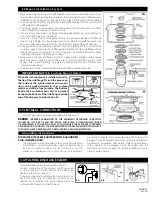
7. Place mount ring over sink flange and hold in place while installing cushion mount
(large side down) so the groove on the inside of cushion mount fits over lip on sink
flange, similar to putting the lid on a plastic container (see 3D, 3E & 3F). Please read
important notice below.
8. The disposer must be installed so that the reset button is readily accessible.
EZ Mount Installation System
When the cushion mount is installed correctly,
the lip of the sink flange fits into the groove on
the inside of the cushion mount and mount
ring can be pulled downward over cushion
mount and will be free to rotate. The bottom
bead of the cushion mount acts as a gasket
between the bottom of the sink flange and the
top of the disposer. See illustration 3F.
ImportaNt NotICe:
Cushion Mount Detail
•
Connect disposer to appropriate household current only.
DANGER:
IMPROPER CONNECTION OF THE EQUIPMENT GROUNDING CONDUCTOR
CAN RESULT IN A RISK OF ELECTRIC SHOCK. CHECK WITH A QUALIFIED ELECTRICIAN
OR SERVICEMAN IF YOU ARE IN DOUBT AS TO WHETHER THE APPLIANCE IS PROPERLY
GROUNDED. DO NOT MODIFY THE PLUG PROVIDED WITH THE APPLIANCE IF IT WILL NOT FIT
THE OUTLET. HAVE A PROPER OUTLET INSTALLED BY A QUALIFIED ELECTRICIAN.
4. ELECTRICAL CONNECTIONS
TOP OF SINK FLANGE
FIBER
GASKET
RUBBER
GASKET
SUPPORT
RING
SINK
FLANGE
SINK
BOTTOM
BEAD OF
CUSHION
MOUNT
3E
A N T N O T I C E : C U S H I O N M O U N T DE T A I L
3D
3C
OPEN AREA, NO
OBSTRUCTION
MOUNT RING
SHOULD BE
FREE TO MOVE
UP & DOWN
Grounding Instructions
For WaSte DISpoSerS eQUIppeD WItH a GroUNDeD
pLUG-IN poWer CorD.
•
This appliance must be grounded. In the event of a malfunction
or breakdown, grounding provides a path of least resistance
for electric current to reduce the risk of electric shock. This
appliance is equipped with a cord having an equipment-
grounding conductor and a grounding plug. The plug must be
plugged into an appropriate outlet that is properly installed and
grounded in accordance with all local codes and ordinances.
If the supply cord is damaged it must be replaced by the
manufacturer, its service agent or similarly qualified person in
order to avoid a hazard.
KWD-01EZ
022013
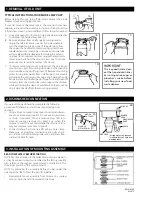
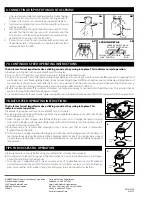
5. ATTACHING DISCHARGE ELBOW
• Assemble rubber gasket to waste elbow (see 5A).
• Connect waste elbow to the disposer (see 5B), proceed
to step 6 and then connect bottom of the elbow by
tightening the slip nut (see 5C).
• If you are connecting to a dishwasher, return to section
2B. If not, make sure all plumbing connections are
tight and in accordance with all plumbing codes and
ordinances. Run water and check for leaks.
5A
5B
5C


