www.kiefer.com 800-323-4071
Installation Instructions for
Battery Motor & Hands
1. Remove the clock lens cover by un-screwing the four (4) Phillips Head screws and removing the
white plastic tabs.
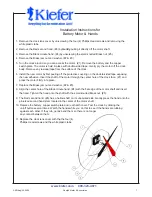
2. Remove the Red second hand, (#6) by
Gently
pulling it directly off the motor shaft.
3. Remove the Black minute hand, (#4) by unscrewing the small knurled Brass nut, (#5).
4. Remove the Brass jam nut and washer, (#2 & #3).
5. Turn the clock around so you can access the motor, (#1). Remove the battery and the copper
switch plate. The motor is held in place with double-sided tape. Gently pry the motor off the clock
body. Remove any residual tape from the surface of the clock.
6. Install the new motor by first peeling off the protective covering on the double-sided tape exposing
the new adhesive. Insert the shaft of the motor through the center hole of the clock face, (#7) and
press the motor firmly into place.
7. Replace the Brass jam nut and washer, (#2 & #3).
8. Align the center hole of the Black minute hand, (#4) with the flat edge of the motor shaft and insert
the hand. Tighten the hand onto the shaft with the small knurled Brass nut, (#5).
9. The Red second hand, (#6) has a hollow shaft on it’s unpainted side. Gently press the hand onto the
pin-sized second hand stem located in the center of the motor shaft.
10. Replace the battery, copper switch plate and rear hatch cover. Test the clock by clicking the
on/off button several times. Watch the hands while you do this to see if the hands are rubbing
against each other. If they rub, gently bend them so there is no longer
any contact between them.
11. Replace the clock lens cover with the the four (4)
Phillips Head screws and the white plastic tabs.
AKA/dag/08.04.09
Adolph Kiefer & Associates
1


