10
SoloX Subwoofers
Moun
ting
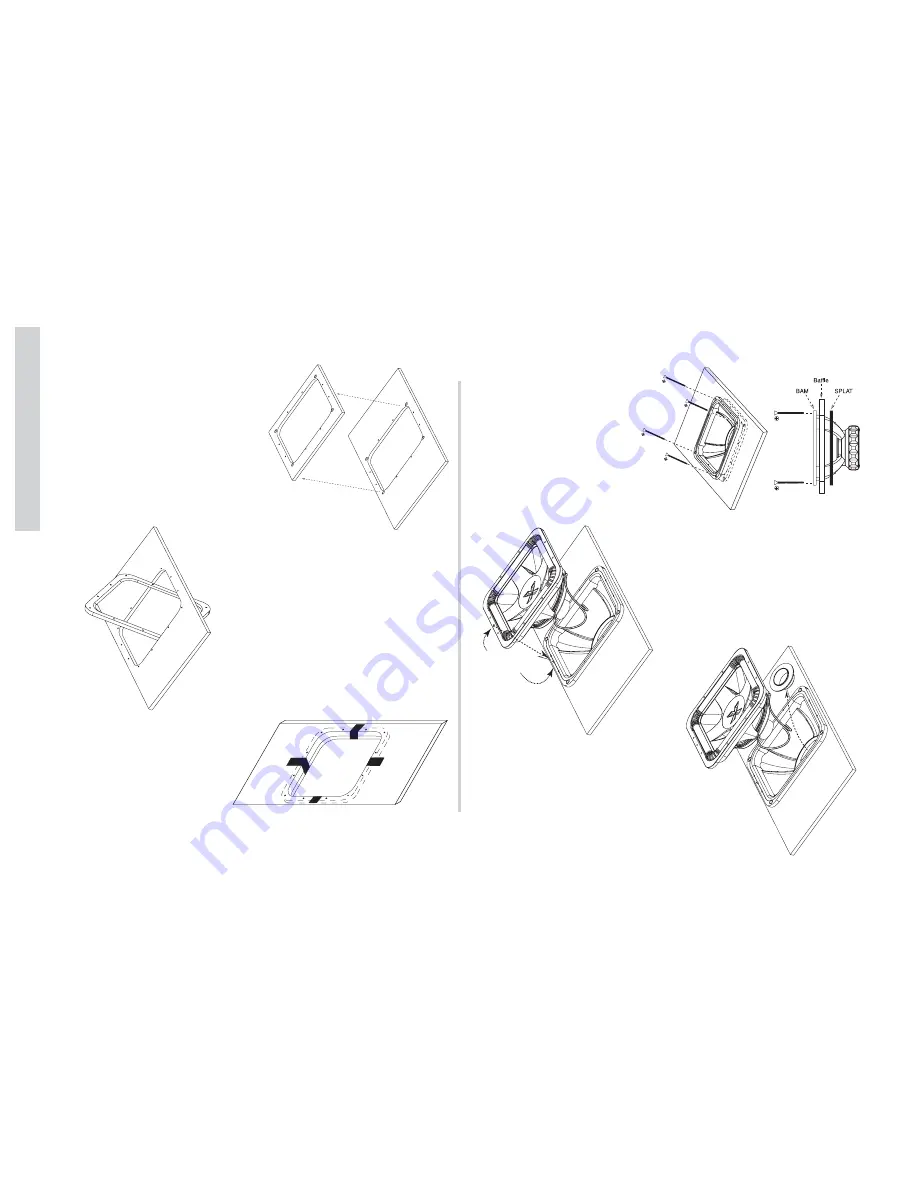
6. Once the holes are marked
remove template. Using a jigsaw
cut out the woofer hole and use a
1/4
”
drill bit for the mounting
holes
NOTE:
You will need assistance
for the following steps!
7. Insert the SPLAT into the cutout
and move into position.
8. Use masking tape to
temporarily hold the SPLAT
in place while securing the
BAM. This tape can be
removed after the corner
hardware has been
started.
9. With your assistant,
insert the BAM and start the
corner hardware. Now is
the time you remove the
unidirectional bonding strip!
(Tape) Tighten the Phillips
Head Machine Screws to
secure the BAM to the
baffle.
10. Pull the wires out through
the BAM and connect to the
Binding Posts.
Make sure you
are using proper polarity!
The LLocator PPin aand LLocator
Hole w
will p
properly aalign tthe
SPAIR tto tthe BBAM!
11. Remove the Gap Cap before
inserting SPAIR.
Baffle
10 - 24
10 - 24
Locator Pin
Locator Hole
Содержание Solo X S10X
Страница 1: ......
Страница 15: ...15 SoloX Subwoofers Notes S tuff To Remember ...
Страница 16: ......


