SoloX 18 Subwoofer
REAS
SEMBL
E
Reassemble
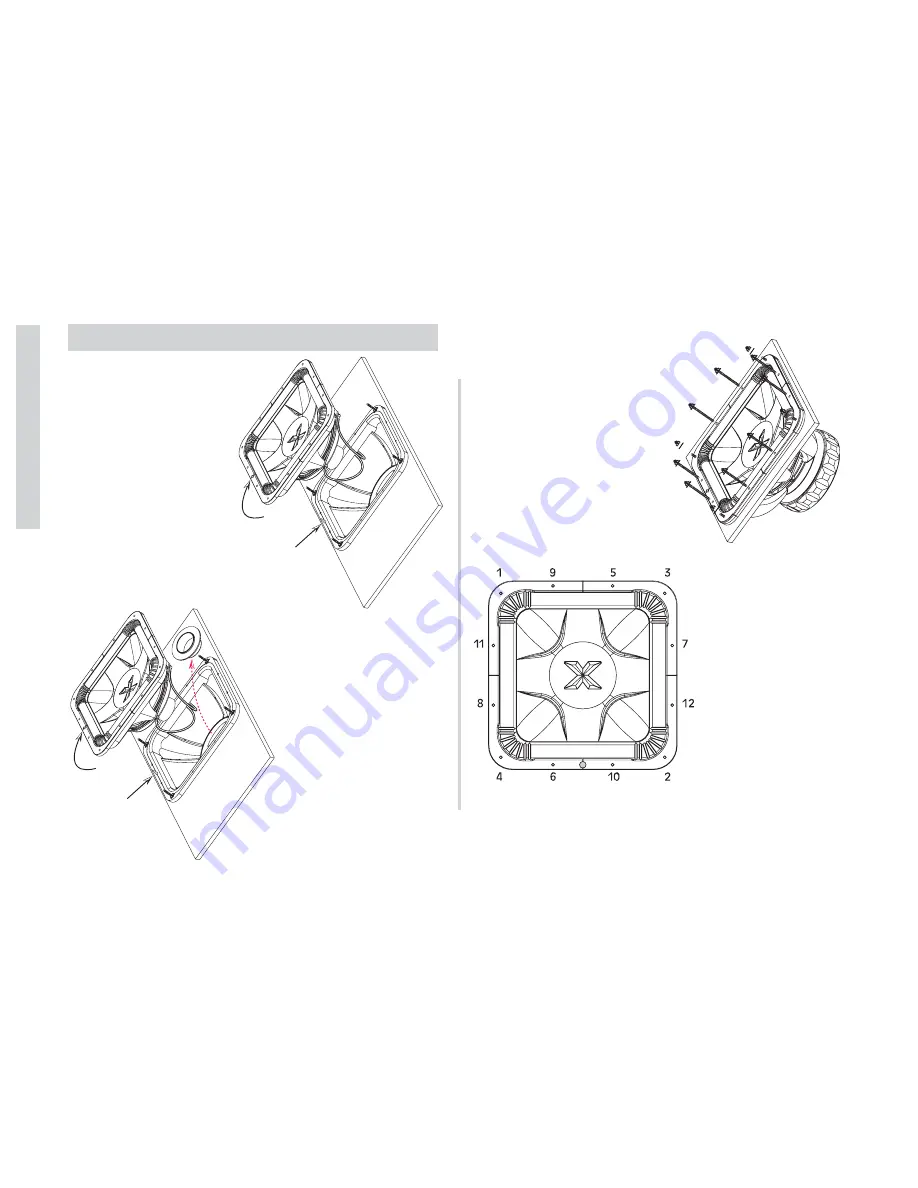
3. With the SPAIR properly
seated in the BAM you can now
secure it using the (4) four acorn
head nuts and (8) eight bolts.
Hand tighten all the
hardware onto the SLAM first
using the pattern shown below.
4. With a 1/4” socket
wrench or open end wrench
go around and tighten all the
hardware following the
pattern shown. Use common
sense while tightening. All
hardware should be snug
but not so tight as to crack
or damage the SLAM.
5. You’re Done! Pop the top on a nice cold beverage while you admire
your work. If you experience any difficulties, contact your local
Authorized KICKER Dealer or KICKER directly for further
assistance.
ATTENTION!
1. Do not remove the Gap
Cap before completing this
step!
Connect your speaker
wires to the SPAIR. Use the
instructions from the WIRING
section for assistance if
required.
NOTE:
The Locator
Hole of the SPAIR must align
with the Locator Pin on the
BAM for proper assembly and
operation.
2. You can now remove the
Gap Cap and slide the SPAIR
assembly back into the BAM.
The ARCTIC Cap, four double
ended studs sticking up and
the Locator Hole/Locator Pin
will help you properly align and
guide it in. Be sure your
speaker wires are free and not
pinched between the SPAIR
and BAM.
Locator Pin
Locator Hole
Locator Pin
Locator Hole
8


