

337001
GENERAL INFORMATION
This remote control is designed to separately control your ceiling fan speed
and light brightness.
The fan button will control the fan speed. (Hi, Med., Low, Off)
The light buttons will control the lights, brightness dimmer and off.
The red indicator on the transmitter will light when the button is pressed.
INSTALLATION AND OPERATING
INSTRUCTIONS
NOTE:
This remote control unit is equipped with 16 frequency code
combinations to prevent possible interference from or to other remote units.
The frequency switches on your receiver and transmitter have been preset at
the factory. Please recheck to make sure the switches on transmitter and
receiver are set to the same position, any combination of settings will
operate the fan as long as the transmitter and receiver are set to the same
position.
1. SETTING THE FREQUENCY CODE
To set the frequency (code), follow these steps
Caution!
The dip switches on the receiving unit are covered with a rubber
cover, remove the rubber cover and then have it replaced after making any
changes to the dip switches.
A.
Setting the code on the transmitter:
a. Remove the battery cover. Press firmly below the arrow and slide
battery cover off.
b. Slide the code switches to your choice of up or down position. (Factory
setting is all up). Use a small screwdriver or a ballpoint pen to slide each
small switch UP or DOWN. (Fig. A)
c. Replace the battery cover on the transmitter.
B.
To set the code on the receiver, slide each code switch to the same position
as set on your transmitter. (Fig. B)
2. INSTALLING THE RECEIVER UNIT
A.
Safety precautions:
WARNING: HIGH VOLTAGE!
Household electrical power can
cause serious injury or death. Disconnect the source of electrical power
to the ceiling fan by removing the fuse or switching off the circuit
breaker.
B.
Installing the receiver unit.
a. Remove the ceiling fan canopy from the mounting bracket.
b. Disconnect the existing wiring between the ceiling fan and supply at
the electrical junction box.
c. Lay the black antenna wire on top of the receiver and slide the
receiver into the mounting bracket as shown in Figure C. Do NOT
let the antenna wire get tangled up in the other electrical wires.
d. Make the connections as follows, using the wire nuts supplied: (Fig. D)
CONNECT TO
Green fan wire...........................................Bare supply wire
Black receiver wire (AC IN L)..................Black supply wire
White receiver wire(AC IN N)..................White supply wire
White receiver wire (TO MOTOR N).......White fan wire
Black receiver wire (TO MOTOR L)........Black fan wire
Blue receiver wire(FOR LIGHT)..............Blue light wire
Fig. B
Fig. A
Fig. C
RECEIVER
Fig. D
AC SUPPLY
BLACK
WHITE
BARE
GREEN
WHITE
WHITE
BLUE
BLUE
BLACK
BLACK
RECEIVER
NOTE:
When installing the remote control, be sure your fan is operated in
"HIGH SPEED"
and light is in
"ON"
condition at the switch knob.
Code switches
Receiver
ON
Code switches
Transmitter
ON
1
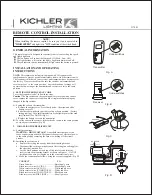
REMOTE CONTROL INSTALLATION


