background image


PART 2. AUDIO FEATURES

    2-35


A

U

D

IO

 F

EA

TU

R

ES

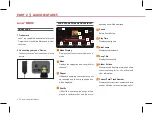
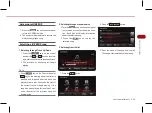
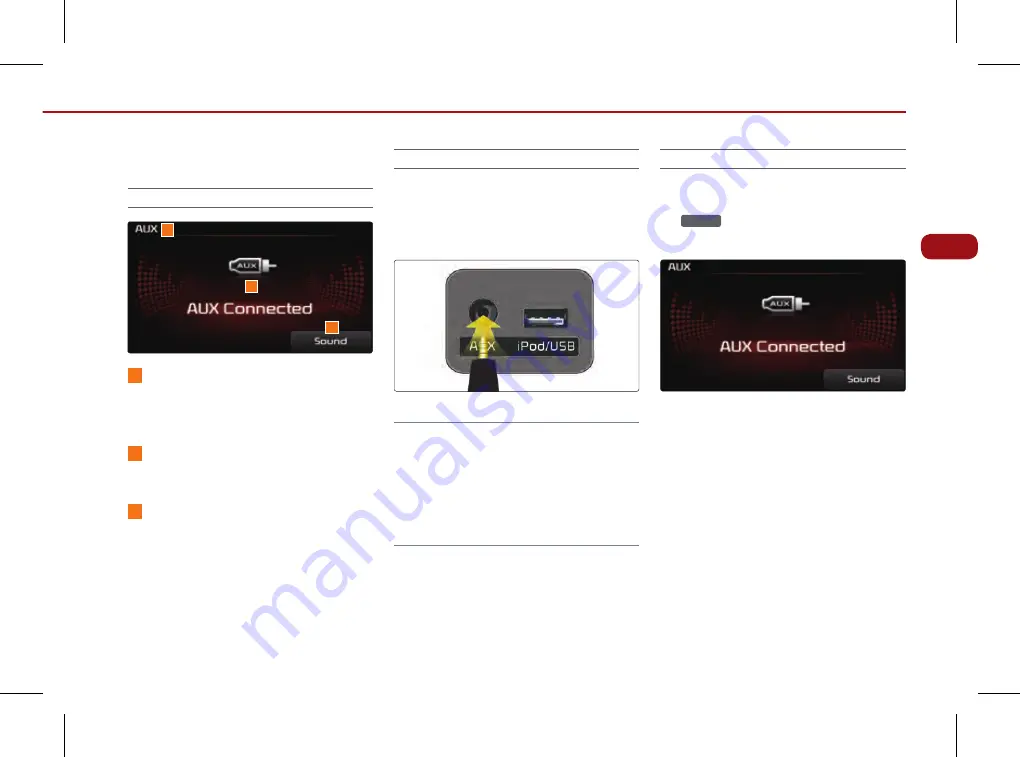
AUX MODE

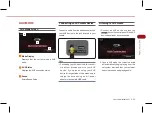
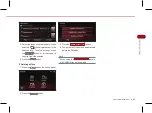
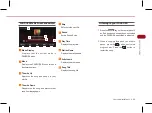
AuX Mode Screen

1

Mode Display


Displays that the current mode is AUX 
mode.

2

AuX Status

  Displays the AUX connection status

3

Sound

  Enters Sound Setup.

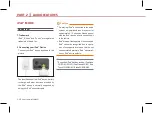
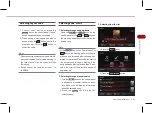
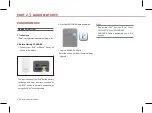
Connecting an AuX media device

Connect a cable from the headphone jack on 
your AUX device to the jack located in your 
vehicle. 

Note

Connecting your AUX device with the vehi-
cle will not provide power to your AUX 
device. If you plan on using your AUX 
device for long periods of time, make sure to 
charge the device using an A/C power 
adapter or a separate USB cable.

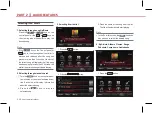
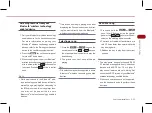
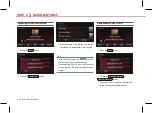
Listening to AuX media

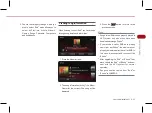
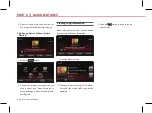
1.  Connect an AUX device or press the 

MEDiA

 key on the control panel if the AUX 

device has already been connected. 

2.  Once in AUX mode, the connected audio 

will automatically begin playing from the 
car system provided that your external 
device is turned on and playing audio.

1

2

3

Содержание UVO

Страница 1: ...2TENE07 UVO SYSTEM USER S MANUAL...

Страница 2: ...EDIA mode Each press of the MEDIA key will change the mode in the order of CD USB iPod zune JUKEBOX AUX BT Audio PANDORA CD 5 POWER VOLUME Push Turns Power On Off Dial Turns Volume Up Down 6 SEEK TRAC...

Страница 3: ...e REW FF the current track 7 CATEGORY In SIRIUS TM mode moves to the previous or next SIRIUS TM category 8 TUNE In FM AM mode turn the knob to manually search for frequencies In SIRIUS TM mode turn th...

Страница 4: ...3 USB iPod zune BT AUDIO plays the previous or next track song or file In PANDORA Radio PANDORA Radio skip Seek up In JUKEBOX mode plays the previous or next track Long over 0 8 seconds In FM AM mode...

Страница 5: ...hort under 0 8 seconds If Voice recognition is off turns on Voice recognition If system is speaking interrupts speaking and enters listening mode Long over 0 8 seconds If Voice recognition is on turns...

Страница 6: ...y one of the FM AM SAT and MEDIA keys will turn on the system and display the last mode corresponding to each key For example pressing the MEDIA key while a CD or other media source is loaded will tur...

Страница 7: ...nguage 5 The system will reboot and automatically restore the most recent mode in the new language Resetting and Initializing UVO system 1 Resetting the system If the system is behaving abnormally pre...

Страница 8: ...he Factory defaults button Note Initializing the system will erase all Phone settings and other changes which you have made to the system Some songs in the USB or CD may be misrecognized during the in...

Страница 9: ...Note Changes are saved as they are made In other words once you change a setting the new setting will become saved 1 FADER BALANCE Fader Balance allows you to adjust the position of sound within the...

Страница 10: ...ep Touch Screen Beep allows you to turn on off the beep that sounds when you touch the screen 1 In Sound Setup press the On or Off button next to the Touch Screen Beep menu to turn the feature on or o...

Страница 11: ...Note Changes are saved as they are made In other words once you change a setting the new setting will become saved 1 Setting Brightness The UVO system allows you to control the screen brightness auto...

Страница 12: ...he manual buttons are not active Press the Default button to restore the default setting Turning Display On and Off This feature turns off the display allowing you to listen only to the audio It is a...

Страница 13: ...T 1 GETTING STARTED 1 13 GETTING STARTED 3 Press any key on the control panel or steering wheel controller to turn the display back on Note Touching any place on the screen will also turn on the displ...

Страница 14: ...transmitted displays radio text information 7 HD RadioTM Optional Changes HD RadioTM stations Becomes active when an HD RadioTM broadcast is being received 8 Radio Icon When pressed while listening t...

Страница 15: ...ing RDS signals 1 Selecting a broadcast frequency The UVO system provides you with various ways to search for radio broadcasts There are 3 ways to select radio broadcasts selecting through SEEK select...

Страница 16: ...0 8 sec onds on the steering wheel controller to flip through the presets sequentially Press and hold the keys over 0 8 seconds on the steering wheel controller to operate SEEK 2 Storing presets Pres...

Страница 17: ...M 12 presets AM 6 presets in sequential order Each preset will be played for 5 seconds 5 Listening to HD RadioTM Stations Optional HD RadioTM Technology is a digital radio tech nology used by AM and F...

Страница 18: ...screen 10 Sound Enters Sound Setup 11 Artist Displays the artist name 12 Title Displays the title Listening to the SiriusTM radio Press the SAT key on the control panel The most recently played Sirius...

Страница 19: ...ecting through preset 1 Press the Presets button 2 Select the desired preset and press the button to start listening Note Press the keys under 0 8 sec onds on the steering wheel controller to flip thr...

Страница 20: ...tton 2 Select the desired channel to start listen ing or press the Category List button to display the channels in the selected category 2 Using Skip 1 Press the List button 2 Press the Skip Setting b...

Страница 21: ...3 From the preset list press and hold over 0 8 seconds the preset number button to which you wish to save 4 The current radio broadcast will automati cally be saved to the present number A beep will s...

Страница 22: ...dy been inserted or connected 2 Each press of the MEDIA key will change the mode in the order of CD USB iPod zune JUKEBOX AUX BT Audio Pandora CD 3 When a desired media is playing and you wish to paus...

Страница 23: ...epeat the song that is currently playing 1 Press the Repeat button The Repeat icon will be displayed 2 Press once to turn on the Repeat setting and again to turn off Using Shuffle The Shuffle setting...

Страница 24: ...y not operate properly in the system Data CDs are not supported by the system For safe and efficient operation Never disassemble the CD Player CDP for repair purposes Contact your place of purchase in...

Страница 25: ...t the software developer Additional information regarding compati bility can be found on the CD R RW soft ware disc box DVD R RWdiscsarenotsupportedbythedevice Compressed audio compatibility This syst...

Страница 26: ...Play Time Displays the play time 7 Current Total Track Number Displays the current track number and total number of tracks on CD 8 DISC indicator Displays that a DISC has been inserted Inserting Ejec...

Страница 27: ...oller to play the desired track 2 The previous or next track will begin playing Note If the SEEK TRACK key on the Control panel or key on the steering wheel controller are pressed and released after t...

Страница 28: ...ailed specification is as below Maximum directory layers 8 layers Maximum folder length 64 Bytes file name length 64 Bytes Maximum number of folders which can be stored onto one disc 256 folders inclu...

Страница 29: ...the artist name 9 Song Title Displays the song title 10 Album Art Icon When pressed displays information about the current song artist title album and other information 11 Current Total Track Number D...

Страница 30: ...ong has been playing for less than 3 seconds the start of the previous song will begin playing 2 Selecting through manual search 1 Turn the TUNE knob on the control panel in clockwise or counter clock...

Страница 31: ...ough song details and information 1 Press the Album art icon 2 The song information Artist Title Album Genre for the current MP3 song will be displayed 3 Press the button to return to the pre vious sc...

Страница 32: ...ter selecting the desired songs press the Copy button 6 Once copying is complete you can listen to copied music in JUKEBOX mode Note If memory is already full and songs can no lon ger be copied the Me...

Страница 33: ...4 ID3 tags 3 Supported media The MP3 media supported by the device are CD ROM and USB 4 Supported media formats This device supports ISO9660 LEVEL1 and LEVEL2 Detailed specification is as below Maxim...

Страница 34: ...h bodily parts and foreign substances Repeatedly connecting disconnecting the USB in a short period of time may damage the system A sound may occasionally occur when disconnecting the USB device Do no...

Страница 35: ...t operate normally during severe vehicle vibrations Avoid using USB devices also used as key chains or mobile phone accessories Connecting your USB device Connect the USB as shown in the picture USB M...

Страница 36: ...he progress bar Press the button to restart the song Note For some media formats the system requires time for media indexing In the case of USB mp3 songs the system will take 1 5ms song Flash HDD or 4...

Страница 37: ...UNE knob can also be used to select songs 4 By Folders Artists Albums Genres Songs Composers 1 Press the Menu button 2 Choose the category through which you wish to select a song USB Mode allows you t...

Страница 38: ...displayed Press the button to return to the previous screen Note Even as you browse through song information you can use the SEEK TRACK or SEEK TRACK keys on the control panel or or keys on the steeri...

Страница 39: ...ct All button 5 After selecting the desired songs press the Copy button 6 Once copying is complete you can listen to copied music in JUKEBOX mode Note If memory is already full and songs can no longer...

Страница 40: ...rted by using your iPod connector cable Caution If a playing iPod is connected to the audio system a high pitched tone may occur for approximately 1 2 seconds Please pause stop the iPod device prior t...

Страница 41: ...d Setup 6 Play Time Displays the play time 7 Artist name Displays the artist name 8 Song Title Displays the song title 9 Album Art Icon When pressed displays information about the current song artist...

Страница 42: ...has been playing for less than 3 seconds the start of the previous song will begin playing 2 Selecting through manual search 1 Turn the TUNE knob on the control panel in clockwise or counter clockwise...

Страница 43: ...Album Genre for the current iPod song will be displayed 3 Press the button to return to the previous screen Note Songs in the iPod can be properly played in UVO system only when they have been downloa...

Страница 44: ...If Repeat is operating the current song will be repeated and the corresponding icon will be displayed 4 Shuffle If Shuffle is operating the songs will be played in random order and the corre sponding...

Страница 45: ...s the SEEK TRACK or SEEK TRACK keys on the control panel or the or keys on the steering wheel controller to play the desired song Note If the SEEK TRACK key on the Control panel or key on the steering...

Страница 46: ...hoose the category through which you wish to select zune mode allows you to select by Songs Genres Albums Artists and Playlists Viewing song information When listening to your zune you can browse thro...

Страница 47: ...Connecting your AUX device with the vehi cle will not provide power to your AUX device If you plan on using your AUX device for long periods of time make sure to charge the device using an A C power a...

Страница 48: ...between the Bluetooth wireless technology handsfree or BT audio function Playing music from the car is not possible when there are no music files stored in the handset device BT Mode Screen and Featur...

Страница 49: ...after displaying the Phone music screen try start ing the music directly from the Bluetooth wireless technology enabled device Selecting a song 1 Press the SEEK TRACK or SEEK TRACK keys on the control...

Страница 50: ...ds removes current song to Favorites list 4 Repeat If Repeat is operating the current song will be repeated and the corresponding icon will be displayed 5 Shuffle If Shuffle is operating the songs wil...

Страница 51: ...panel or key on the steering wheel controller is pressed and released after the track has played for more than 3 seconds the start of the current track will begin playing If the song has been playing...

Страница 52: ...EBOX mode allows you to select by Favorites Artists Albums Genres Songs and Composers Adding Favorites The Favorites feature allows you to create a separate Favorites list of songs 1 While listening t...

Страница 53: ...ess the Favorites button 3 Press the name of the song from the list The song will begin playing Note The Favorites button will be inactive when there are no songs saved as Favorites When deleting favo...

Страница 54: ...he SETUP key on the control panel 2 Press the System button 3 Press the System Information button 4 The system information screen shows you the memory currently in use Deleting JUKEBOX 1 Deleting JUKE...

Страница 55: ...elect All button All of the songs in the play list will be selected 5 Press the Delete button 2 Deleting all files 1 Press the SETUP key on the control panel 2 Press the System button 3 Press the Dele...

Страница 56: ...n the picture The identification of the iPod device battery recharge and other functions provided by the iPod device is normally supported by using your iPod connector cable 2 Start the Pandora Radio...

Страница 57: ...ing again 5 Skip EMoves to the next file 6 Sound Enters Sound Setup 7 Play Time Displays the play time 8 Station Name Displays the station name 8 Artist name Displays the artist name 9 Song Title Disp...

Страница 58: ...atically start playing Note In the station list screen the TUNE knob can also be used to find the desired station Upon selecting Shuffle from the Station list screen stations are selected randomly and...

Страница 59: ...y allows you to conveniently use various Bluetooth wireless technology enabled phone features as you drive your vehicle The Bluetooth wireless technology handsfree system offers Pairing mobile phones...

Страница 60: ...bile device and its fea tures will help you to use the features more easily Place your mobile device in easy reach Be able to access your mobile device with out removing your eyes from the road Do not...

Страница 61: ...can be set so that it automatically connects to your handset each time you start your vehicle Caution For safety make pairings between your handsfree system and handset only while the vehicle is park...

Страница 62: ...logy is turned on The process for initiating Bluetooth wireless tech nology connections may vary depending on the manufacturer Use the handset device user s manual as a reference guide The UVO system...

Страница 63: ...ally connects the Bluetooth wireless technology enabled device set at the highest priority As a result in order to connect a different phone follow the following steps 1 W h i l e in Phone mode press...

Страница 64: ...ed to the system you can set the connection pri ority so that a certain phone is connected with priority starting from the next time you turn on the system 1 While in Phone mode press the Connections...

Страница 65: ...mobile phone The battery charge status may not be displayed in some mobile phones 2 Signal Strength Displays the mobile phone signal strength The signal strength may not be displayed in some mobile ph...

Страница 66: ...all 3 Name of the other party Displays the name of the other party The name of the caller will not be displayed if the caller s phone number has not been saved in contacts 4 Number of other party Disp...

Страница 67: ...Press the Reject button on the screen or the key on the steering wheel controller 2 The call will be rejected Call waiting Call waiting is a feature which allows you to place the current call on hold...

Страница 68: ...ess the Dial Number button 2 Use the dial pad on the right side of the screen to enter the phone number 3 Press the button on the screen or the key on the steering wheel con troller to connect the cal...

Страница 69: ...ton 2 Press the spell you wish to find 3 Select the contact you want to call from the list 4 Press the button on the screen or the key on the steering wheel con troller to connect the call 3 By recent...

Страница 70: ...ls function may not be sup ported in some handset devices Contact list 1 Downloading contact list from mobile phone You can store a list of names and phone numbers in the system contact list The con t...

Страница 71: ...ave many contacts downloaded in the device from your handset device you can make searches of your contacts to conve niently find the desired person 1 By alphabet 1 While in Phone mode press the Contac...

Страница 72: ...n 2 Press the spell you wish to find 3 Press the Search button 4 Press the Search by name 5 Enter the name you wish to find and press the Done button 6 Press the contact you want to connect the call N...

Страница 73: ...Press the spell you wish to find 3 Press the Search button 4 Press the Search by number button 5 Enter the number you wish to find and press the Done button 6 Press the contact you want to connect the...

Страница 74: ...one mode press the Recent Calls button 2 Press the Sort by button 3 Press the Missed button 4 The list of missed calls will be displayed Favorites 1 Placing a call by favorites 1 While in Phone mode p...

Страница 75: ...was changed in the mobile phone In this case delete it and save the new information 2 Adding favorites 1 While in Favorites screen press the Add button 2 Select the contact you want to add from the l...

Страница 76: ...ew incoming messages will automatically be notified through the system When the notification window is displayed press the Yes button to check the new incoming message 3 Sending an SMS message Custom...

Страница 77: ...button for an incoming call the following screen will be displayed 2 Press the Private button The call will be transferred to the handset device Note Accepting a call with the handset device will aut...

Страница 78: ...ired level Note Press the Default button to restore the default setting Although the call volume can be changed during a call the volume will return to its ini tial level as saved in Setup Call volume...

Страница 79: ...ings press the Settings button 2 Press the On or Off button next to the SMS menu Note Press the Default button to restore the default setting Changes are saved as they are made In other words once you...

Страница 80: ...on the type of mobile phone Call waiting is supported only when connected mobile phones support this feature The call waiting pop up may not be displayed in some mobile phones Streaming audio mode wil...

Страница 81: ...noise in the car while you are speaking and ask your passengers not to speak while you are giving voice commands As the handsfree microphone is positioned to pick up the driver s voice commands by ot...

Страница 82: ...ck and enter a voice command To terminate the voice control system either say Exit or press the key for over 0 8 second The system voice comment Please say a command after the beep will not be stated...

Страница 83: ...ing At such time help instructions appropriate to the state of the dialogue will be provided Turning Command Feedback On and Off 1 Press the Voice button 2 Press the On or Off button next to the Comma...

Страница 84: ...oice button 2 Use the buttons to adjust the voice command volume 3 Press the button to return to the Setup screen Note Press the Default button to restore the default setting Changes are saved as they...

Страница 85: ...can adapt to your voice Creating a profile takes approximately several minutes and must be done while the vehicle is parked You can quit resume a reading session but the system cannot be interrupted...

Страница 86: ...set For each one press the speak button and read the command on the screen Selecting a Previous Voice Profile 1 Press the Voice button 2 Press the profile name button next to the Speaker Adaptation m...

Страница 87: ...rofile name button next to the Speaker Adaptation menu 3 Press the Delete button next to the name of the profile 4 Press the Yes button Note Press the None Default button to restore the default profil...

Страница 88: ...modes or when screens of corresponding modes are displayed Command List General Commands Command Operation Exit Quit Cancel Terminate the voice control system Go back Returns to the previous step Repe...

Страница 89: ...FM preset 1 12 Plays the selected FM preset Radio AM preset 1 6 Plays the selected AM preset What s playing Reads back HD Radio TM Optional station information Command Operation SIRIUS TM Plays the m...

Страница 90: ...ying Reads back the current song information Repeat on off Turns the repeat feature on or off Shuffle on off Turns the shuffle feature on or off Play CD zune iPod USB artist name Plays songs for the s...

Страница 91: ...ted composer What s playing Reads back the current song information Add to favorites Adds the current song to favorites Remove from favorites Removes the current song from favorites Repeat on off Turn...

Страница 92: ...proves the song and prevents that song from playing again Bookmark this track The current track is bookmarked on the currently connected device Bookmark this artist The current artist is bookmarked on...

Страница 93: ...Calls the desires person on the other number Dial by number Starts dial by number operation Call a contact Starts call by name operation Phone Turns on Phone mode screen Dial international Starts int...

Страница 94: ...phone state If the feature is not operating properly you may need to reset the UVO eServices App or the smartphone to try again accord ing to the following steps 1 Try again 2 Reset smartphone app 3 R...

Страница 95: ...en a Bluetooth device without phone feature support has been connected such as an MP3 device When the system is booting When the system power supply is unstable When the attempted call is blocked due...

Страница 96: ...formation to the 9 1 1 Operator 2 Roadside Assist If a diagnostic issue exists you can connect with a Roadside Assist agent 3 Vehicle Diagnostics Informs you if certain diagnostic issues are found in...

Страница 97: ...o Enhanced Roadside Assistance a connected mobile phone via Bluetooth within the cellular service coverage area is required Vehicle Diagnostics do not take the place of regularly scheduled maintenance...

Страница 98: ...ng Bluetooth wireless technology 1 Press the PHONE key on the UVO eSer vices system 2 Press the Connections icon on the touch screen 3 Press the Add Device button to display the Add Device screen 4 Tu...

Страница 99: ...ch screen 4 After reading the UVO eServices terms of use displayed on the touch screen press the Activate button Before pressing the Activate button ensure that you are running UVO eServices app on yo...

Страница 100: ...Settings menu By enabling this feature you are agree ing the 911 Connect terms of use An icon is displayed at the top of the touch screen as shown below when 911 Connect is enabled and a mobile phone...

Страница 101: ...le When the 9 1 1 Operator requests your vehicle location the following icon is dis played on the screen and the vehicle loca tion is automatically sent to the 9 1 1 Operator 4 If the 9 1 1 Operator a...

Страница 102: ...found you can con nect with a Roadside Assist agent Enhanced Roadside Assistance feature can be used only when your phone is connected via Bluetooth wireless technology 1 Press the eServices key 2 Pr...

Страница 103: ...cel diagnostics press the Cancel button on the touch screen or any key 4 Once vehicle diagnostics is complete the diagnostic results are displayed on the screen 5 If diagnostic issues are found press...

Страница 104: ...on your UVO eServices app a vehicle diagnos tics check will automatically start on the day you selected 1 On the day of the Scheduled Diagnostics the following window will be displayed 2 Press the Ye...

Страница 105: ...with the UVO eServices app running on your smartphone before using this feature 1 After parking the vehicle press the eServices key 2 Press the Parking Minder icon on the touch screen to send the vehi...

Страница 106: ...ed time range Speed Alert Speed Alerts are alerts that are triggered when a driver exceeds the pre defined maxi mum speed My Car Zone feature is supported only when UVO eServices has been activated 1...

Страница 107: ...n check the Speed Alert History for trig gered speed limit alerts of the vehicle 1 Press the Speed Alert button on the touch screen 2 Press the corresponding alert to view detailed alert information N...

Страница 108: ...ck My Car Zone alert history from your smartphone you must first send the alert his tory to your MyUVO account 1 Press the Send Data button on the touch screen Note Before using Send Data ensure your...

Страница 109: ...es Guide provides guidance on how to use UVO eServices This feature is only available when the mobile phone is connected via Bluetooth wireless technology 1 Press the eServices key 2 Press the eServic...

Страница 110: ...our Settings UVO eServices Activation 1 Press the eServices key and then the Settings button on the touch screen 2 If UVO eServices has not yet been acti vated press the Activate button to start the p...

Страница 111: ...ervices sends trip information i e Driving Distance Driving Speed Driving Time and etc to MyUVO com regularly Trip Info Sync Reminder feature is the function that give a notice when trip information n...

Страница 112: ...Services key and then the Settings button on the touch screen 2 Press the My Car Zone setting button 3 The PIN must be entered to use My Car Zone Settings 4 Press the Change button to change Curfew Li...

Страница 113: ...interval of the speed limit To enable Speed Alert ensure that the On button is selected Change PIN This feature is used to change the PIN to enter My Car Zone Settings 1 Press the Change button of pi...

Страница 114: ...tton 2 Select the Time Zone that you want to set Daylight Saving Setting This feature is used to set Daylight Saving Time for My Car Zone To enable Daylight Saving ensure that the On button is selecte...

Страница 115: ...ra screen 1 Place the transmission in Reverse R Warning Check surroundings for your safety The Rear Camera Display is equipped with an optical lens necessary to help acquire a wider field of vision an...

Отзывы: