background image

6

6

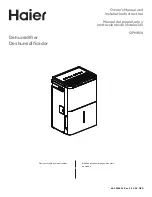
IDENTIFICATION OF PARTS

Power Cord and plug

Drain hose outlet

Band(Used only when 
storing the unit.)

Front

Rear

Air outlet grille

Caster

Identification of parts

Fig.2

Fig.3

Air filter (behind the grille)

Control panel

Air intake grille

Water bucket

1

2

3

4

5

1

2

3

4

NOTE:


All the pictures in the manual are 

for explanation purposes only. The actual 
shape of the unit you purchased may be 
slightly different, but the operations and 
functions are the same.
             

Accessories:

Drain hose(1pc)            adaptor A(1pc)            screw(2pc)

6

Handle (both sides)

1

2

3

1

2

4

5

3

6

Содержание R-KSTAD50B

Страница 1: ...this product please read the instructions carefully and save this manual for future use Register your unit at www arcaugusta com register my product htm REFURBISHED DEHUMIDIFIER Model R KSTAD50B R KST...

Страница 2: ...When using the unit 7 Removing the collected water 8 CARE AND MAINTENANCE Care and cleaning of the dehumidifier 9 TROUBLESHOOTING TIPS Troubleshooting tips 10 CONTROL PADS ON THE DEHUMIDIFIER Control...

Страница 3: ...rd Do not place the unit near a heat source Before cleaning turn off the power and unplug the unit Do not use the machine near flammable gas or combustibles such as gasoline benzene thinner etc CAUTIO...

Страница 4: ...unit If water enters the unit turn the unit off and disconnect the power contact a qualified service technician Do not place flower vases or other water container on top of the unit The manufactures n...

Страница 5: ...pad and the light will go off 5 5 Humidity Set Control Pads 7 7 Up Down Pads TIMER Set Control Pads Use the Up Down pads to set the Auto start and Auto stop time from 0 0 to 24 The humidity level can...

Страница 6: ...ress it again the Time Off indecator light illuminates It indicates the Auto Stop is initiated Check filter feature The system starts to count the time once the fan motor operates The check filter fea...

Страница 7: ...ig 3 Air filter behind the grille Control panel Air intake grille Water bucket 1 2 3 4 5 1 2 3 4 NOTE All the pictures in the manual are for explanation purposes only Theactual shape of the unit you p...

Страница 8: ...spill water Adehumidifier operating in a basement will have little or no effect in drying an adjacent enclosed storage area such as a closet unless there is adequate circulation of air in and out of...

Страница 9: ...perate When you remove the bucket if there is some water in the unit you must dry it Fig 5 Fig 6 OPERATING THE UNIT 2 Continuous draining Water can be automatically emptied into a floor drain by attac...

Страница 10: ...using the unit for long time periods CARE AND MAINTENANCE Care and cleaning of the dehumidifier Turn the dehumidifier off and remove the plug from the wall outlet before cleaning 1 Clean the Grille a...

Страница 11: ...idity control may not be set low enough Check that all doors windows and other openings are securely closed O O Room temperature is too low below 5 C 41 F There is a kerosene heater or something givin...

Отзывы: