U3042AE16
Cal Kit Operational Check
1-Port Calibration Procedure
1. Connect the ECal or the mechanical cal kit to Port 1 or the port you are testing. Torque to
8 in-lb. For further information refer to the Help menu.
2. Perform a 1-Port Calibration on Port 1. On the analyzer, select
Response
>
Cal > Start Cal > Calibration Wizard
-OR-
(Response > Cal > Other Cals)
.
a. If using a mechanical cal kit, select
SmartCal (Guided Calibration)
>
Next
.
b. If using an ECal module, connect the ECal to a analyzer’s USB port. Select
Use Electronic
Calibration (ECal)
>
Next
.
3. Continue following the Cal Wizard prompts. In the “Select Calibration Ports and ECal
Module” dialog box click
Clear All
and select
Port 1
>
Next
>
Measure
.
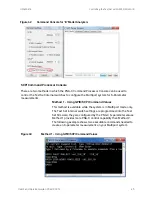
4. Ensure the Cal Kit you are using is indicated on the right side of the window.
Figure 4
9
1-Port Calibration
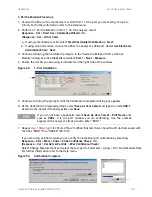
5. Continue to follow the prompts until the Calibration Completed dialog box appears.
6. At the Calibration Completed prompt, select
Save As User Calset
and type the name
999.1
.
Overwrite the Calset if it already exists and
Save
.
If you do not have a keyboard, select
Save As User Calset
>
Edit Name
and
save as
999.x.
X is the port number you are calibrating. Use the numeric
keypad on the analyzer’s front panel to enter “999.1.”
7. Repeat
thru
for Ports 2 thru 20. When finished, there should be 20 Cal Sets saved with
the titles “999.1” thru “999.20” (20-Port).
If you are using an ECal module you can verify the individual port calibration by selecting
Response > CAL > More > ECAL > ECAL Confidence Check
-OR-
(Response > Cal > Cal Sets & Cal Kits > ECal Confidence Check)
.
Select Change Measurement and select the test port S-Parameter > Apply > OK > Read Module Data.
For further information refer to the Help menu.
Figure
50
Calibration Complete
User's and Service Guide U3042-90012
59

