background image

15

Console Instructions

INTERVAL PROGRAMS OVERVIEW

 - These programs give users the best of both worlds.  

Lower intensity levels can provide effective fat burning, while higher intensity levels can provide 
effective cardiovascular training.  The CG1 combines these benefits in three effective Interval 
programs.

INTERVAL

 - This program simulates interval training thru a series of two hill profiles.

INTERVAL MOUNTAIN

 - This program simulates interval training thru a difficult mountain 

profile.

INTERVAL SPEED TRAINING

 - This program simulates interval training with more extreme 

levels of high and low intensity levels.

USER PROFILES: 

U1/U2

 - User Profiles U1 and U2 allow you to customize and save a exercise session.  To enter  


data into User Programs:


Scroll thru programs to U1 or U2.  If no profile has been saved, the message window will  


scroll   “EMPTY FILE PRESS START TO BUILD A NEW PROFILE”.  Press Start.  You may  


make changes to the tension level at any time during your exercise session.  One you  


press PAUSE/RESET and exit the program, the data is automatically saved.

To clear a saved User program:
 

Press Program button to scroll to U1 or U2 program.  Press ENTER to select program.   


Press and hold PAUSE/RESET for 2 seconds (console will beep twice).

DURING OPERATION - 


The Console will display and update calculated workout data in each of the windows.


The Console will continue to count down until Time has reached 0:00.


Use the +/- buttons to adjust the resistance level at any time during your workout     


session.


In the Profile Window the current column will be flashing.


During non-heart rate programs, the profile window will toggle between the program  


profile and the track display.  Profile will show for 10 seconds, Track for 30 seconds.


During heart rate programs, the profile window will only show the track.


The User may change the program selection during an exercise session by pressing the  


PROGRAM button until new program is selected.  The new selected program will start  

MOUNTAIN

 - This program takes the user gradually up to a high tension level, then brings the 

tension level back down to the starting point.  This program simulates what one might   
encounter on a true mountain course.  This is a difficult program since higher tension levels are 
maintained for long periods of time.

HILL

 - This program takes the user thru two hill profiles.  Tension changes are small during 

this program.  This is a good program to get started with or for someone looking for a lower 
stress workout.

RANDOM

 - This program randomly generates a new program profile every time it is chosen.  

This allows you to keep the workouts fresh and motivating.  When you scroll thru the programs 
to reach the RANDOM program, you will be able to see the program profile.  If this profile is 
not to your liking, simply scroll thru the programs again.  A new RANDOM program will be  
generated.  The RANDOM program will be different every time you use it.

Содержание Center G CG1

Страница 1: ...6 07 07 Rev A Owner s Manual Customer Service 888 340 0482 4009 Distribution Drive Suite 250 Garland TX 75041 www keysfitness com SERIAL TAG IS LOCATED ON THE FRAME Model Name CG1 Date of Purchase Serial Number ...

Страница 2: ...nt Safety Information 3 4 Assembly 5 10 Console Instructions 11 18 Monitoring Your Heart Rate 19 Warm Up Exercises 20 Troubleshooting 21 Parts List 22 Exploded Views 23 Warranty Information 24 Table of Contents ...

Страница 3: ...be placed under the unit to protect floor or carpet and for easier cleaning 4 Follow safety information in regards to plugging in your unit Do not run the power cord underneath your unit Do not operate the unit with a damaged or frayed power cord 5 Wear comfortable good quality walking or running shoes and appropriate clothing Do not use the unit with bare feet sandals socks or stockings 6 Always ...

Страница 4: ...n will have on your exercise heart rate If you have heart problems your are not active and or are over the age of 35 years do not use the pre set programs or start an exercise program without first contacting and receiving approval from your physician To avoid the risk of electrical shock always keep the console dry Do not spill liquids on the console Keys Fitness recommends a sealed water bottle ...

Страница 5: ...n of Figure 8 If you are missing any bags please call Keys Fitness at 1 888 340 0482 Tools have been provided to assist with product assembly Assembly Figure 1 Locate bag labeled Figure 1 Locate Console Tube Attach Console Tube to Main Frame Slide Tube down into Main Frame Connect Upper Console Wire to Lead Wire Assembly Secure using three M10 80 mm Hex Head Screws extending through the frame and ...

Страница 6: ...Right Handrail Assemblies Secure Left Handrail Assembly to Console tube by using one Washer one Spring Washer one M10 20 Hex Bolt and one End Cap Repeat for the right side Note The Handrail Assembly will only go onto the Console Tube one way The connector on the middle of the Handrail Assembly will face outwards Figure 3 M5 0 8 12 SCREW END CAP M10 20 HEX BOLT SPRING WASHER WASHER CONSOLE TUBE HAN...

Страница 7: ...nded that 2 adults align and secure the Pedal Tube Assemblies to the Handrail Assemblies Figure 4 Locate bag labeled Figure 4 Lift and place left Linkage onto Shaft Sleeve and align holes Secure Linkage to unit using four M8 12 mm Hex Bolts Repeat for right side Note The Linkage is secured to the sleeve with three M8 12 Hex Bolts on the top of the Linkage and one M8 12 Hex Bolt on the bottom of th...

Страница 8: ... M5X0 8 12 Repeat for other side Note Do not overtighten screw this will damage Bracket Cover Figure 6 Figure 7 Locate bag labeled Figure 7 Locate Handlebars Attach Left Handlbar to Handlebar Assembly using three M8 16mm Hex Bolts Repeat for other handlebar Figure 7 BRACKET COVER SCREW LEFT HANDLEBAR M8 16 HEX BOLT RIGHT HANDLEBAR CONSOLE TUBE HANDRAIL ASSEMBLY ...

Страница 9: ...t all wires are secure inside console tube Be careful not to pinch wires Figure 9 Figure 8 Locate Console Connect Upper Console Wire and Pulse Wires to the appropriate location on the back of the Console Secure Console to Console Tube using four Screws Note The four Console Screws will already be installed into the back of Console when you remove it from the box Figure 8 Assembly M6 10 HEX SOCKET ...

Страница 10: ...Figure 10 Secure bottle holder to console tube using two M5 0 8 12 Screws Figure 10 10 Assembly CONGRATULATIONS You have completed assembly of your CG1 Elliptical M5 0 8 12 CR RE SCREW ...

Страница 11: ...PER MIN to CALORIES PULSE LEVEL CAL HR To exit Auto Scan Mode and enter Manual Scan Mode Press and Hold button for two seconds Console will beep twice Manual Scan Mode allows you to toggle display from TIME DISTANCE SPEED STRIDES PER MIN to CALORIES PULSE LEVEL CAL HR by pushing the ENTER SCAN button To return to Auto Scan Mode Press and Hold button for two seconds Console will beep twice to confi...

Страница 12: ...he program selected will show in the message window The program profile will show in the profile window There are two information windows on the console MESSAGE WINDOW Displays Program Name Messages TIME DISTANCE SPEED RPM revolutions per minute CALORIES PULSE RESISTANCE LEVEL and CAL HOUR PROFILE WINDOW This 10 X 14 LED Window displays Program Profile Tension Bar Heart Rate Bar HR Programs only L...

Страница 13: ...utes Weight is set at 150 lbs LAP DISPLAY Shows your progress around an virtual track This also shows the tension level in the first column Every dot in the tension column represents an increment of two Tension is adjustable from 1 20 One dot on the lap counter is equal to 15 revolutions One revolution is equal to 2 steps Current position on track will blink Lap Progress Display 19 20 17 18 15 16 ...

Страница 14: ... in Message Window Use the buttons to set Time desired Press ENTER SCAN to confirm time setting Default Time is 30 minutes Time settings can range from 1 minute to 99 minutes If Time entered 14 minutes each column in the program profile 1 minute If Time entered 14 minutes each column Time 14 WEIGHT will show in Message Window Use the buttons to set weight Press ENTER SCAN to confirm weight setting...

Страница 15: ...ole will continue to count down until Time has reached 0 00 Use the buttons to adjust the resistance level at any time during your workout session In the Profile Window the current column will be flashing During non heart rate programs the profile window will toggle between the program profile and the track display Profile will show for 10 seconds Track for 30 seconds During heart rate programs th...

Страница 16: ...esigned to automatically change resistance to keep your heart rate at a predetermined level based on the selected Heart Rate program Each Heart Rate pro gram is designed with a specific goal in mind If no Heart Rate signal is detected for 10 seconds the message center will show NO DETECTED HR If this continues for 40 seconds the message center will show ABORT PROGRAM for 3 seconds then interrupt t...

Страница 17: ... by automatically adjusting the tension levels This program provides the ultimate fat burning workout HR HILL 65 75 85 Simulates hill training by changing the Target Heart Rate thru 3 dif ferent percentages The changes will occur as follows 65 75 85 75 65 75 85 etc Each percentage will be held for three minutes before changing to the next percentage HR INT HILL INTERVAL This program alternates bet...

Страница 18: ...set to 0 Unit will automatically shut off after 4 minutes of inactivity Press any button to bring the console back to full functionality ERROR MESSAGES The message center will display motor error message whenever the brake motor was unable to move to its target position within 2 seconds Each time the CG1 is powered on the console will check the brake motor status If the brake motor does not reply ...

Страница 19: ... fitness During your first several months of exercising the AHA recommends aiming for the lower part of the target heart rate zone 60 then gradually progressing up to 75 According to the AHA exercising above 75 of your maximum heart rate may be too strenu ous unless you are in top physical condition Exercising below 60 of your maximum will result in minimal cardiovascular conditioning Check your p...

Страница 20: ... tendons and ankles QUADRICEPS STRETCH With one hand against a wall for balance reach back and grasp one foot with your other hand Bring your heel as close to your buttocks as possible Hold for 15 counts then relax This will stretch your quadriceps and hip muscles INNER THIGH STRETCH Image not Shown Sit with the soles of your feet together and your knees outward Pull your feet toward your groin ar...

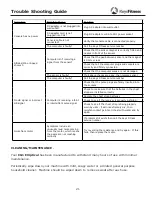
Страница 21: ...service number Check that the pulse plugs are firmly inserted into the sockets Check to make sure that the batteries in the chest strap are installed correctly Replace the chest strap batteries Check to see if the receiver is properly installed Check to see if the chest strap is being properly worn by user if skin is extremely dry then moisten contact points on chest with water and try again No HR...

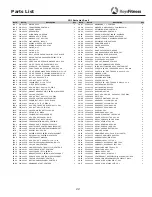
Страница 22: ...21LG 319 00225 COLLAR CENTERG 2 2LXT 302 01455 BOLT HEX SOC HD CAP M12X1 75 55 BLAC 2 21NP 302 01280 HEX HD BOLT M12 1 75 110 ZINC 2 2MPY 306 00808 GRIP CG1 2 21X8 302 01304 SPACER CENTER G ACHIEVER CDT 3 2MQD 323 00543 CONSOLE MAST ASSY CG1 HR 1 21ZR 302 01353 CROWN NUT M10 1 5 120 BLACK 3 2MXU 313 00407 WIRE ASSY 1100MM CG1 HR 1 22LR 302 01401 C RING A 16 T 1 2 BLACK 1 2MXV 313 00408 WIRE ASSY 1...

Страница 23: ...2 2GWU 0K3X 01FE 01FD 01FD 10 01FD 2 2GSJ 1479 2D4K 2CU7 2CTQ G 0J4Z 4 2 0KR0 2CU8 2 2CS3 2 2CU9 2 2CTC J 2 2D2K 0K94 16 24 0K4T 4 16 0KRK 2GPV H 4 27JR 2 2CRJ 2 2DUW 0K4R 4 J C 2H7B 2H66 0K2W Q 2H4J 0JEG 2HNU 22LR 21AA 3 3 21X8 N 2 2 0KN2 0J93 2JZS 2DB6 2DB7 2 2DM4 0J93 2 Q K F 2 21NP 2 21LG 2 2GQP D P 2D4J 0K9C 2 22QV 2GQS 2CU3 2 K 2GQN L 4 0K2C 0KR0 2 D 25VV 0J9C 0K4R 2 0JEE 2GS1 2GPW A M 2DZV ...

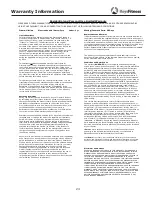
Страница 24: ... a defect has not been repaired or the Product is deemed non repairable by Keys technical service and support staff Keys based on a case by case review may opt to replace the Product or recommend an alternate resolution such as a warranty buy out Product cost subject to deduction of a reasonable charge for usage or a credit Keys as a manufacturer reserves the right to replace the Product with a Fa...

Страница 25: ...Customer Service 888 340 0482 Keys Fitness Products 4009 Distribution Drive Suite 250 Garland TX 75041 www keysfitness com ...

Отзывы: