157
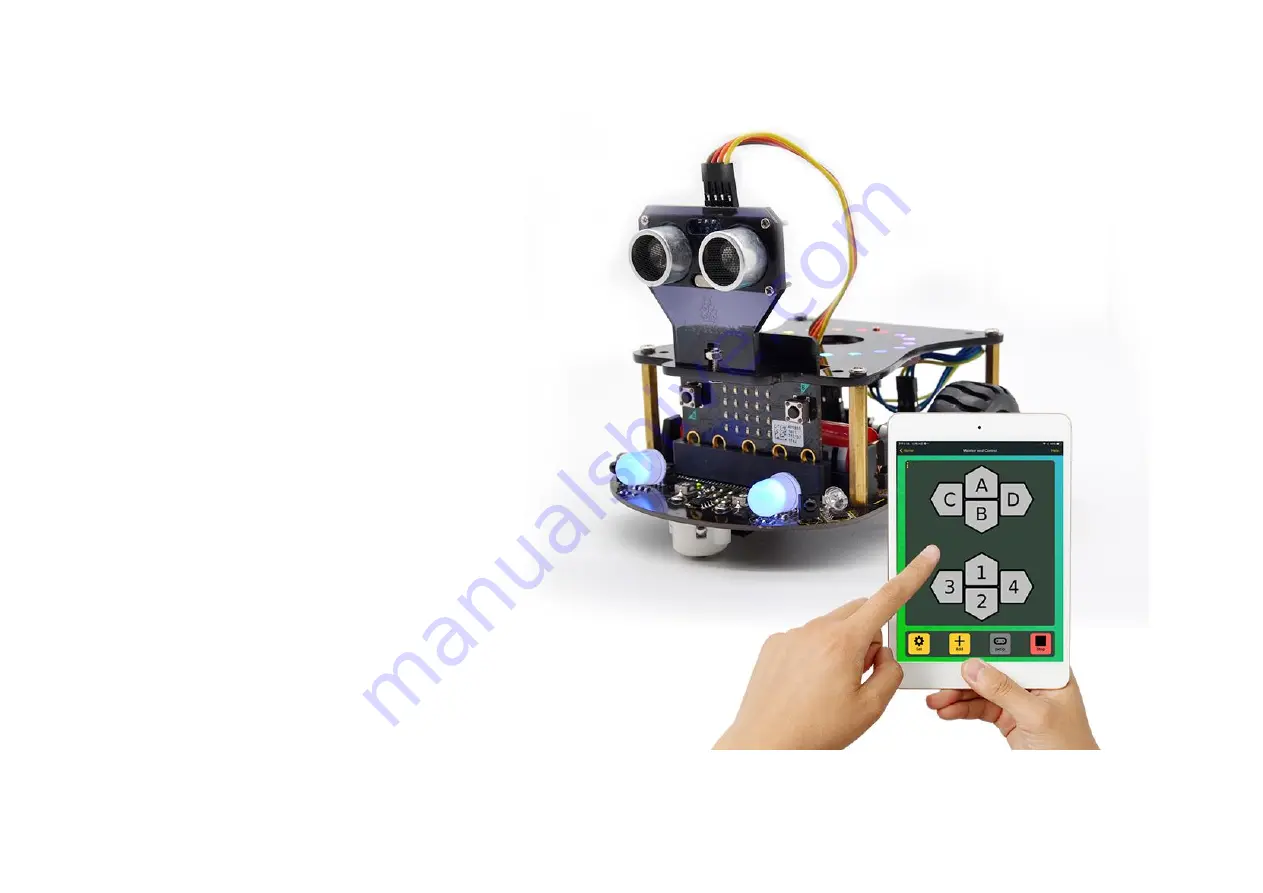
Test Result
Press key
A
, robot goes front; Press the
key
B
, go back; Press key
C
, turn left;
Press key
D
, turn right;
Press
Stop
to disconnect the Bluetooth,
robot will stop.
Press key 1, robot stops; Press key 2,
robot stops to turn left 180
°
and then
stop to go forward;
Press key 3, robot will turn left circle;
press key 4, turn right circle.
Содержание Micro:bit Mini Smart Robot Car V2
Страница 1: ...Micro bit Mini Smart Robot Car V2...
Страница 11: ...2 b To begin with should use two screws of universal wheel to mount the wheel on the bottom shield...
Страница 12: ...3 The front and back view are shown as below picture...
Страница 14: ...5...
Страница 17: ...8...
Страница 20: ...11...
Страница 21: ...12 e Finally you should get the parts below...
Страница 22: ...13...
Страница 24: ...15...
Страница 26: ...17 Insert the micro bit main board into bottom shield Congrats The fantastic micro bit robot is installed well...
Страница 28: ...2...
Страница 29: ...3 3 After that click Next to continue the installation...
Страница 30: ...4 4 Wait the driver installing finished...
Страница 31: ...5 5 Completing the driver installation...
Страница 32: ...6 6 Driver installation completed then you can right click the Computer Properties Device Manager...
Страница 33: ...7 You can check the detailed Ports information shown as below...
Страница 36: ...10 Click the JavaScript you can see the corresponding program code Shown as below figure...
Страница 39: ...13 You can power it using USB cable or battery The battery holder should connect two 1 5V AA batteries...
Страница 41: ...15...
Страница 43: ...17...
Страница 44: ...18...
Страница 45: ...19 Get Started with Micro bit Robot Projects...
Страница 46: ...20 Get Knowledge of Micro bit Shield Elements...
Страница 48: ...22 Birthday...
Страница 51: ...25 Source Code...
Страница 55: ...29 Then click Advanced find the Extensions to add file...
Страница 56: ...30 Search neopixel then add the library file...
Страница 57: ...31...
Страница 58: ...32 Library added well you should see the Neopixel on the Blocks interface...
Страница 59: ...33 Test code 1 You can drag the code file to the MicrosoftMakeCode window...
Страница 64: ...38 Then click Advanced find the Extensions to add file...
Страница 65: ...39 Enter https github com jdarling pxt pca9685 and search...
Страница 66: ...40 Then you will get the pca9685 below...
Страница 67: ...41 Click the pca9685 to download the extension...
Страница 68: ...42 Finally you should see the PCA9685 project is added successfully...
Страница 69: ...43 Test code 1...
Страница 70: ...44 Test code 2...
Страница 80: ...54 Line Tracking Robot...
Страница 82: ...56...
Страница 83: ...57 Source Code...
Страница 87: ...61...
Страница 89: ...63 Ultrasonic Following Robot...
Страница 92: ...66...
Страница 94: ...68 Source Code...
Страница 96: ...70...
Страница 99: ...73...
Страница 101: ...75 Obstacle Avoiding And Following Robot...
Страница 103: ...77...
Страница 105: ...79...
Страница 109: ...83 Source Code...
Страница 113: ...87 Source Code...
Страница 115: ...89 Infrared Control Robot...
Страница 121: ...95 Then click Advanced find the Extensions to add file...
Страница 122: ...96 Enter https github com jhlucky maqueen and search...
Страница 123: ...97 Then you will get the maqueen file below...
Страница 124: ...98 Click the maqueen file to download the extension...
Страница 125: ...99 Finally you should see the maqueen project is added successfully...
Страница 126: ...100 Code...
Страница 128: ...102...
Страница 129: ...103...
Страница 130: ...104 We have listed out the key value of infrared remote control See the figure below...
Страница 132: ...106 Source Code...
Страница 134: ...108 Key on IR remote control Robot status Move forward Move backward Turn left Turn right stop...
Страница 135: ...109 Bluetooth Control Robot...
Страница 138: ...112...
Страница 139: ...113 Then click Advanced find the Extensions to add file...
Страница 140: ...114 Then click the Bluetooth...
Страница 141: ...115 Select Remove extensions and add Bluetooth...
Страница 142: ...116 Finally you should see the Bluetooth is added well...
Страница 144: ...118 Finally you should see the library blocky Talky BLE is added successfully...
Страница 145: ...119 Source Code Right click the source code to send to micro bit main board...
Страница 152: ...126...
Страница 154: ...128...
Страница 155: ...129 Step 3 open the micro bit interface click Choose micro bit...
Страница 156: ...130 Then click Pair a micro bit and click Next...
Страница 158: ...132 Step 5 copy the pattern from your micro bit device and tap Next...
Страница 159: ...133 Continue to tap Next to pair...
Страница 160: ...134 OK pairing successful...
Страница 162: ...136 Step 7 open the Microsoft MakeCode for micro bit click the icon select to open the Project Settings...
Страница 163: ...137 Then you will see the interface below Close the option2 JustWorks pairing and open option1 No Pairing Required...
Страница 164: ...138 Step 8 write the code...
Страница 165: ...139 Wrote well click the triangle icon at the bottom left to change the name then click to save the code...
Страница 166: ...140 Step 9 go to the Flash interface click the blue bar to flash code to micro bit Wait the process complete...
Страница 167: ...141 OK Flashing successful...
Страница 169: ...143 Source Code...
Страница 172: ...146...
Страница 173: ...147 Step 3 open the micro bit interface click Choose micro bit...
Страница 174: ...148 Then click Pair a micro bit and click Next...
Страница 176: ...150 Step 5 copy the pattern from your micro bit device and tap Next...
Страница 177: ...151 Continue to tap Next to pair...
Страница 178: ...152 OK pairing successful...
Страница 180: ...154 Step 7 Tap the Add and then select the Gamepad...
Страница 181: ...155 And you should see the control interface shown below Click Start to connect...
Страница 182: ...156 Connection successful Click Stop to disconnect...


