99
4.
3.
3. a)
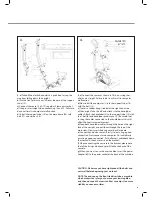
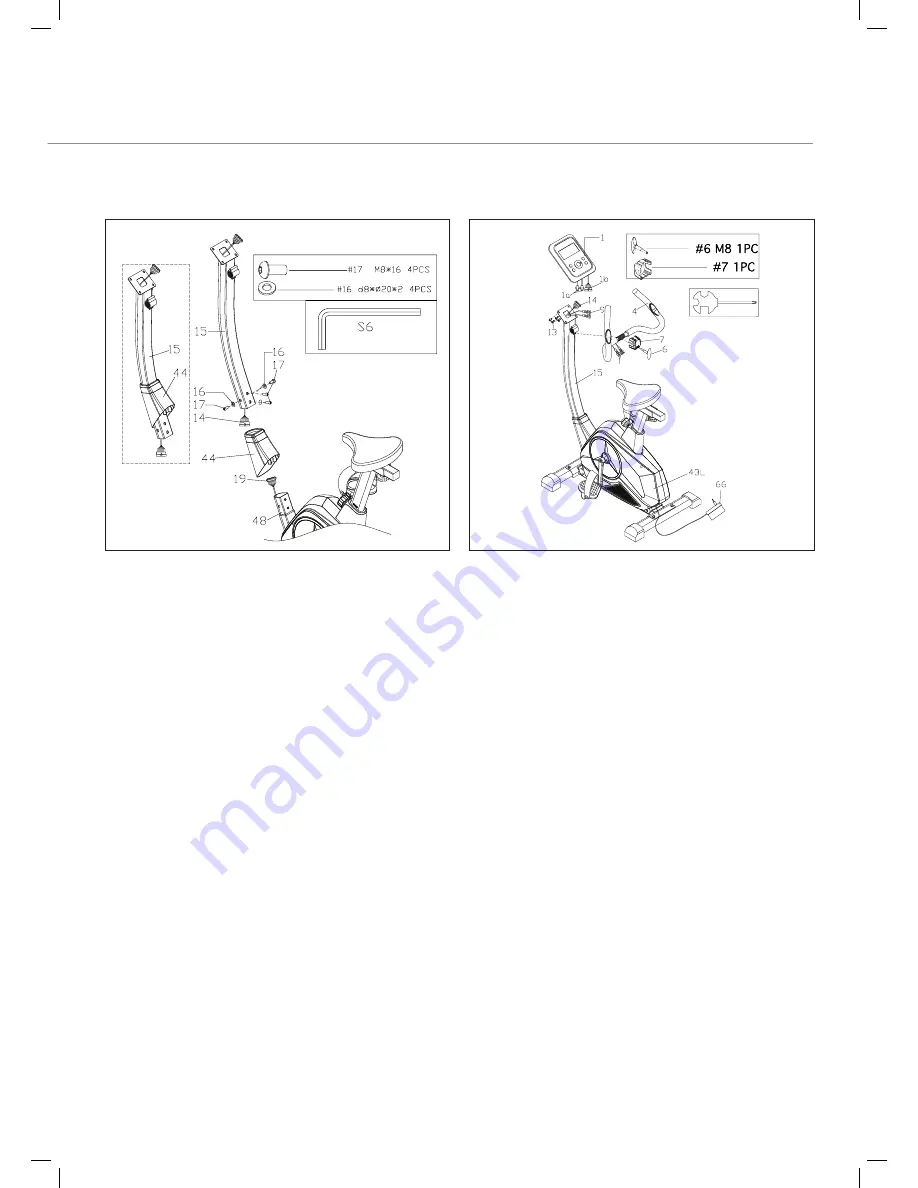
Take off the elastic band which is pre-fitted to stop the
wire from falling down the upright.
b)
Put the front plastic cover (44) over the base of the support
tube (15).
c)
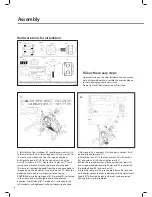
Connect the sensor (14 & 19) together. Please ensure that
all the pins are straight when connecting 14 and 19. Failure to
do so will result in computer malfunction.
d)
Install the support tube (15) on the main frame (48) with
bolt (17) and washer (16).
4. a)
Connect the sensor as shown in FIG.4, ensuring that
all pins are straight. Failure to do so will result in computer
malfunction.
b)
Now install the computer (1) into the support tube (15)
with the bolt (13).
c)
There is a rubber bung situated at the right-hand side
of the upright. Take this off and attach it to the handlebar
cables. Attach the handlebar (4) to the support tube (15) with
the T bolt (6) and handlebar plastic cover (7). Be careful not
to snag the cables connected to the handlebars as this will
affect the heart rate measurement.
d)
Feed both handlebar cables through the hole on the right
face of the upright, and pull them through the top of the
main stem. Now insert the bung cover back into hole.
e)
Connect hand pulse sensors firmly (1a) ensuring a good
connection. Now connect main computer (1b) cable firmly
ensuring a good connection. Push all excess cable back down
the stem until the console sits on the bracket.
f)
When connecting the console to the bracket, please note
that all the fixings are already pre-fitted to the back of the
console.
g)
When you want to use the exercise bike, insert the power
adapter (66) to the power socket at the back of the machine.
CAUTION: Make sure you have tightened all the bolts and
nuts well before beginning your workout.
NOTE: The end cap on the front stabiliser tube is movable,
which makes it easy for you to move your training bike,
and the end cap on the rear stabiliser can adjust to ensure
stability on uneven surfaces.


