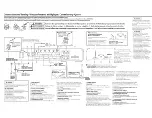
Installation board, etc. (thickness : 15 mm or more)
Tableau d’installation, etc. (épaisseur: 15 mm ou plus)
Tablero de instalación, etc. (grosor: 15 mm o más)
❷
Parts included
Pièces comprises
Partes incluidas
(2.5 mm)
Dressing cover
Enjoliveur
Cubierta de adorno
Cooling fan
Ventilateur de refroidissement
Ventilador de refrigeración
❶
Parts included
Pièces comprises
Partes incluidas
Installation / Installation / Instalación
Installation procedure
This unit needs a specialist install and setting. Read
the instruction manual well to select the proper
connection and setting.
1. Remove the ignition key and disconnect the
negative
⊖
terminal of the battery to prevent
short circuits.
2. Remove the Dressing cover.
3. Connect the battery wire.
4. Connect the ground wire to chassis ground of
vehicle.
5. Connect the speakers.
6. Connect the ADS cables. Refer to "Connection
and Setting" on the back side.
7. Attach the unit.
8. Attach the Dressing cover.
9. Connect the negative
⊖
terminal of the battery.
CAUTION
• Do not install in the below locations;
(Unstable location, In a location that interferes
with driving, In a location that gets wet, In a dusty
location, In a place that gets hot, In a place that
gets direct sunlight, In a location that gets hit by
hot air)
• Do not install the unit under the carpet.
Otherwise heat build-up occurs and the unit may
be damaged.
• Install this unit in a location which allows heat to
easily dissipate. Once installed, do not place any
object on top of the unit.
• The surface temperature of the amplifier will
become hot during use. Install the amplifier in a
place where people, resins, and other substances
that are sensitive to heat will not come into
contact with it.
• This unit has cooling fan to decrease the internal
temperature. Do not mount the unit in a place
where the cooling fan and ducts of the unit are
blocked. Blocking these openings will inhibit the
cooling of the internal temperature and result in
malfunction.
• When making a hole under a seat, inside the
trunk, or somewhere else in the vehicle, check
that there is nothing hazardous on the opposite
side such as a gasoline tank, brake pipe, or wiring
harness, and be careful not to cause scratches or
other damage.
• Do not install near the dashboard, rear tray, or air
bag safety parts.
• The installation to the vehicle should securely
fasten the unit to a place in which it will not
obstruct driving. If the unit comes off due to a
shock and hits a person or safety part, it may
cause injury or an accident.
• After installing the unit, check to make sure that
electrical equipment such as the brake lamps,
turn signal lamps and windshield wipers operate
normally.
About the Lead Terminals
1. Wire Thicknesses
You can use wires with the following
thicknesses:
Battery wire and
ground wire
AWG 4 – AWG 6
Speaker wire
AWG 8 – AWG 16
2. Strip the wire
Make a cut in the wire sheath (insulator
made from vinyl, etc.) at the position 10–13
mm (3/8”–1/2”) away from the end of the
wire, and then remove the unnecessary
portion of the sheath by twisting it.
3. Install the wire
Loosen the screw using the supplied
hexagon wrench. Insert the conductor
of the wire in the terminal hole, and then
tighten the screw.
À propos des bornes de câble
1. Épaisseurs des câbles
Vous pouvez utiliser des câbles aux
épaisseurs suivantes.
Câble de batterie et
câble de masse
AWG 4 – AWG 6
Câble d'enceinte
AWG 8 – AWG 16
2. Dénuder le câble
Coupez la gaine du câble (isolant en
vinyle, etc.) à environ 10–13 mm (3/8”–1/2”)
de l'extrémité du câble, puis enlevez
la portion de gaine inutile en la faisant
tourner dans vos doigts.
3. Installer le câble
Desserrez la vis à l'aide de la clé
hexagonale fournie. Insérez le fil
conducteur du câble dans l'orifice de la
borne, puis serrez la vis.
Acerca de los terminales con-
ductores
1. Grosores de cables.
Puede utilizar cables con los siguientes
grosores:
Cable de batería y cable
de tierra
AWG 4 – AWG 6
Cable de altavoz
AWG 8 – AWG 16
2. Pele el cable.
Realice un corte en el revestimiento del
cable (aislante de vinilo, etc.) a 10–13 mm
(3/8”–1/2”) del extremo del cable y, a con-
tinuación, retire la parte innecesaria del
revestimiento torciéndola.
3. Instale el cable.
Afloje el tornillo con la llave hexagonal
suministrada. Inserte el conductor del
cable en el orificio del terminal y apriete el
tornillo.
10–13 mm
(3/8
”
‒
1/2
”
)
Hexagon wrench
Clé polygonale
Llave hexagonal
❸
Parts included
Pièces comprises
Partes incluidas
(4.0 mm)
320 mm (12-5/8”)
169 mm (6-5/8”)
51 mm (2”)
Power indicator
When the power is turned on, the Power
indicator lights.
Indicateur d’alimentation
Lorsque l’alimentation est activée, l’indicateur
d’alimentation s’illumine.
Indicador de potencia
Cuando la alimentación se activa, el indicador
de potencia se ilumina.
XR600-6DSP.indd 1
2017/01/13 13:19


