


English
|
7
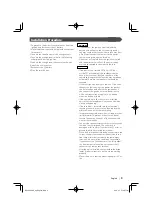
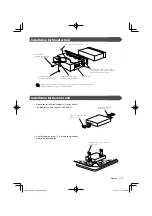
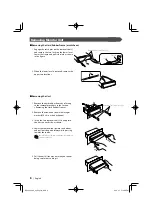
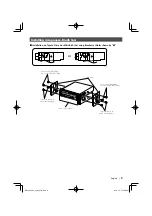
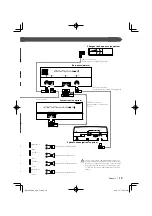
Installation for Monitor Unit
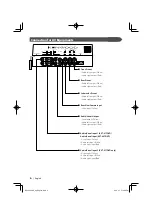
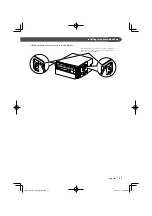
Installation for Receiver unit
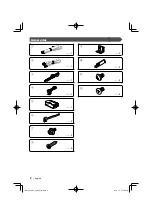
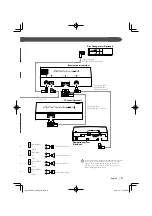
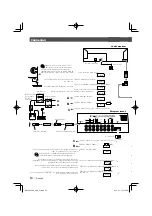
Accessory
5
Bend the tabs of the mounting
sleeve with a screwdriver or similar
utensil and attach it in place.
Metal mounting strap
(commercially available)
Self-tapping screw
(commercially available)
Screw (M4X8)
(commercially available)
Firewall or metal support
Make sure that the unit is installed securely in place. If the unit is unstable,
it may malfunction (eg, the sound may skip).
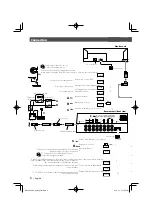
1. Attach the installation brackets
9
to the sides of
the hideaway unit using the sems bolts
7
.
2. Use the tapping screw
8
to secure the hideaway
unit to the audio board.
Installation brackets
(Accessory
9
)
Sems bolts (M4 × 8 mm)
(Accessory
7
)
Tapping screw (ø4 × 16 mm)
(Accessory
8
)
B54-4502-00̲00̲English.indd 7
B54-4502-00̲00̲English.indd 7
06.4.21 7:12:58 PM
06.4.21 7:12:58 PM
Содержание KVT-617DVD
Страница 42: ...B54 4502 00 00 K Po indd 42 B54 4502 00 00 K Po indd 42 06 4 21 7 11 46 PM 06 4 21 7 11 46 PM ...
Страница 43: ...B54 4502 00 00 K Po indd 43 B54 4502 00 00 K Po indd 43 06 4 21 7 11 46 PM 06 4 21 7 11 46 PM ...
Страница 44: ...B54 4502 00 00 K Po indd 44 B54 4502 00 00 K Po indd 44 06 4 21 7 11 46 PM 06 4 21 7 11 46 PM ...


