background image

— 3 —

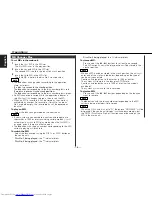
The marking of products using lasers
(Except for some areas) 

The label is attached to the chassis/case and
says that the component uses laser beams
that have been classified as Class 1. It means
that the unit is utilizing laser beams that are
of a weaker class. There is no danger of
hazardous radiation outside the unit.

Setting of the O-N switch will be required
depending on the centre unit that is to be
connected. (See page 10.)
The operations you perform and the
resultant operation of the unit will differ
depending on the setting of the O-N
switch. Please see the appropriate
description of operations for the "O" or
"N" switch setting. 

CLASS 1
LASER PRODUCT

1

2

3

O

N

O

N

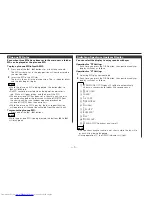
Cleaning the Unit

If the faceplate of this unit is stained, wipe it
with a dry soft cloth such as a silicon cloth.
If the faceplate is stained badly, wipe the
stain off with a cloth moistened with neutral
cleaner, then wipe neutral detergent off.

Applying spray cleaner directly to the unit
may affect its mechanical parts. Wiping the
faceplate with a hard cloth or using a volatile
liquid such as thinner or alcohol may scratch
the surface or erases characters.

Cleaning the Faceplate Terminals

If the terminals on the unit or faceplate get
dirty, wipe them with a dry, soft cloth.

Lens Fogging

Right after you turn on the car heater in cold
weather, dew or condensation may form on
the lens in the MD player of the unit. Called
lens fogging, MDs may be impossible to play.
In such a situation, remove the disc and wait
for the condensation to evaporate. If the unit
still does not operate normally after a while,
consult your Kenwood dealer.

2

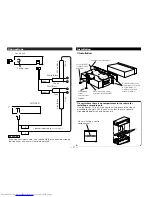
CAUTION

To prevent damage to the machine,
take the following precautions:

• Make sure to ground the unit to a negative

12V DC power supply.

• Do not open the top or bottom covers of the

unit.

• Do not install the unit in a spot exposed to

direct sunlight or excessive heat or humidity.
Also avoid places with too much dust or the
possibility of water splashing.

• Do not set the removed faceplate or the

faceplate case in areas exposed to direct
sunlight, excessive heat or humidity. Also
avoid places with too much dust or the
possibility of water splashing.

• To prevent deterioration, do not touch the

terminals of the unit or faceplate with your
fingers.

• Do not subject the faceplate to excessive

shock, as it is a piece of precision equipment.

• Do not place any object between the

faceplate and the unit.

• During installation, do not use any screws

except for the ones provided. The use of
improper screws might result in damage to
the main unit.

2

CAUTION

Содержание KMD-D401

Страница 1: ...KMD D401 B64 1955 00 EN 3 DISC AND 1 DISC MD AUTO CHANGER INSTRUCTION MANUAL ...

Страница 2: ... all the way in until it is fully locked in place Otherwise it may fall out of place when jolted To prevent a short circuit never put or leave any metallic objects such as coins or metal tools inside the unit If the unit starts to emit smoke or strange smells turn off the power immediately and consult your Kenwood dealer Make sure not to get your fingers caught between the faceplate and the unit B...

Страница 3: ...e terminals on the unit or faceplate get dirty wipe them with a dry soft cloth Lens Fogging Right after you turn on the car heater in cold weather dew or condensation may form on the lens in the MD player of the unit Called lens fogging MDs may be impossible to play In such a situation remove the disc and wait for the condensation to evaporate If the unit still does not operate normally after a wh...

Страница 4: ...e 1994 If used with such units an optional CA SD200 sold separately must be used FAILURE TO FOLLOW THESE INSTRUCTIONS MAY RESULT IN DAMAGE TO THIS UNIT AND CONTROL UNIT Handling Mini discs The MD shutter is designed so that it cannot be opened If forced open the cartridge will be damaged and use of the MD will no longer be possible If the shutter has been opened due to some cause be careful not to...

Страница 5: ...AYER 11BAND SPECTRUM ANALYZER 60 120 250 380 500 750 1k 2k 4k 8k 16k DISP MENU Buttons and Display Release button DISP button Operations 1 2 3 01 02 03 MD Slot MENU indicator DISC indicator Disc No indicator Spectrum analyzer display Title display Opration indicator DEMO indicator ...

Страница 6: ...en the first MD is inserted even if there are other sources The 0 button with the disc number corresponding to the MD currently playing will blink red To switch the MD Select the disc number using the DISC or DISC button on the centre unit Disc No 1 being played the indicator blinks Disc No 2 being played the indicator blinks NOTE NOTE 3 2 1 Disc No 3 being played the indicator blinks To store an ...

Страница 7: ...tre unit While the plus one MD is playing the disc repeat function will operate but it cannot be cancelled from the centre unit To remove the plus one MD Press one of the 01 03 buttons While the plus one MD is being ejected the buttons 01 to 03 will blink green NOTE NOTE 2 1 Switching Spectrum Analyzer Display You can select the display to enjoy sounds with eyes Operation for N Setting Each time y...

Страница 8: ...5 4 3 2 1 Table of Adjustment Mode Selectable title 1 TITLE Adjustment mode Display DISC button DISC button Operation of Control button Spectrum Analyzer level 3 ANA LV The spectrum analyzer level increased The spectrum analyzer level decreased LCD contrast level 4 LCD CNT The setting values higher The setting values lower Analyzer title ANA Disc title DISC Track title TRACK Title scroll 2 SCROLL ...

Страница 9: ...o the front and remove it If the controls remain untouched for a period of 5 minutes or more after the panel has dropped open or been removed the disc will automatically stop playing A warning beep starts sounding 30 seconds before play stops automatically The faceplate is a precision piece of equipment and can be damaged by shocks or jolts For that reason keep the faceplate in its special storage...

Страница 10: ...e centre unit 4 Connect the control cable to the control connector 5 Install the unit in your car 6 Reconnect the battery 7 Press the reset button on the centre unit Do not connect the changer control cable while the centre unit is turned on Be sure to press the reset button after installation Whether the centre unit in use is compatible with the N operation or not can be identified by referring t...

Страница 11: ...ilable Self tapping screw commercially available Firewall or metal support Screw M4X8 commercially available Installation Installation Bend the tabs of the mounting sleeve with a screwdriver or similar utensil and attach it in place U P 2 On cars where there is no compartment in the centre for installing a car audio unit Use the spacer 2 to affix the centre unit sleeve and the sleeve attached to t...

Страница 12: ...remove the hard rubber frame Remove the Hex head screw with integral washer M4 8 on the back panel Insert the two removal tools deeply into the slots on each side as shown 3 2 1 When the lower level is removed remove the upper two locations 2 The frame can be removed from the top side in the same manner NOTE Catch Lock Engage the catch pins on the removal tool and remove the two locks on the lower...

Страница 13: ...ads but soon comes out again Nothing is recorded on the MD Switch the MD for one that is recorded The disc cannot be changed Four MDs have been set in the main unit Remove the MD currently playing No sound can be heard or the volume is low The fader or balance settings are set all the way to one side Reset the fader or balance settings Attenuator is turned on Turn off Attenuator The spectrum analy...

Страница 14: ...he MD player exceeds 60 C 140 F stopping all operation Cool down the unit by opening the windows or turning on the air conditioner As the temperature falls below 60 C 140 F the disc will start playing again E 0d HOLD The faceplate of this unit has been removed Replace it NO PANEL E 30 Nothing has been recorded on the MD The next MD will automatically be played BLANK No tracks are recorded on the M...

Страница 15: ...kHz 0 03 Signal to Noise ratio 90 dB 1 kHz Dynamic range 87 dB Channel separation 80 dB Spindle speed 400 900 rpm CLV Wow Flutter Below Measurable Limit General Operating voltage 14 4 V 11 16 V allowable Current consumption 0 8 A Installation size W H D 180 50 160 mm 7 1 16 1 15 16 6 1 16 in Weight 1 3 kg 2 9 Lbs Specifications subject to change without notice Specifications ...

Страница 16: ......

Отзывы: