background image

47


|


KDC-BT92SD

English


|


48

DSP Setup

Car Type Selection

You can compensate the delay of the sound arrival 
time by selecting your environment from the 
following car types.

Display

Overview

“OFF”

Not compensating.

“Compact”

Compact car

“Sedan”

Sedan

“Wagon”

Station wagon

“Minivan”

Minivan

“SUV”

Sport-utility vehicle

“Passenger Van”

Passenger van

(      : Factory setting)

Select the source

Pressing the [SRC] button repeatedly switches 
source.

Select a source other than “STANDBY”.


SRC Select mode 2: Press the [SRC] button and 
then turn the [VOL] knob. To determine the 
selected source, press the [VOL] knob.

Enter Audio Control mode

Press the [VOL] knob.

Enter Car Type select mode

Turn the [VOL] knob and press it when the 
desired item is displayed. 
Select “Pro Setup”

 > 

“Car Type”.

Select the car type

Turn the [VOL] knob. 

Set the value

Press the [VOL] button.

Exit Audio Control mode

Press the [MENU] button for at least 1 second.

•  You can compensate the distances in more details by 

using 

<Listening Position Fine Adjustments> (page 49)


function.

Speaker Setting

The speaker X’Over is automatically set when the 
position and size of each speaker are selected from 
the following items.

Speaker

Item

Range

“Front”

“SIZE”

Speaker Size Front

“O.E.M.”, “8cm”, “10cm”, “12cm”, 

“13cm”, “16cm”, “17cm”, “18cm”, “4x6”, 

“5x7”, “6x8”, “6x9”, “7x10”

“LOCATION” Speaker Location Front

“Door”, “On Dash”, “Under Dash”

“TWEETER” Speaker Range Tweeter

“None”, “Small”, “Middle”, “Large”

“Rear”

“SIZE”

Speaker Size Rear

“None”, “O.E.M.”, “8cm”, “10cm”, “12cm”, 

“13cm”, “16cm”, “17cm”, “18cm”, “4x6”, 

“5x7”, “6x8”, “6x9”, “7x10”

“LOCATION” Speaker Location Rear

• “Door”, “Rear Deck”

•  “2nd Row”, “3rd Row”

 (Car Type: 

“Minivan”, “Passenger Van”)

“SubWoofer” “SIZE”

Speaker Size Subwoofer

“None”, “16cm”, “20cm”, “25cm”, 

“30cm”, “38cm Over”

(      : Factory setting)

Select the source

Pressing the [SRC] button repeatedly switches 
source.

Select a source other than “STANDBY”.


SRC Select mode 2: Press the [SRC] button and 
then turn the [VOL] knob. To determine the 
selected source, press the [VOL] knob.

Enter Audio Control mode

Press the [VOL] knob.

Enter Speaker setting mode

Turn the [VOL] knob and press it when the 
desired item is displayed. 
Select “Pro Setup”

 > 

“Speaker Setting”.

Select the setting item to adjust

Turn the [VOL] knob and press it when the 
desired item is displayed. 

Make a setting

Turn the [VOL] knob to select a setting value, 
and then press the [VOL] knob.

Exit Audio Control mode

Press the [MENU] button for at least 1 second.

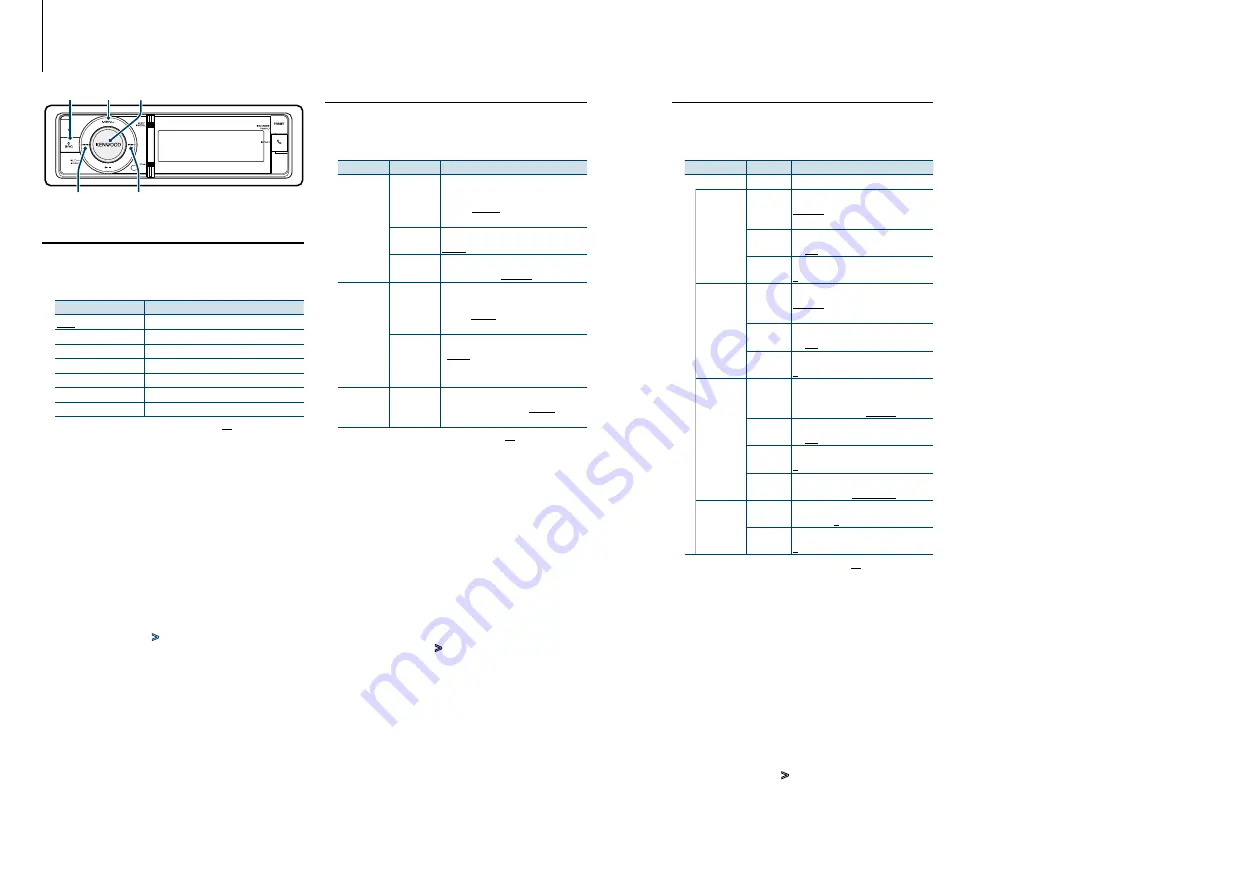
SRC

4

MENU VOL

¢

Select the speaker you want to set

Turn the [VOL] knob and press it when the 
desired item is displayed. 
Select “Front”, “Rear”, “SubWoofer” or “Tweeter”.

Select the setting item to adjust

Turn the [VOL] knob and press it when the 
desired item is displayed. 

Make a setting

Turn the [VOL] knob to select a setting value, 
and then press the [VOL] knob.

Repeat steps 4 to 6 to complete the X’Over 
settings.

Exit Audio Control mode

Press the [MENU] button for at least 1 second.

X’Over Setting

Fine adjusting the following setting values 
corresponding to the X’Over values set in the 
section 

<Speaker Setting> (page 47)

.

Display

Item

Range

“X’Over”

“Front”

“FC”

Front High Pass Filter

Through, 30, 40, 50, 60, 70, 80, 90, 

100, 120, 150, 180, 220, 250 (Hz)

“SLOPE”

Front High Pass Slope

-6, -12, -18, -24 dB/Oct

“GAIN”

Front Gain

0, -1, -2, -3, -4, -5, -6, -7, -8 dB

“Rear”

“FC”

Rear High Pass Filter

Through, 30, 40, 50, 60, 70, 80, 90, 

100, 120, 150, 180, 220, 250 (Hz)

“SLOPE”

Rear High Pass Slope

-6, -12, -18, -24 dB/Oct

“GAIN”

Rear Gain

0, -1, -2, -3, -4, -5, -6, -7, -8 dB

“SubWoofer” “FC”

Subwoofer Low Pass Filter

30, 40, 50, 60, 70, 80, 90, 100, 120, 

150, 180, 220, 250, Through (Hz)

“SLOPE”

Subwoofer Slope

-6, -12, -18, -24 dB/Oct

“GAIN”

Subwoofer Gain

0, -1, -2, -3, -4, -5, -6, -7, -8 dB

“PHASE”

Subwoofer Phase

Reverse (180°)/ Normal (0°)

“Tweeter”

“FC”

Tweeter High Pass Filter

1, 1.6, 2.5, 4, 5, 6.3, 8, 10, 12.5 (kHz)

“Volume” Tweete Volume

0, -1, -2, -3, -4, -5, -6, -7, -8 dB

(      : Factory setting)

Select the source

Pressing the [SRC] button repeatedly switches 
source.

Select a source other than “STANDBY”.


SRC Select mode 2: Press the [SRC] button and 
then turn the [VOL] knob. To determine the 
selected source, press the [VOL] knob.

Enter Audio Control mode

Press the [VOL] knob.

Enter X’Over setting mode

Turn the [VOL] knob and press it when the 
desired item is displayed. 
Select “Pro Setup”

 > 

“X’Over”.

Содержание KDC-BT92SD

Страница 1: ... JVC KENWOOD Corporation KDC BT92SD CD RECEIVER INSTRUCTION MANUAL Before reading this manual click the button below to check the latest edition and the modified pages http manual kenwood com edition im350 Check the latest edition ...

Страница 2: ...splay Mode 3 line Display Mode iPod like Display Mode Customization of Spectrum Analyzer Display Mode Customization of Clock Display Mode Illumination Color Selection Auxiliary Input Display Setting Clock and Other Functions 39 Clock Date display type setting Clock Adjustment Date Adjustment Dual clock city setting Initial Settings Demonstration mode Setting Theft Deterrent Faceplate Audio Adjustm...

Страница 3: ... Kenwood dealer Notes If you experience problems during installation consult your Kenwood dealer When you purchase optional accessories check with your Kenwood dealer to make sure that they work with your model and in your area Characters that conform to ISO 8859 1 can be displayed Characters that conform to ISO 8859 5 or ISO 8859 1 can be displayed Set Russian of Initial Settings page 41 to On Th...

Страница 4: ...n also be cancelled in DEMO Mode of Menu List mode Refer to Demonstration mode Setting page 42 Common Operation Power and source select Turns the power ON by pressing the SRC button When the power is ON select a source SRC Select mode 1 Pressing the SRC button each time switches between sources Tuner TUNER Bluetooth Audio BT AUDIO USB USB or iPod iPod SD SD CD CD Auxiliary input AUX Standby STANDB...

Страница 5: ...KCA iP102 optional accessory is required to connect an iPod Play Mode You can select a Play Mode such as Random play and Repeat play 1 Select iPod source 2 Enter Menu List mode Press the MENU button 3 Turn the VOL knob and press it when the desired item is displayed Select Play Mode 4 Select the Play Mode Turn the VOL knob Display Overview APP iPod Mode When set to ON allows you to operate iPod wi...

Страница 6: ...e step 4 of Selecting a song by browsing iPod page 9 to select a song Cancelling the Direct Search Press the PRESET button for at least 1 second Characters that can be entered are alphabetical characters A to Z numerical characters 0 to 9 and indicates characters other than alphabetical and numerical characters You cannot enter any more characters when entering in the first character position If t...

Страница 7: ...em is displayed Select Skip Search 5 Search for item Operation type Operation Move between items Turn the VOL knob Select an item Press the VOL knob Skip Search Press the DISP or iPod button Keep pressing the button for 1 second or longer skips songs at 10 irrespective of the setting Sets the ratio of skip performed Press the 4 or button Return to previous item Press the MENU button After this ste...

Страница 8: ...s Playlists Artists Artists Albums Albums Songs Songs Genres Genres 1 Select USB or SD source 2 Enter Menu List mode Press the MENU button 3 Turn the VOL knob and press it when the desired item is displayed Select Music 4 Select a file Operation type Operation Move between items Turn the VOL knob Select an item Press the VOL knob High Speed Search Press the DISP or iPod button to scroll up or down...

Страница 9: ... Press the MENU button Turn the VOL knob and press it when the desired item is displayed Select Music item 3 Enter Skip Search mode Press the PRESET button for at least 1 second 4 Search for music Operation type Operation Move between items Turn the VOL knob Select an item Press the VOL knob Skip Search Press the DISP or iPod button Keep pressing the button for 1 second or longer skips songs at 10...

Страница 10: ...eration Drop open the faceplate Press the Release button Push the faceplate on the left side and return it to its former position Disc play A disc inserted When inserted the source is switched automatically and a song is starts playing When a CD is inserted the CD IN indicator is ON Select CD source Press the SRC button Select the CD display SRC Select mode 2 Press the SRC button and then turn the...

Страница 11: ...bulletin Changing News 00min to News 90min turns this function ON If news bulletin starts when this function is ON NEWS is displayed and news is received If 20min is has been set reception of another news bulletin will not start for 20 minutes The news bulletin volume is the same level that was set for Traffic Information Forced MONO Strong electrical fields such as from power lines may cause unst...

Страница 12: ... second Select FM 2 Enter Menu List mode Press the MENU button 3 Enter PTY mode Turn the VOL knob and press it when the desired item is displayed Select PTY Search 4 Select the Program Type Turn the VOL knob 5 Search for the selected Program Type station Press the 4 or button 6 Exit PTY mode Press the MENU button This function cannot be used during a traffic bulletin or AM reception When the selec...

Страница 13: ... Full is displayed 3 Select a Bluetooth device name Turn the VOL knob To register a new Bluetooth device select Device Search then go to When registering a Bluetooth device for the first time 4 Press the VOL knob 5 Select the profile for the device to connect Turn the VOL knob HF HFP AUD A2DP or H A HFP and A2DP indicates the corresponding profile 6 Set up the Bluetooth device name Press the VOL k...

Страница 14: ...or stopping playback Some audio players cannot be controlled remotely or reconnected after Bluetooth disconnection Operate the main unit of the audio player to connect Bluetooth Two audio devices can be connected simultaneously Speakers from which audio is output change depending on the Bluetooth setting Bluetooth HF Audio The default is Front Refer to Bluetooth Setting page 53 Play mode You can s...

Страница 15: ...th mode Press the button 2 Select a dialing method Turn the VOL knob and press it when the desired item is displayed Display Overview Preset Call Calling a number in the preset Phonebook Selecting the character to be searched for the phone book Outgoing Calls Calling a number in the outgoing call list Incoming Calls Calling a number in the incoming call list Missed Calls Calling a number in the mi...

Страница 16: ... remote controller 4 Make a call Press the VOL knob Press the DIRECT button on the remote controller You can input max 32 digits Making a call by voice dialing You can make a voice call using the voice recognition function of the cell phone 1 Enter Voice tag mode Press the VOL button for at least 1 second Voice Tag is displayed 2 Have the cell phone recognize your spoken word Pronounce the name re...

Страница 17: ... the desired item is displayed Select Settings DISP ILLUMI 4 Select the setting item to adjust Turn the VOL knob and press it when the desired item is displayed Display Overview Settings DISP ILLUMI Making Display and Illumination settings Display Select Selecting and customizing the Display type Color Select Selecting the Illumination Color of the panel Refer to Illumination Color Selection page ...

Страница 18: ...alyzer Clock Speana Clock Date Date Blank Blank 3 line display mode Title Artist Title Artist Album Artist Album Artist Folder name Folder Name File name File Name Play time P Time Play time bar Time Bar iPod only Spectrum analyzer Clock Speana Clock Date Date Blank Blank iPod like display mode Song title SongTitle Album name Album Name Artist name Artist Name Blank Blank In Bluetooth audio source...

Страница 19: ...and key Display Display Key Key 4 Select the Illumination Color Turn the VOL knob and press it when the desired item is displayed Select the color from Variable Scan Color1 Color 24 User Creating User color You can create your original color during the selection from Color1 Color24 The color you created can be called when you select User 1 Press the VOL knob for at least 1 second Enter the detail ...

Страница 20: ... OFF ON Sub Clock Adjust Adjusts the time difference caused by summer time 1h 0h 1h Date Adjust Sets the date Refer to Date Adjustment page 40 Date Mode Select Sets the date display mode 7 types Factory setting Clock and Other Functions MENU VOL SRC Release Date Adjustment You can adjust the date 1 Enter Menu List mode Press the MENU button 2 Enter Clock adjustment mode Turn the VOL knob and press...

Страница 21: ... name Album name OFF ON Menu Language You can select the display language for the Menu list item English Français Español Deutsch Italiano Pyccкий Power OFFWait Setting the timer to turn this unit s power OFF automatically when Standby mode continues Using this setting can save the vehicle s battery power Power OFFTimer function is OFF 20min 40min 60min Turns the power OFF after minutes Built in A...

Страница 22: ...DTA Settings Zone Control Sets the Dual Zone System Dual Zone System page 45 Sound Enhancements Supreme Turns ON OFF the Supreme function Can be set while Audio file source of USB SD CD and iPod source ON OFF HIGWAY SOUND Compensates the low volume or bass sound being lost by road noises to make vocal sound clearer OFF Low Middle High Space Enhancer Virtually enhances the sound space using the DSP...

Страница 23: ... MENU button for at least 1 second When iPod is selected in the section Preset Equalizer curve Select page 44 Manual Equalizer Control is disabled You can select for each source Dual Zone System Main source and sub source Auxiliary input output Front channel and Rear channel separately Display Overview 2 Zone Sets the Dual Zone System OFF ON 2 Zone RearVolume Adjust the volume of Rear channel 0 35...

Страница 24: ...3 Enter Speaker setting mode Turn the VOL knob and press it when the desired item is displayed Select Pro Setup Speaker Setting 4 Select the setting item to adjust Turn the VOL knob and press it when the desired item is displayed 5 Make a setting Turn the VOL knob to select a setting value and then press the VOL knob 6 Exit Audio Control mode Press the MENU button for at least 1 second SRC 4 MENU ...

Страница 25: ...ront seat Factory setting 1 Select the source Pressing the SRC button repeatedly switches source Select a source other than STANDBY SRC Select mode 2 Press the SRC button and then turn the VOL knob To determine the selected source press the VOL knob 2 Enter Audio Control mode Press the VOL knob 3 Enter Preset position setting mode Turn the VOL knob and press it when the desired item is displayed S...

Страница 26: ...number 4 Turn the VOL knob and press it when the desired item is displayed Select YES Memory Completed is displayed 5 Exit Audio Control mode Press the MENU button for at least 1 second Register 2 patterns of Audio Preset Memory Preset number 1 When you press the Reset all the sources will be the setting value which is registered Preset number 1 and 2 The memory cannot be erased by the Reset butto...

Страница 27: ...ng enough even after it is disconnected ON OFF WhenthisfunctionisturnedON theBluetoothdevice isreconnectedifithasbeendisconnectedbyselecting PhoneSelection AudioSelection Bluetooth HF Audio You can specify output speakers for hands free voice communication and Bluetooth audio sound Front Outputs audio from the front speakers All Outputs audio from the front and rear speakers Call Beep You can outp...

Страница 28: ...n mode Turn the VOL knob and press it when the desired item is displayed Select BT Settings Pairing SPCL DVC Select 2 Enter Special device registration mode Press the VOL knob A list is displayed 3 Select a device name Turn the VOL knob and push the center when the desired device name is displayed If Completed is displayed registration is completed 4 Go through the procedure step 3 of Registering ...

Страница 29: ...n 2 By operating the cell phone send the phone book data to this unit By operating the cell phone download the phone book data to this unit During downloading Downloading is displayed After completion of downloading Completed is displayed 3 By operating the cell phone start the hands free connection To clear the downloading completion message Press any button Up to 500 phone numbers can be registe...

Страница 30: ...of the list Other messages are displayed in the order of reception The SMS that has arrived when the cell phone is not linked with Bluetooth cannot be displayed Download the SMS The short message cannot be displayed during downloading the SMS SMS reply setting You can select a method to reply to the received SMS 1 Enter Bluetooth mode Press the button 2 Enter SMS Reply mode Turn the VOL knob and p...

Страница 31: ...ct mode Press the MENU button 8 Exit BT Settings mode Press the button You can enter letters using the remote control Example of entry To enter letter A press the 2 button once and then press the button To enter letter F press the 3 button three times and then press the button To switch between letter types press the DIRECT button After entering all letters pressing the 38 button allows you to pre...

Страница 32: ...row Changing the battery of the remote control unit Keep on slide Pull out CR2025 side Use a commercially available button battery CR2025 Insert the battery with the and poles aligned properly following the illustration inside the case Hands free phone control Making a call Enter Bluetooth mode Select a dialing method 5 ENT Number dial input Input a digit 0 9 Input Input FM Input AM Clear the ente...

Страница 33: ... is powered Install the USB device in the place where it will not prevent you from driving your vehicle properly You cannot connect a USB device via a USB hub and Multi Card Reader Take backups of the audio files used with this unit The files can be erased depending on the operating conditions of the USB device We shall have no compensation for any damage arising out of erasure of the stored data ...

Страница 34: ...ISP ILLUMI TUNER Settings Function items appearing when the Music CD Audio file source is selected Display Page Music 20 Play Mode 20 File Scan Track Scan Folder Random Disc Random All Random File Repeat Folder Repeat Track Repeat Settings Clock Date DISP ILLUMI TUNER Settings Function items appearing when the Tuner source is selected Display Page FM AM PTY Search 23 Settings Local Seek 21 Seek Mo...

Страница 35: ...l of Old Electrical and Electronic Equipment and Batteries applicable for EU countries that have adopted separate waste collection systems Products and batteries with the symbol crossed out wheeled bin cannot be disposed as household waste Old electrical and electronic equipment and batteries should be recycled at a facility capable of handling these items and their waste byproducts Contact your l...

Страница 36: ...y of water splashing Do not use your own screws Use only the screws provided If you use the wrong screws you could damage the unit If the power is not turned ON Protect is displayed the speaker wire may have a short circuit or touched the chassis of the vehicle and the protection function may have been activated Therefore the speaker wire should be checked Make sure that all wire connections are s...

Страница 37: ...ected to the constant power supply and the A 4 pin yellow is linked to the ignition Unit Vehicle A 7 Pin Red A 4 Pin Yellow Ignition cable Red Battery cable Yellow Installation Removing the Unit Installation Bend the tabs of the mounting sleeve with a screwdriver or similar utensil and attach it in place Make sure that the unit is installed securely in place If the unit is unstable it may malfunct...

Страница 38: ... rear speakers The Dual zone function is disabled Dual Zone System page 45 Cannot set up Display Demonstration mode Setting page 42 is not turned off The number of songs contained in Songs category of this unit is different from that contained in Songs category of iPod Podcast files are not counted in this unit as this unit does not support the playback of podcast files What might seem to be a mal...

Страница 39: ...erly and press the reset button If the Protect code does not disappear consult your nearest service center Unsupported File An Audio file is played with a format that this unit can t support Copy Protection A copy protected file is played Read Error The file system of the connected USB device is broken Copy the files and folders for the USB device again If the error message is still displayed init...

Страница 40: ... filter D A 8 Times Over Sampling D A Converter 24 Bit Spindle speed 500 200 rpm CLV Wow Flutter Below Measurable Limit Frequency response 1 dB 10 Hz 20 kHz Total harmonic distortion 1 kHz 0 008 Signal to Noise ratio 1 kHz 110 dB Dynamic range 93 dB MP3 decode Compliant with MPEG 1 2 Audio Layer 3 WMA decode Compliant with Windows Media Audio AAC decode AAC LC m4a files SD card section Compatible ...

Страница 41: ...h the essential requirements and other relevant provisions of Directive 1999 5 EC Français Par la présente Kenwood déclare que l appareil KDC BT92SD est conforme aux exigences essentielles et aux autres dispositions pertinentes de la directive 1999 5 CE Par la présente Kenwood déclare que ce KDC BT92SD est conforme aux exigences essentielles et aux autres dispositions de la directive 1999 5 CE qui...

Отзывы: