


23
Return to the Top page
DVD, VCD
DVD Disc Menu Operation
You can set up some items in the DVD-VIDEO
disc menu.
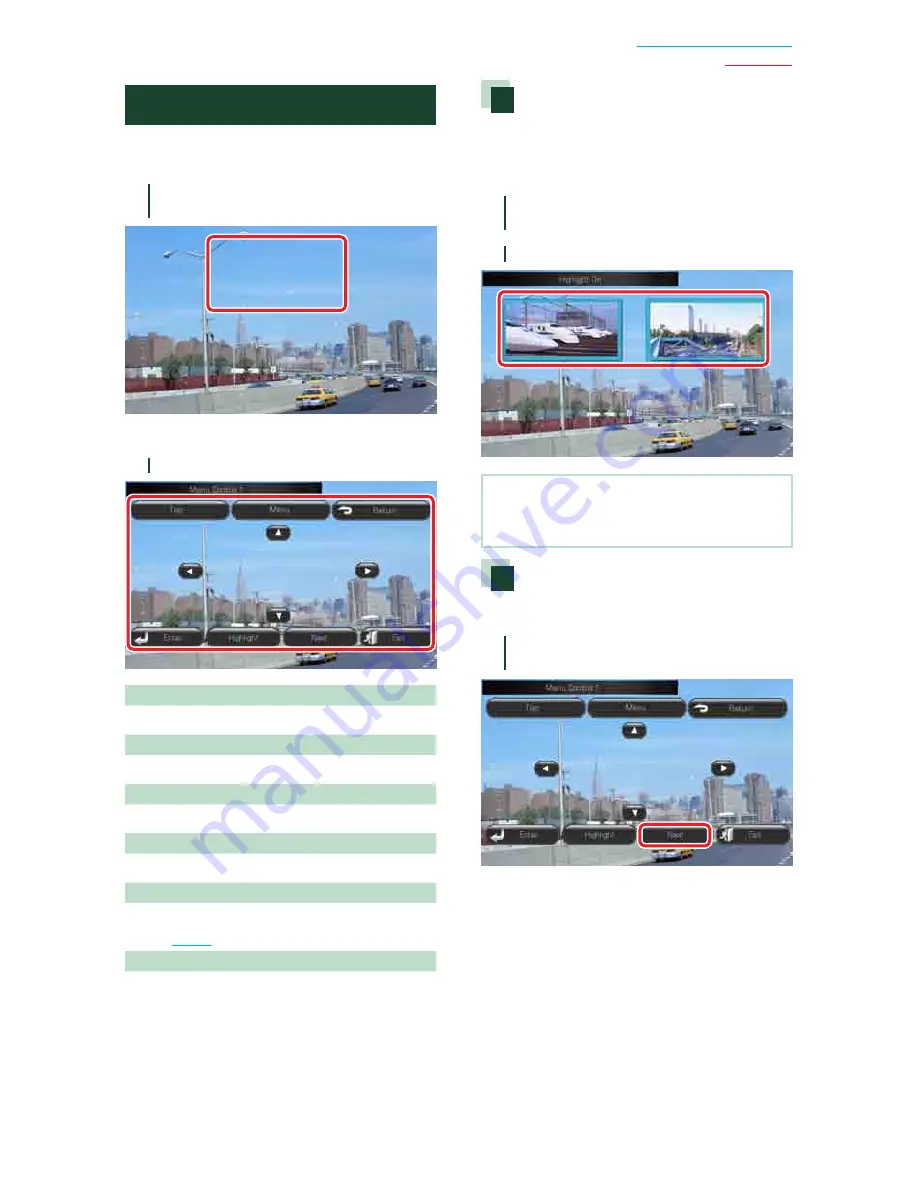
1
Touch illustrated area during
playback.
Menu Control screen appears.
2
Perform desired operation as follows.
Displays the top menu
Touch [Top].*
Displays the menu
Touch [Menu].*
Displays the previous menu
Touch [Return].*
Enters selected item
Touch [Enter].
Enables direct operation
Touch [Highlight] to enter the highlight control
mode
(P.23)
.
Moves the cursor
Touch [
5
], [
∞
], [
2
], [
3
].
* These keys may not function depending on
the disc.
Highlight control
Highlight control lets you control the DVD
menu by touching the menu key directly on
the screen.
1
Touch [Highlight] in the Menu Control
screen.
2
Touch desired item on the screen.
NOTE
• The highlight control is cleared automatically if
you do not operate for a constant time.
DVD Play Mode Setting
You can select DVD play mode.
1
Touch [Next] in the Menu Control
screen.
Menu Control 2 screen appears.
Continued
Содержание DNX5180
Страница 143: ......


