


ENGLISH
53
SETTINGS
SETTINGS
❏
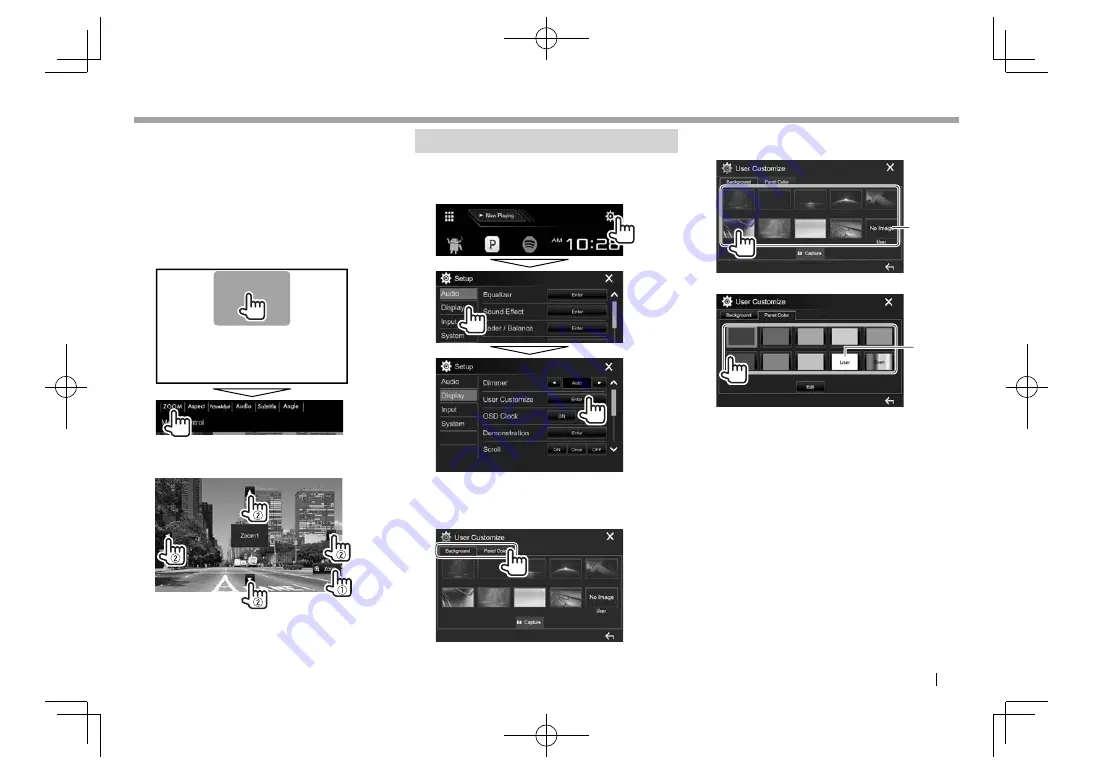
Zooming the picture
You can zoom the picture (
<FULL>
,
<Zoom1>
to
<Zoom3>
).
• When
<Aspect>
is set to
<JUST>
or
<Auto>
(Page 52), the picture is zoomed with the aspect
ratio of the
<FULL>
setting.
1
Display the magnification level selecting
screen.
On the source control screen:
2
Change the magnification (
1
), then move
the zooming frame (
2
).
• The zoom function cannot be used for some video
sources.
Changing the display design
You can change the background and panel color.
1
Display
the
<User Customize>
screen.
On the Home screen:
2
Select an item to change (background
design:
[Background]
/panel color:
[Panel
Color]
*
1
).
3
Select a background/panel color.
To select a background
*
2
To select a panel color
*
3
• Selecting
[Scan]
changes the illumination
color gradually.
*
1
Only for DDX374BT.
*
2
Store your own scene beforehand. (Page 54)
*
3
Store your own color adjustment beforehand. (Page 54)
2017DDX-Entry̲K.indb 53
2017DDX-Entry̲K.indb 53
2016/06/03 10:07
2016/06/03 10:07


